
Easy M&M Cookies Recipe
Cookies and M&Ms are two of my favorite sweet treat indulgences. It’s hard for me to say no to a cookie and it’s hard for me to pass up a few M&Ms. One of my favorite types of cookie is a cookie with M&M’s in it. So I made these easy M&M Cookies to enjoy during Easter!
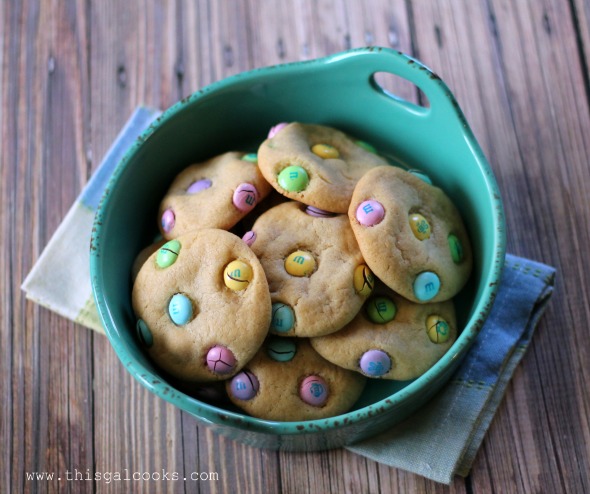
Mmmm. Don’t those look delicious? And quite festive, I might add. I made those little gems yesterday afternoon. I wanted to make a sweet treat with an Easter theme, since Easter is this weekend. I had some Easter M&Ms so I decided to make Easter M&M Cookies! I hope you enjoy this recipe.
Why This Easy M&M Cookies Recipe Works
M&M cookies are an American classic, a nostalgic treat that brings a smile to just about everyone’s face. They’ve been a staple in lunchboxes and at bake sales for decades, loved for their cheerful colors and the perfect combination of a soft cookie with a crunchy candy shell. Their popularity comes from their simplicity and pure, uncomplicated joy. They are, at their heart, a perfect chocolate chip cookie that decided to put on its party clothes.
But a classic can always be improved, and that’s what makes this recipe so special. While many recipes call for all butter, I found that often leads to cookies that spread too much, losing that delightful chewiness in the center. That’s where my little twist comes in, the one that guarantees a perfect cookie every single time.
The magic is in using both butter and shortening. Butter provides that rich, creamy flavor that is absolutely essential for a truly delicious cookie. You simply cannot replicate it. Shortening, on the other hand, has a higher melting point. This means it helps the cookies hold their shape during baking, preventing them from spreading out too thin. It creates a wonderfully tender, soft-baked texture that stays soft for days. By combining them, you get the absolute best of both worlds, the fantastic flavor of butter and the perfect, soft, puffy structure from shortening. This simple adjustment is what makes this easy M&M cookies recipe foolproof and consistently delicious.
Ingredients for Easy M&M Cookies
The beauty of a classic cookie recipe is in its simple, accessible ingredients. There’s nothing too fancy here, just pantry staples that come together to create something truly special. But the quality of these ingredients, and how you use them, makes all the difference. My special twist lies in the fat combination, which I know you’ll love.
Here’s exactly what you’ll need to make these perfect cookies:
- 1/3 C butter, room temp
- 1/3 C shortening
- 2/3 C packed brown sugar
- 1/3 C sugar
- 1 egg
- 1 tsp vanilla extract
- 3/4 tsp salt
- 2 C all-purpose flour
- 3/4 tsp baking soda
- 1/2 C Easter M&M’s, plus more for topping
Now, let’s talk about the key players here. The combination of butter and shortening is the star of this show. Using real, unsalted butter at room temperature will give you the best flavor. For the shortening, a solid vegetable shortening like Crisco is what you want. It’s what gives these easy M&M cookies their signature soft texture.
Make sure your brown sugar is soft and packed firmly into the measuring cup. This adds moisture and chewiness. A good quality pure vanilla extract, not imitation, will also elevate the flavor immensely. And please, make sure your baking soda is fresh! Old baking soda can result in flat, dense cookies. When it comes to the M&Ms, any variety works, but I love using seasonal ones like the Easter pastels for a festive touch. Having extra M&Ms to press into the tops before baking is my little secret for picture-perfect cookies every time.
Step-by-Step Instructions For Making Easy M&M Cookies
I believe baking should be relaxing and rewarding, not stressful. I’ve broken down this recipe into simple, clear steps. We’ll walk through it together, and I’ll share a few little tips along the way to ensure you get perfect, bakery-quality cookies right in your own kitchen. Grab your apron and let’s get started!
Step 1: Cream the Fats and Sugars
In the bowl of your stand mixer fitted with the paddle attachment, combine your room temperature butter, shortening, packed brown sugar, and granulated sugar. Beat them together on a medium speed (speed 4 is perfect) until the mixture is light, fluffy, and pale in color. This process is called creaming, and it’s so important because it whips air into the dough, which helps the cookies rise. Scrape down the sides of the bowl once or twice to make sure everything is evenly incorporated. Once it’s creamed, add your egg and vanilla extract and beat again until just combined.
Step 2: Combine the Dry Ingredients
In a separate medium-sized mixing bowl, whisk together your all-purpose flour, baking soda, and salt. Mixing the dry ingredients separately before adding them to the wet ensures that the leavening agent, the baking soda, is evenly distributed throughout the dough. This means every single cookie will bake up perfectly, without any salty or soapy-tasting spots.
Step 3: Bring It All Together
With the mixer on low speed, gradually add the flour mixture to the creamed butter mixture. Mix only until the last streaks of flour have disappeared. This is crucial, do not overmix! Overmixing develops the gluten in the flour, which can lead to tough, dense cookies instead of the soft and chewy ones we’re aiming for. Gently fold in your 1/2 cup of M&M’s with a spatula until they’re just distributed through the dough.
Step 4: The Crucial Chilling Step
Now for the step that many people skip, but I promise makes a world of difference. Cover the bowl with plastic wrap and refrigerate the dough for at least one hour. Chilling the dough solidifies the fat (our butter and shortening). When the cold dough hits the hot oven, the fat melts more slowly, which keeps the cookies from spreading out too much. This step is the key to getting thicker, chewier cookies.
Step 5: Shape and Bake to Perfection
Preheat your oven to 350°F and line a baking sheet with parchment paper. Parchment paper is a baker’s best friend, it prevents sticking and promotes even browning. Scoop out teaspoon-sized amounts of the chilled dough and roll them into balls. Place them on your prepared baking sheet, leaving about two inches between each one. Now, for that bakery-style look, gently press a few extra M&M’s into the tops and sides of each dough ball. Bake for 8-10 minutes. You’ll know they’re done when the edges are just starting to turn a light golden brown, but the centers still look a little soft. They will continue to bake on the hot pan after you pull them out. Let them cool on the baking sheet for a few minutes before transferring them to a wire rack to cool completely.
How To Serve Easy M&M Cookies
Once these beautiful cookies are cooled, the fun part begins. Of course, they are absolutely divine on their own, perhaps with a tall glass of cold milk for a classic after-school snack. There’s nothing quite like that simple pleasure. But if you’re looking to dress them up a bit for a party or a special dessert, I have a few ideas that are always a huge hit in my house.
These easy M&M cookies are the star of any dessert platter. Their bright, cheerful colors make them stand out. I love to arrange them on a big white plate alongside some brownies and maybe some lemon bars for a beautiful and delicious spread that has something for everyone. They are always the first thing to disappear at any gathering.
For a truly decadent treat, you can take things a step further. Here are some of my favorite ways to serve them:
- Ice Cream Sandwiches: Place a scoop of your favorite vanilla bean ice cream between two cookies. You can even roll the sides in sprinkles or more crushed M&M’s for an extra special touch. These are perfect for a hot summer day.
- Cookie Sundae Bowls: Warm a cookie for just a few seconds in the microwave until it’s soft and gooey. Place it in the bottom of a bowl, top with a scoop of ice cream, a drizzle of hot fudge or caramel sauce, a dollop of whipped cream, and a cherry on top.
- Crumble Topping: Roughly chop or crumble a few cookies and sprinkle them over a bowl of yogurt or a scoop of plain ice cream. It adds a wonderful texture and a pop of sweetness.
No matter how you choose to serve them, these cookies are all about sharing a little bit of happiness. They’re simple, they’re joyful, and they’re guaranteed to make anyone’s day a little bit brighter. So bake a batch, share them with people you love, and enjoy every single bite.
How To Store & Reuse Easy M&M Cookies Leftovers
One of the best things about this easy M&M cookies recipe is that they stay wonderfully soft and chewy for days after baking. Proper storage is key to keeping them tasting just as fresh as when they came out of the oven. Assuming you have any leftovers, that is. In my house, a batch tends to disappear pretty quickly!
For short-term storage, allow the cookies to cool completely on a wire rack. This is an important step because storing them while they’re still warm will create condensation, which can make them soggy. Once they are completely cool, place them in an airtight container at room temperature. They will stay fresh for up to five days. My secret Southern trick is to tuck a slice of plain sandwich bread into the container with the cookies. The cookies will absorb moisture from the bread, which helps keep them incredibly soft.
If you want to plan ahead or have made a double batch, this dough is also perfect for freezing. Here are my two favorite methods for storing your cookies long-term:
- Freezing Baked Cookies: Let the baked cookies cool completely. Place them in a single layer on a baking sheet and pop them in the freezer for about an hour, or until firm. Once they are frozen solid, you can transfer them to a freezer-safe zip-top bag or container. This prevents them from sticking together. They’ll keep beautifully for up to three months. Just let them thaw at room temperature for an hour or so before enjoying.
- Freezing Cookie Dough: This is my preferred method for having fresh-baked cookies on demand. Shape the dough into balls as if you were about to bake them. Place the dough balls on a parchment-lined baking sheet and freeze until solid. Transfer the frozen dough balls to a freezer bag. You can bake them directly from frozen, just add an extra 2 to 3 minutes to the baking time. There’s nothing better than being able to bake just a few fresh cookies whenever a craving strikes!
And if your cookies happen to get a little stale, don’t throw them out! You can crumble them up to use as a fantastic pie crust or as a mix-in for a batch of homemade ice cream.
Substitutions & Variations For Easy M&M Cookies
I always say a good recipe is like a good road map, it gets you where you need to go, but there’s always room for a little scenic detour. This easy M&M cookies recipe is a fantastic starting point, but it’s also incredibly versatile. Feel free to play around with it and make it your own! It’s fun to experiment with different flavors and textures to find your family’s perfect cookie.
The ingredients are pretty standard, which makes substitutions quite simple. Whether you have a dietary need or just want to try something new, this dough is very forgiving. If you don’t have shortening on hand, you can use all butter, but be aware that the cookies will spread more and have a crispier texture. They will still be delicious, just different. Conversely, using all shortening will result in a very soft, cake-like cookie with less of that classic buttery flavor.
Here are a few of my favorite variations to get your creative juices flowing:
- Change Up the Candies: The most obvious swap is the M&M’s themselves! Try using peanut M&M’s (you might want to give them a rough chop first), caramel M&M’s, or even the crispy or pretzel varieties. You can also swap them out entirely for other candies like Reese’s Pieces or chopped candy bars.
- Add Some Crunch: For a wonderful texture contrast, try adding a half cup of chopped nuts like pecans or walnuts, or even some old-fashioned rolled oats to the dough when you fold in the M&M’s.
- Chocolate Lover’s Dream: Make these cookies extra rich by adding a half cup of semi-sweet, milk, or white chocolate chips along with the M&M’s. A chocolate and candy combination is always a winner.
- Gluten-Free Option: To make these cookies gluten-free, simply substitute the all-purpose flour with a good quality measure-for-measure gluten-free flour blend. I’ve had great success with blends that contain xanthan gum. The texture will be nearly identical.
Don’t be afraid to experiment. Baking is all about making things you and your family love, so have fun with it. You might just discover a new family favorite!
Recipe: Easter M&M Cookies
Ingredients
- 1/3 C butter, room temp
- 1/3 C shortening
- 2/3 C packed brown sugar
- 1/3 C sugar
- 1 egg
- 1 tsp vanilla extract
- 3/4 tsp salt
- 2 C all-purpose flour
- 3/4 tsp baking soda
- 1/2 C Easter M&M's, plus more for topping
Instructions
- Using a stand up mixer, beat together the sugar, eggs, butter, shortening and vanilla with the flat attachment on speed 4.
- In a mixing bowl, combine the flour, baking soda and salt.
- Beat the flour mixture into the butter mixture on speed 4 until well blended.
- Fold in the 1/2 C M&Ms.
- Refrigerate for 1 hour.
- Roll tsp sized amounts of dough into balls. Place on a parchment lined baking sheet and then press M&M's into top and sides.
- Bake at 350 for 8-10 minutes or until the edges are just starting to brown.
- Cool on a wire rack before serving.
Notes
Adapted from allrecipes.com
5 FAQs About Easy M&M Cookies
Here are some straightforward answers to the most common questions I receive about this easy M&M cookies recipe.
Why did my Easy M&M Cookies spread so much?
Ah, the dreaded cookie spread. It’s a common baking frustration, but thankfully, it’s usually easy to fix. The number one reason for cookies spreading too much is that the fat in the dough was too soft when it went into the oven. This is precisely why the one-hour chilling step in this recipe is so important. Chilling the dough solidifies the butter and shortening, so it melts more slowly in the heat of the oven, allowing the cookie to set before it can spread into a thin pancake. If your kitchen is particularly warm, you might even want to chill the dough for a little longer.
Another culprit can be the baking sheet itself. Never place cookie dough on a hot or even warm baking sheet. If you’re baking in batches, make sure the sheet has cooled completely before you place the next round of dough on it. Using parchment paper, as the recipe suggests, can also help. Lastly, double-check your flour measurement. Scooping flour directly from the bag with a measuring cup can compact it, resulting in too much flour. The best method is to spoon the flour into your measuring cup and then level it off with the back of a knife. Too little flour means the dough won’t have enough structure to hold its shape.
Can I make the dough for these Easy M&M Cookies ahead of time?
Absolutely! This is one of the things that makes this recipe so convenient. The cookie dough can be made ahead of time and stored, which is perfect for busy schedules or planning for a party. If you plan to bake the cookies within a few days, you can simply make the dough as directed, cover the bowl tightly with plastic wrap, and store it in the refrigerator for up to three days. When you’re ready to bake, just scoop and go. The dough will be quite firm, so you may need to let it sit at room temperature for about 15-20 minutes to make it easier to scoop.
For longer-term storage, the freezer is your best friend. My favorite method is to scoop the dough into balls, place them on a parchment-lined baking sheet, and freeze them until solid, which usually takes about an hour. Then, you can transfer the frozen dough balls into a labeled freezer-safe bag. They’ll keep for up to three months this way. The best part is that you can bake them directly from frozen. Just place the frozen dough balls on your baking sheet and add 2-3 extra minutes to the baking time. It’s the perfect way to have warm, fresh-baked cookies whenever the mood strikes.
What is the secret to soft and chewy Easy M&M Cookies?
The secret to achieving that perfect soft and chewy texture lies in a few key components of this recipe. First and foremost is the combination of butter and shortening. The butter provides the rich flavor, while the shortening is what creates that incredibly tender, soft crumb and prevents the cookies from getting hard. It’s a classic, old-fashioned technique that truly works wonders. Using more brown sugar than white sugar is also critical. Brown sugar contains molasses, which adds moisture to the dough and results in a chewier final product.
Another critical factor is the baking time. The biggest mistake people make is overbaking their cookies. For a soft and chewy cookie, you want to pull them out of the oven when the edges are set and just beginning to turn a light golden brown, but the centers still look slightly underdone. They will continue to cook from the residual heat of the baking sheet as they cool. This process, called carryover cooking, is the key to ensuring the center stays soft and gooey. Let them rest on the baking sheet for about five minutes before moving them to a wire rack to finish cooling.
Why are my Easy M&M Cookies hard instead of soft?
If your cookies are turning out hard or crunchy instead of soft, there are a few likely reasons. Overbaking is the most common cause. Even an extra minute or two in the oven can be the difference between a soft, chewy cookie and a hard, crispy one. Watch them closely and pull them out when the centers still look a little soft. They will firm up as they cool.
Another possibility is overmixing the dough after you’ve added the flour. When you mix flour with wet ingredients, you begin to develop gluten. A little gluten provides structure, but too much will make your cookies tough and hard. That’s why the instructions say to mix only until the last streaks of flour disappear. From that point on, be gentle. The final culprit could be incorrect ingredient measurements. Using too much flour can dry out the dough, leading to a harder cookie. Be sure to measure your flour correctly by spooning it into the measuring cup rather than scooping with the cup itself.
How do I get the M&Ms on my cookies to look so bright and perfect?
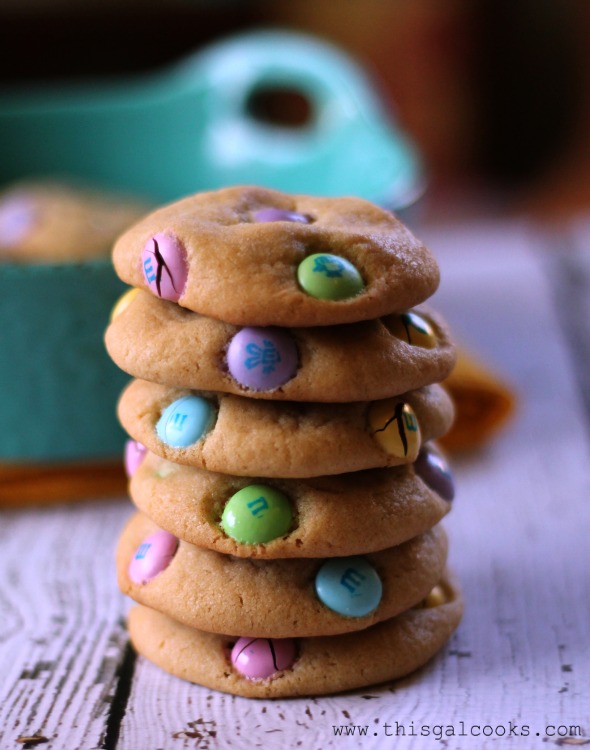
This is my favorite little trick for making cookies that look like they came straight from a professional bakery! While the recipe calls for folding a half cup of M&M’s into the dough, you’ll notice that many of them get hidden inside the cookie as it bakes. To get that classic, vibrant look with bright candies dotting the surface, you need to add some more M&M’s right before they go into the oven.
After you have rolled your dough into balls and placed them on the baking sheet, take a few extra M&M’s and gently press them into the tops and sides of each dough ball. I usually add about 3 to 5 candies per cookie. This ensures that the colorful shells are front and center, and they won’t get covered up by the spreading dough. It’s a simple extra step that takes just a moment, but it makes a huge visual impact and is the secret to those picture-perfect easy M&M cookies.
Try These Recipes Next
If you loved making these easy M&M cookies, here are a few other recipes from my kitchen that I think you’ll enjoy just as much.
- Chewy Chocolate Chip Cookies: The ultimate classic, perfected for an irresistibly chewy texture every time.
- Easy Homemade Crumbl Cookie Recipe: Get that famous, oversized, and super soft cookie experience right at home with this simple copycat recipe.
- Candy Corn M&M White Chocolate Fudge: A fun and festive treat that’s perfect for fall and couldn’t be easier to make.
I hope you have as much fun baking these treats as my family and I do eating them!
Oh, I love those Easter cookies! I want something sweet and have nothing made…if only I could reach through the screen! Pinning! :)
GENIUS idea!! I’m so making these for Easter! Thanks for sharing!
Those Easter cookies look so delicious! I love M&Ms :)
Easter M&M cookies looks colorful and tempting
http://foody-buddy.blogspot.com
So pretty! These look delicious!
Mine did not come out so well. I followed the recipe closely but my cookie balls never flattened out like they were supposed to so subsequently the edges did not brown until the cookies were over cooked. Still tasty but dry and had had a grainy texture.
Hmmmm… now I know what to do with my M&M’s besides eating them all… actually I need to bring a kid type dessert to our friends on Sunday and these cookies will be great. Pinning!
Hi Julie
Pinning this recipe – I will most definitely be making these with my children over the Easter weekend.
Have a lovely day.
Kate x
Kate at Home
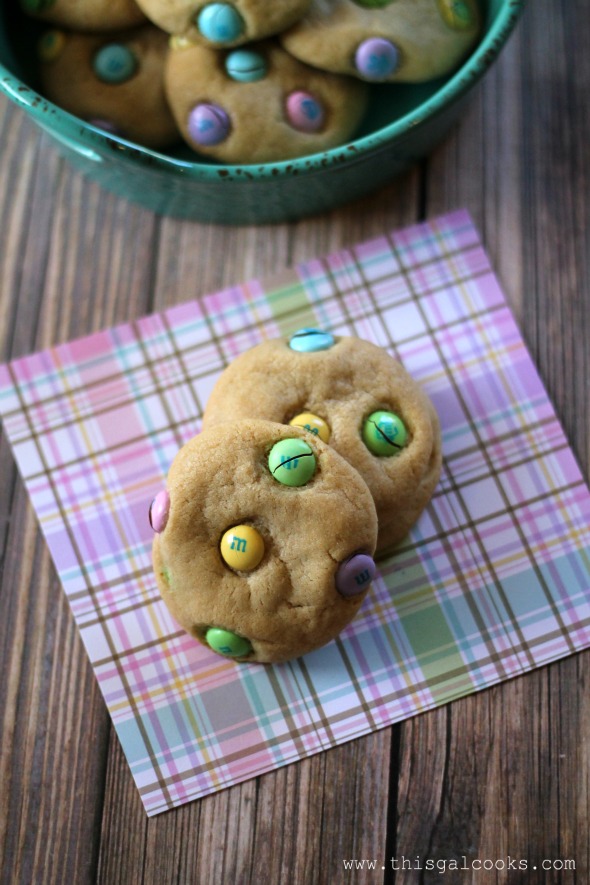
The cookies are perfect for Easter – they look like lovely decorated pastel eggs :)
Love this, Julie! Definitely on the to-make-soon list :-) Thank you for sharing at ALL MY BLOGGY FRIENDS !
Cookies and M&M’s…two things I can never no to!!! I love how soft and puffy your cookies look!!!
Those definitely look delicious – thanks for sharing!
These look cute. They will work perfect in an Easter basket. Instead of eggs, cookies could be used. I think the kids would enjoy it more. After all, who can eat a basket full of hard boiled eggs? Thanks for sharing!
Just made these from your recipe…DELICIOUS, kids loved them too…thank you
YUM! Why is it that the holiday M&M’s make things tasted even better?
Easter cookies! Yum! And M&Ms, more YUM!!
YES! I Totally agree. Love cookies and M&Ms!
Pingback: 118 Mouthwatering Easter Recipes - Farmer's Wife Rambles