
Savory Brown Butter and Sage Corn Casserole Recipe
The first time I ever had corn casserole was at a church potluck when I was about twelve. It was sweet, creamy, and scooped onto my plate right next to the fried chicken. I thought it was just about the best thing I’d ever tasted. For years, that simple, classic version was my gold standard. It’s a beloved Southern side for a reason, showing up at every holiday table from Thanksgiving to Easter.
But as I started hosting my own dinners, I began to think about that beloved dish. It was comforting, yes, but could it be more? I wanted to give my corn casserole a little something extra, a signature touch that would make people ask, “What is in this?”
My lightbulb moment came one autumn afternoon while I was making a butternut squash pasta. The recipe called for a brown butter and sage sauce. The second that nutty, herby aroma filled my kitchen, I knew. I had to try it in my corn casserole. The deep, toasted flavor of the brown butter and the earthy perfume of crispy sage were the exact savory notes I needed to balance the sweetness of the corn and the richness of the cheese. It was a game-changer, and I’ve never looked back.
Why This Corn Casserole Recipe Works
Corn casserole, also known in some circles as corn pudding or spoonbread, is a cornerstone of Southern potlucks and holiday feasts. Its enduring popularity comes from its simplicity. It’s a dump-and-stir recipe that uses easy-to-find pantry staples like a box of Jiffy mix and canned corn. It’s practically foolproof, and the result is a creamy, custardy, cornbread-like side dish that appeals to almost everyone.
The classic recipe is a perfect canvas, but it can sometimes lean a little one-note in its sweetness. That’s where my special twist comes in to create a more sophisticated and balanced dish. This isn’t just another corn casserole, it’s an experience.
The secret is the brown butter sage. Browning butter is a simple French technique that transforms melted butter into a complex, nutty, and deeply flavorful liquid gold. It toasts the milk solids, creating an incredible aroma and a flavor that regular melted butter just can’t touch. This nuttiness beautifully complements the sweet corn and the tangy sour cream.
Infusing that brown butter with fresh sage leaves adds another layer of magic. The sage gets crispy and releases its woodsy, savory oils into the butter. Sprinkling those crispy sage crumbles on top right before serving adds a delightful texture and a final burst of herbaceous flavor. This one simple step elevates the entire dish from a comforting classic to a truly memorable side that will have everyone at the table impressed.
Ingredients for Corn Casserole
The beauty of this recipe is that it takes simple, accessible ingredients and elevates them with one key technique. While most of the items are pantry staples, choosing quality ingredients where it counts will make a noticeable difference in the final product. Here’s what you’ll need to make this unforgettable corn casserole.
- 1/2 cup (1 stick) unsalted butter: Using unsalted butter is important here because it allows you to control the total salt content of the dish. This is the base of our magical brown butter.
- 8-10 fresh sage leaves: This is our star ingredient! Fresh sage is essential for the best flavor and for getting those perfectly crispy leaves for the garnish. Dried sage won’t provide the same aromatic quality or texture.
- 1 (8.5 ounce) box Jiffy corn muffin mix: The classic shortcut for corn casserole. It provides the perfect blend of cornmeal, flour, and leavening to give the casserole its signature texture.
- 1 (15 ounce) can whole kernel corn, drained: This adds pops of texture and sweet corn flavor throughout the casserole. Be sure to drain it well to avoid adding excess water.
- 1 (14.75 ounce) can creamed corn: This is the secret to the casserole’s creamy, custardy interior. It provides moisture and a concentrated corn flavor.
- 1 cup full-fat sour cream: Don’t skimp here! Full-fat sour cream adds essential moisture, a pleasant tang that balances the sweetness, and a rich, tender crumb.
- 2 large eggs, lightly beaten: The eggs act as a binder, helping the casserole set properly and giving it a slightly puffed, souffle-like structure.
- 8 ounces sharp white cheddar cheese, freshly grated and divided: Grating your own cheese from a block is a must. Pre-shredded cheese is coated in starches that prevent it from melting as smoothly. A sharp white cheddar provides a tangy, savory counterpoint to the sweet corn.
- 1/2 cup thinly sliced green onions: These add a mild, fresh oniony bite that cuts through the richness of the other ingredients.
- 1/2 teaspoon kosher salt: To enhance all the other flavors.
- 1/4 teaspoon black pepper: For a little bit of warmth and spice.
Step-by-Step Instructions For Making Corn Casserole
Making this elevated corn casserole is nearly as simple as the classic, with just one extra step at the beginning that makes all the difference. Follow these instructions closely, and you’ll have a perfect, golden-brown casserole that will be the star of the side dish table.
Step 1: Preheat Oven and Prepare Dish
First things first, get your oven preheating to 375°F (190°C). This ensures your oven is at the perfect, steady temperature when the casserole is ready to bake. While it heats, grease a 9×9 inch baking dish or a similar 2-quart casserole dish. I prefer using a ceramic or glass dish for this recipe, as they tend to conduct heat more evenly, resulting in a perfectly cooked center without overly browned edges.
Step 2: Create the Brown Butter Sage
This is the most important step for flavor. In a small, light-colored saucepan, melt the stick of unsalted butter over medium heat. A light-colored pan makes it easier to see the milk solids changing color. Once melted, add the whole, fresh sage leaves. Let them sizzle in the butter. The butter will begin to foam and bubble. Swirl the pan occasionally to ensure even cooking. After about 3 to 5 minutes, the foaming will subside, you’ll see toasted brown specks at the bottom of the pan, and the most wonderful nutty aroma will fill your kitchen. Remove it from the heat immediately to stop the cooking process. Use a slotted spoon to carefully remove the crispy sage leaves and set them on a paper towel. Save them for the garnish, they are little bites of heaven!
Step 3: Combine the Casserole Ingredients
In a large mixing bowl, it’s time to assemble the casserole. Add the Jiffy corn muffin mix, the drained can of whole kernel corn, the can of creamed corn, the full-fat sour cream, and the lightly beaten eggs. Next, add most of your freshly grated sharp white cheddar, reserving about 2 ounces (a good handful) for the topping. Finally, stir in the sliced green onions, kosher salt, and black pepper.
Step 4: Incorporate Brown Butter and Mix
Let the brown butter cool for just a minute or two so it doesn’t scramble the eggs. Slowly pour the golden-brown butter into the corn mixture, leaving any of the very dark, almost black, sediment at the bottom of the pan. Gently stir everything together until it’s just combined. One of the keys to a tender corn casserole is not to overmix the batter. A few little lumps are perfectly fine.
Step 5: Bake to Golden Perfection
Pour the batter into your prepared baking dish and use a spatula to spread it into an even layer. Sprinkle the remaining 2 ounces of grated white cheddar cheese evenly over the top. Place the dish in your preheated oven and bake for 40 to 50 minutes. You’ll know it’s done when the edges are pulling away from the dish, the top is a beautiful golden brown, and a knife or toothpick inserted into the center comes out clean.
Step 6: Rest and Garnish
This might be the hardest step, but it’s important! Let the casserole rest on a wire rack for at least 10 minutes before serving. This allows it to set up properly, so it holds its shape when you scoop it out. Just before you’re ready to serve, take those crispy sage leaves you saved, gently crumble them with your fingers, and sprinkle them all over the top. It’s the perfect finishing touch.
How To Serve Corn Casserole
This Brown Butter Sage Corn Casserole is so versatile, it feels right at home on almost any dinner table. Its savory depth and classic comfort make it a perfect partner for a wide variety of main courses. Of course, it’s an absolute must-have for any holiday spread.
For a traditional holiday meal, this casserole is a showstopper. Here are a few classic ways to serve it:
- Thanksgiving Feast: Serve it alongside your roasted turkey, gravy, mashed potatoes, and cranberry sauce. The savory sage notes in the casserole echo the traditional flavors of the holiday stuffing, making it a perfect companion.
- Christmas or Easter Dinner: It’s absolutely divine next to a honey-glazed ham or a perfectly cooked prime rib. The sweetness of the corn and the savory cheese cut through the richness of the meat beautifully.
- Sunday Supper: This dish makes any regular Sunday feel special. Pair it with a simple roasted chicken and some green beans for a meal that feels both elegant and incredibly comforting.
But don’t just save this deliciousness for the holidays! It’s fantastic for weeknight meals and summer barbecues too. Think of it next to a juicy grilled steak or a rack of smoky BBQ ribs. You can even cut it into squares and serve it as a hearty side with a big bowl of chili. The creamy texture and sweet corn flavor are a wonderful contrast to the spicy, savory chili. It truly is one of the most adaptable side dishes you can make.
How To Store & Reuse Corn Casserole Leftovers
If you’re lucky enough to have leftovers of this incredible corn casserole, you’re in for a treat. It stores and reheats beautifully, and I sometimes think it’s even better the next day as the flavors have more time to meld together. Proper storage is key to enjoying it again.
Here’s how to best store and reheat your casserole to keep it tasting fresh and delicious:
- Refrigerating: Once the casserole has cooled completely to room temperature, cover the baking dish tightly with plastic wrap or aluminum foil, or transfer the leftovers to an airtight container. It will keep well in the refrigerator for up to 4 days.
- Freezing: This casserole also freezes surprisingly well. For best results, I recommend cutting it into individual portions. Wrap each portion tightly in plastic wrap, then place them in a freezer-safe zip-top bag or container. It can be frozen for up to 3 months. This is a great tip for holiday meal prep!
- Reheating: For the best texture, I recommend reheating the casserole in the oven. Place it in an oven-safe dish, cover with foil to prevent it from drying out, and bake at 350°F for about 20-25 minutes, or until heated through. If you’re in a hurry, you can certainly use the microwave. Just place a portion on a microwave-safe plate and heat in 60-second intervals until it’s warm.
Beyond simply reheating, you can get creative with the leftovers! Try cubing the cold casserole and pan-frying the cubes in a little butter until they are golden and crispy on the outside. They become almost like polenta cakes and are fantastic served with a fried egg on top for breakfast. You could also crumble the leftovers into a skillet with some breakfast sausage and scrambled eggs for a hearty morning hash.
Substitutions & Variations For Corn Casserole
While I believe this Brown Butter Sage Corn Casserole is perfect as is, I know that every cook likes to put their own spin on things. This recipe is wonderfully adaptable, so feel free to experiment based on your tastes or what you have on hand. It’s a great base for getting creative in the kitchen.
Here are a few substitutions and variations that work beautifully with this recipe:
- Cheese Swaps: The sharp white cheddar is fantastic, but other cheeses can bring new life to the dish. Try smoked Gouda for a smoky, rich flavor, or use pepper jack if you want to add a little bit of spicy heat. A combination of sharp cheddar and Monterey Jack would also be delicious.
- Add Some Heat: If your family likes things spicy, adding some diced jalapeños is a classic choice. A small, 4-ounce can of diced green chiles, drained well, would also add a wonderful mild heat and a bit of Tex-Mex flair. A pinch of cayenne pepper in the batter can also add a subtle warmth.
- Herb Variations: If you’re not a fan of sage or don’t have it fresh, you can infuse the brown butter with other woody herbs. A few sprigs of fresh thyme or a small sprig of rosemary would be lovely, especially around the holidays. Just be sure to remove them before mixing the butter into the batter.
- Make it Gluten-Free: To make a gluten-free version of this corn casserole, simply substitute the Jiffy corn muffin mix with your favorite gluten-free cornbread mix. Be sure to check the weight of the box and adjust if necessary, but most 1-to-1 gluten-free mixes work very well in this application.
Feel free to mix and match these ideas to create your own signature version of this casserole. You could do a pepper jack and jalapeño version for a spicy kick, or a smoked Gouda and thyme version for a rustic, smoky flavor. The possibilities are truly endless, so have fun with it and make it your own.
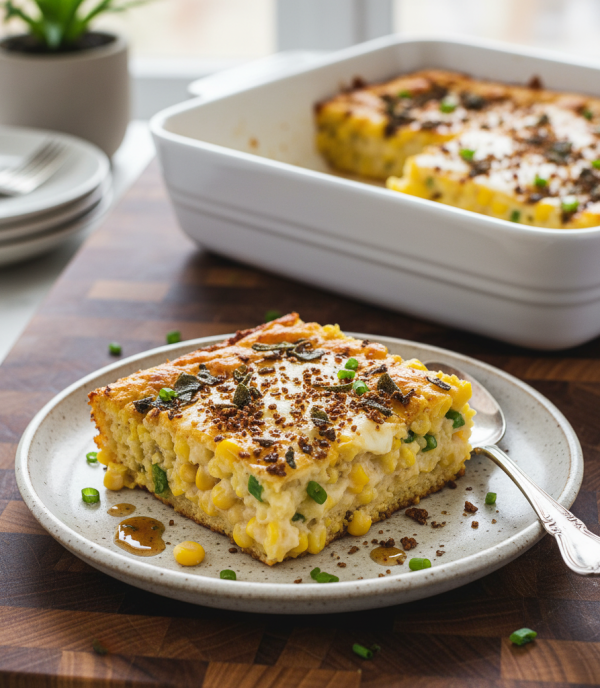
Brown Butter Sage Corn Casserole
Description: A classic Southern corn casserole elevated with the nutty, sophisticated flavor of brown butter and crispy sage. This creamy, cheesy, and savory side dish is perfect for holidays and weeknight dinners alike.
Yield: 8-10 servings | Category: Side Dish | Cuisine: Southern
Prep Time: 15 minutes | Cook Time: 45 minutes
Ingredients
- 1/2 cup (1 stick) unsalted butter
- 8-10 fresh sage leaves
- 1 (8.5 ounce) box Jiffy corn muffin mix
- 1 (15 ounce) can whole kernel corn, drained
- 1 (14.75 ounce) can creamed corn
- 1 cup full-fat sour cream
- 2 large eggs, lightly beaten
- 8 ounces sharp white cheddar cheese, freshly grated and divided
- 1/2 cup thinly sliced green onions
- 1/2 teaspoon kosher salt
- 1/4 teaspoon black pepper
Instructions
- Preheat oven to 375°F (190°C) and grease a 9×9 inch baking dish.
- Melt butter in a saucepan over medium heat. Add sage leaves and cook for 3-5 minutes, swirling pan, until butter browns and smells nutty. Remove crispy sage leaves and set aside.
- In a large bowl, combine Jiffy mix, both cans of corn, sour cream, eggs, 6 oz. of cheese, green onions, salt, and pepper.
- Stir in the slightly cooled brown butter until just combined.
- Pour batter into the prepared dish. Top with the remaining 2 oz. of cheese.
- Bake for 40-50 minutes, until golden and set in the center.
- Rest for 10 minutes. Crumble reserved crispy sage leaves over the top before serving.
Notes
Using a light-colored saucepan makes it easier to monitor the browning of the butter. Be sure to grate your own cheese for the smoothest, creamiest melt.
Servings: 8 | Calories: 410 kcal | Fat: 28g | Carbohydrates: 31g | Protein: 11g
5 FAQs About Corn Casserole
Here are some straightforward answers to the most common questions I receive about this corn casserole recipe.
Can I Make This Corn Casserole Ahead of Time?
Absolutely! This is one of the reasons this dish is such a lifesaver, especially for big holiday meals like Thanksgiving or Christmas. You have a couple of options for making it ahead. The first option is to assemble the entire casserole without baking it. Simply mix all the ingredients as directed, pour the batter into your greased baking dish, cover it tightly with plastic wrap, and refrigerate for up to 24 hours. When you’re ready to bake, take it out of the fridge for about 30 minutes to let it come to room temperature, then bake as directed. You may need to add 5-10 minutes to the baking time.
Your second option is to bake it completely ahead of time. You can bake the casserole a day or two in advance, let it cool completely, then cover and refrigerate it. When you’re ready to serve, cover it with foil and reheat it in a 350°F oven for about 20-25 minutes, or until it’s warmed through. This method is fantastic for saving precious oven space on a busy cooking day.
Why Is My Corn Casserole Watery or Runny?
A runny corn casserole is usually the result of a couple of common issues, both of which are easy to fix. The most frequent culprit is not draining the can of whole kernel corn properly. That excess liquid adds too much moisture to the batter, preventing it from setting up into that perfect, spoonable, custardy texture. Make sure you pour the corn into a colander and give it a good shake to remove as much of the canning liquid as possible before adding it to your mixing bowl.
Another reason could be underbaking. Ovens can vary, so the baking time is a guideline. The casserole needs enough time for the eggs to cook and set the entire dish. The best way to check for doneness is to insert a knife or a toothpick into the center. If it comes out clean, with no wet batter clinging to it, it’s ready. If it’s still wet, give it another 5-10 minutes in the oven and check again. Allowing the casserole to rest for at least 10 minutes after it comes out of the oven is also crucial, as it continues to set as it cools.
Can I Use Fresh or Frozen Corn in This Corn Casserole Recipe?
Yes, you can definitely substitute fresh or frozen corn for the canned whole kernel corn, and it can add a wonderful freshness to the dish. If you’re using frozen corn, you’ll need about 1.5 cups. There’s no need to thaw it beforehand, just add it to the batter frozen. It will thaw and cook perfectly in the oven.
If you’re using fresh corn, you’ll want to use the kernels from about 2 medium ears of corn. Fresh corn has a fantastic pop and sweetness that is hard to beat. You will still need to use the can of creamed corn, as that ingredient is essential for the creamy, moist texture that defines this casserole. It provides a corn-flavored base that you just can’t replicate with whole kernels alone.
Is Corn Casserole the Same as Corn Pudding or Spoonbread?
This is a great question, as these terms are often used interchangeably, especially in different parts of the South. While they are all very similar corn-based side dishes, there are subtle differences. Spoonbread is typically lighter and more souffle-like, often containing more eggs and no flour, relying solely on cornmeal for its structure. It’s meant to be so tender that you eat it with a spoon, hence the name.
Corn pudding is usually more custardy and contains more eggs and dairy, like milk or heavy cream, and often omits the corn muffin mix. My corn casserole recipe, which uses the Jiffy mix, is a wonderful hybrid. It has the creamy, custardy texture of a pudding but with the slightly more structured, cake-like crumb of a cornbread. It’s the best of all worlds, which is why this version has become so incredibly popular at potlucks and family gatherings across the country.
How Do I Know When My Brown Butter Sage Corn Casserole is Done Baking?
Knowing exactly when to pull your corn casserole out of the oven is key to achieving that perfect texture. There are three main indicators to look for. First, look at the appearance. The casserole should be beautifully golden brown on top, and you should see the edges just starting to pull away from the sides of the baking dish. You might also see some bubbling around the edges, which is a good sign that it’s hot all the way through.
Second, give the dish a gentle shake. The center should be mostly set, with only a very slight jiggle. If the center looks liquidy or ripples significantly when you move it, it definitely needs more time in the oven. The final and most reliable test is the knife test. Insert a thin knife or a toothpick into the very center of the casserole. If it comes out clean, you’re good to go. If it comes out with wet, gooey batter on it, put it back in the oven for another 5-7 minutes and test again. Trust these signs, and you’ll have a perfectly baked casserole every time.
Try These Recipes Next
If you loved this Brown Butter Sage Corn Casserole, I know you’ll enjoy some of my other favorite comfort food recipes.
- Homemade Cornbread Dressing: A true Southern classic, this dressing recipe is the perfect complement to any holiday meal.
- Over 25 Thanksgiving Casserole Recipes: Get all the inspiration you need for your holiday table with this roundup of my favorite crowd-pleasing casseroles.
- Spicy Crab and Corn Chowder: If you love the combination of corn and savory flavors, you have to try this rich, creamy, and slightly spicy chowder.
I hope you enjoy making these dishes as much as my family and I do!