
The Perfect Oven-Roasted Corn On The Cob Recipe

If you’ve been looking for the perfect recipe for oven-roasted corn on the cob, look no further!
You’ve probably noticed that corn is in season at the moment. Hence, the piles of corn available at your local grocery store. I pretty much love everything that can be made with corn, especially oven roasted corn on the cob! I’ve already roasted corn three times in the past two weeks.
Knowing how to roast corn in the oven is a great trick to have up your sleeve, especially with all of this crazy weather we’ve been having this year. Depending on where you live, you’re either battling heat and drought or constantly dealing with high humidity and rain.
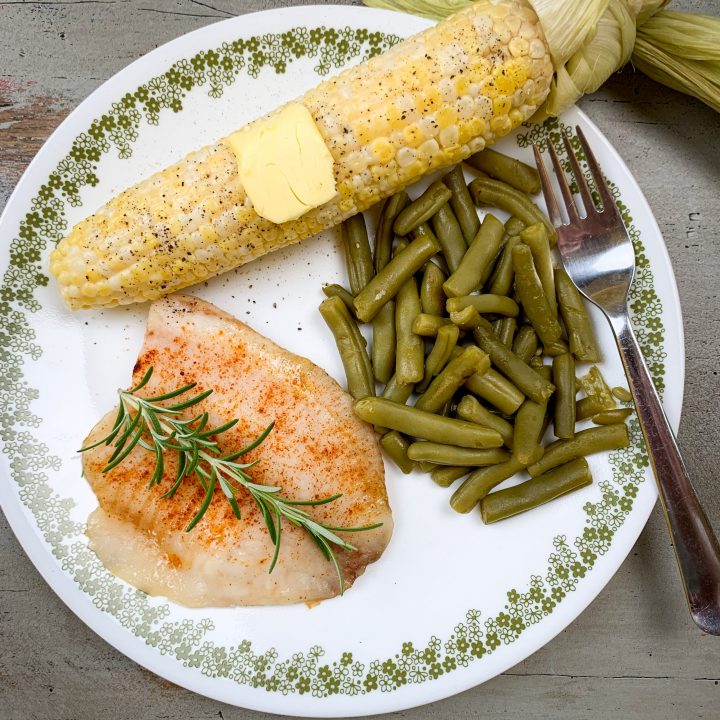
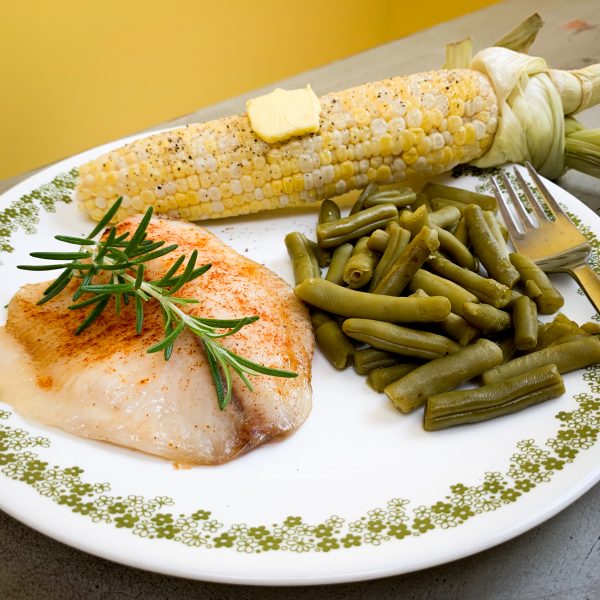
I love being able to pop a few ears of corn in the oven on a rainy day. It’s a convenient and easy way to add variety to most any meal. We like to eat it with fish, burgers, or just by itself.
Why Oven Roasting Corn Is a Game-Changer
Grilled corn gets a lot of the spotlight during summer, but let me tell you, oven roasted corn on the cob deserves just as much love. It’s easy, it’s reliable, and it doesn’t require babysitting a hot grill in 95-degree weather (or running outside in the rain). When you roast corn in the oven with the husks on, you trap all the steam and natural flavor inside.
The result is juicy, sweet kernels that taste like summer in every bite.
Another bonus is that you don’t need any special equipment. No foil, no boiling pots of water, no guessing when the grill is hot enough.
Just pop your soaked corn on a baking sheet and slide it into a preheated oven. It’s a low-effort method that consistently gives you high-reward results, no matter the season or weather.
HOW TO BUY CORN
Roasting corn on the cob in the oven starts with choosing the best corn available at your market. I mean, who wants to eat bland corn, right?
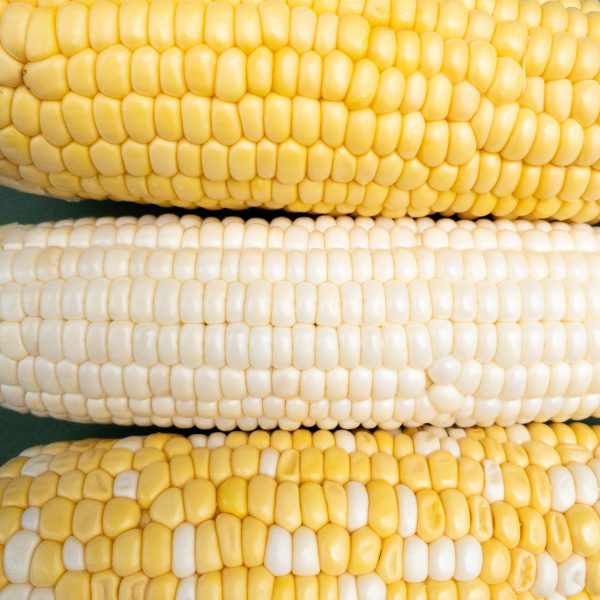
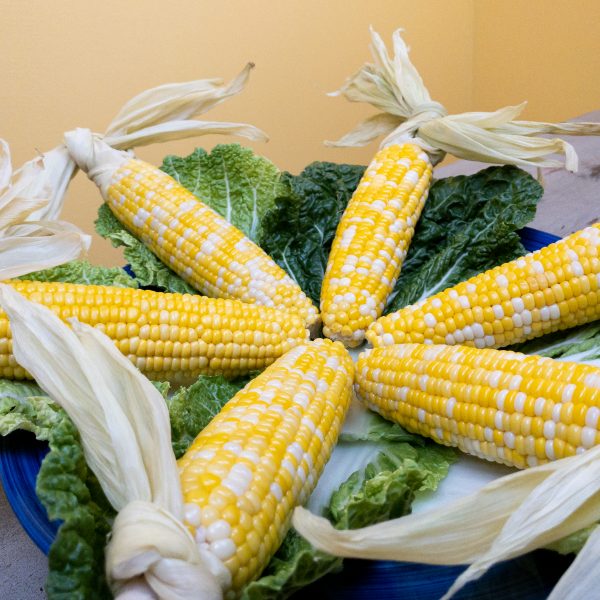
There are six primary types of corn available in the United States: Dent, Flint, Sweet, Pod, Flour, and Popping. Sweet corn is the variety we use for corn on the cob recipes. Chances are you’ll have yellow, white, and bicolored options available to you.

When you’re standing in your vegetable section or farmers market, you’ll get the best information from corn that’s still in its husks. Look for corn with bright green husks. The husks should be cool to the touch and slightly damp. They should also be tightly wrapped around the corn and free of tiny boreholes from insects. If the husks feel dry, look yellowish, and are starting to separate from the cob, this is a sign the corn kernels inside are drying out.
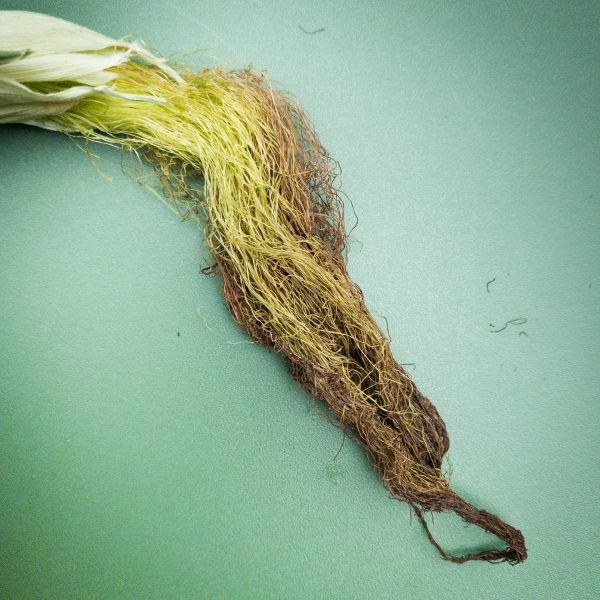
The end of the corn and tassels should also look fresh. Healthy tassels will be golden in color. If the tassels have turned brown, the corn is not as fresh as it could be.
Doing a squeeze test is preferable over peeling back the husks to take a look. The corn should feel firm when you squeeze it. You shouldn’t be able to feel any indented areas without kernels. Don’t worry if people look at you funny while you inspect your corn. They’re probably just curious what you know about corn that they don’t. I know I’ve gotten a few funny looks over the years.
Packages of corn with the ends cut off are a telltale sign of old corn. Once the husks are removed, corn dries out quickly.
OVEN ROASTING CORN ON THE COB WITH HUSKS
In my younger days, I used to help my grandmother shuck corn from the garden. She always boiled her corn, which left corn flavored water that usually got poured out. I didn’t realize it at the time, but we were dumping a lot of important flavor into the sink.
Later in life, I learned that keeping the husks on the corn traps the flavor inside the kernels. It’s pretty simple to do. You soak the corn in water for 15-30 minutes. Then, throw it in the oven for 30-40 minutes. I like to put mine on a baking sheet, but lots of people put their corn directly on the oven rack. Either way, your kitchen will fill with the fragrance of corn as it bakes.
If eating directly from the cob isn’t your thing, you can use this recipe to prepare the corn for my street corn salad.
HOW TO MAKE A CORN HUSK HANDLE
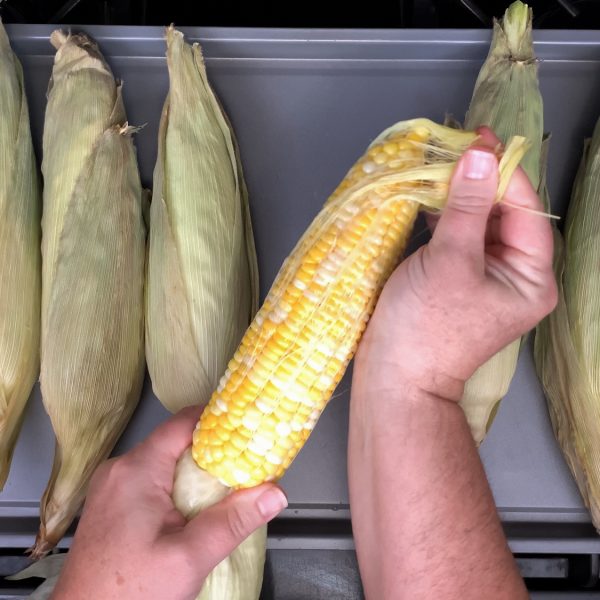
Another great thing about leaving the husks on your corn while roasting is that it sets you up for corn husk handles. If you have kids, you’re gonna love how easy a corn husk handle will make your life.
When I tie mine, I remove the first few outer husks after cooking. Tearing them off tends to work better than breaking or cutting. Then, I peel back the remaining husks, remove the corn silks and tie an overhand knot. And presto, you can hold corn that’s hot to the touch without getting burned.
INGREDIENTS FOR OVEN ROASTED CORN ON THE COB
This will be the simplest ingredients list you’ve ever seen on a recipe post.
- 4-6 ears of fresh corn in husks. Plan on 1-1.5 ears of corn per person.
- Desired seasoning (I like garlic salt, creole, pepper, or just about anything)
That’s it! Yet another thing to love about corn.
STEP 1: SOAK THE CORN

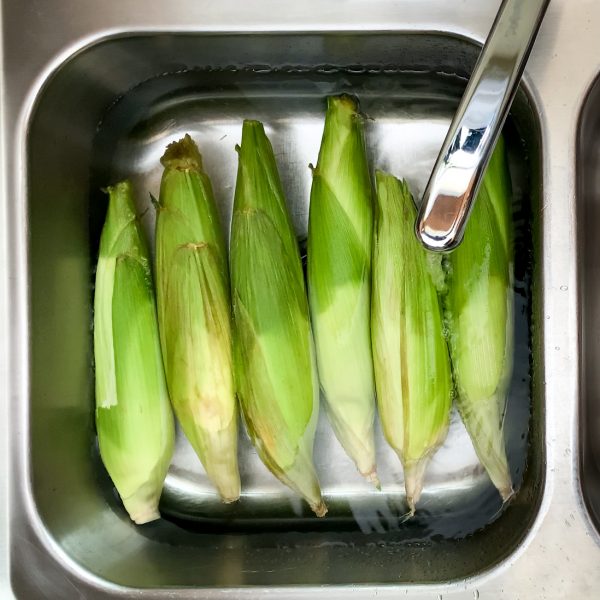
Use a pair of kitchen scissors to trim the silks, husks, and end of the corn. Place the corn in your sink and fill it with water until the corn can be completely submerged when held underwater.
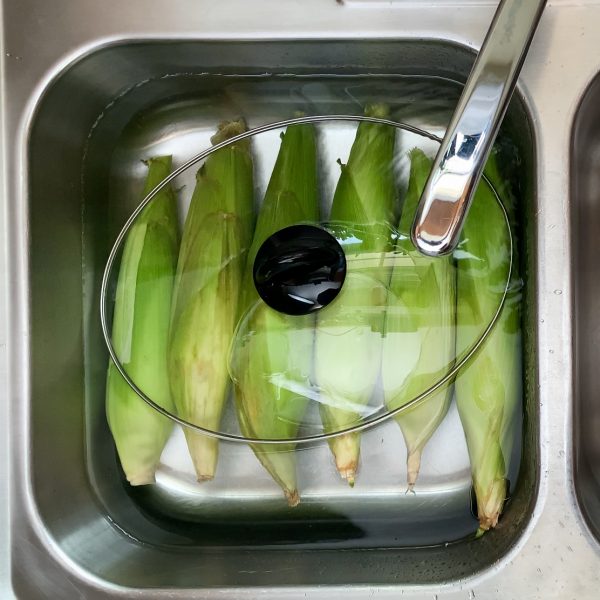
Place a lid or pan on the corn to hold it underwater. Wait 15-30 minutes. Soaking the corn ensures it will not dry out during the roasting process.
STEP 2: PREPARE THE CORN FOR BAKING
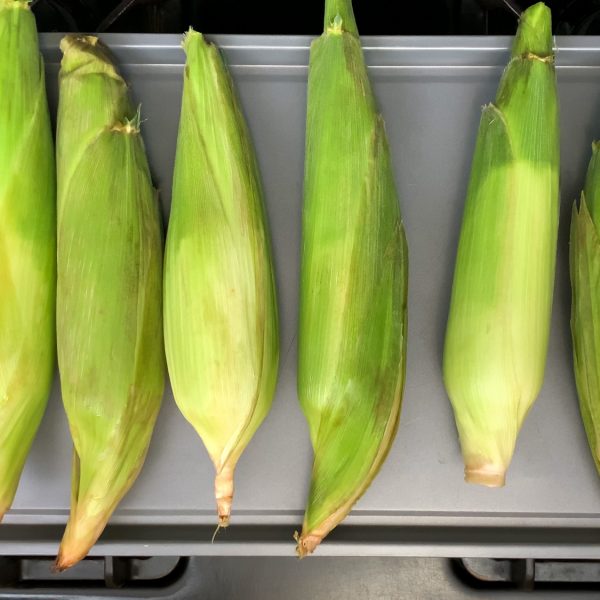
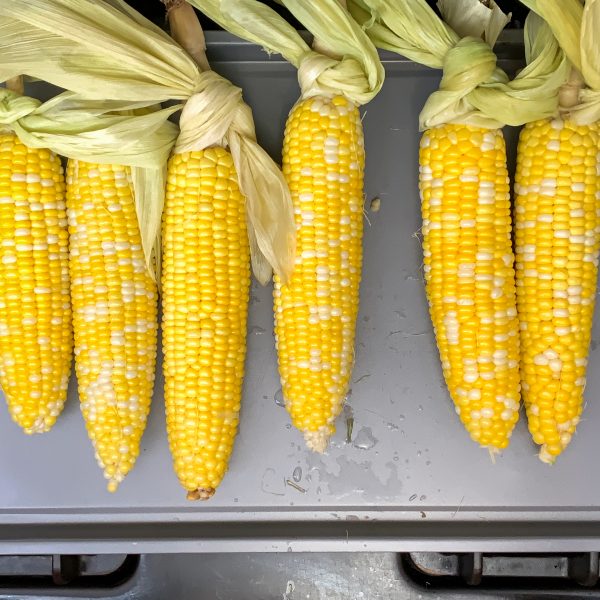
Preheat the oven to 350℉. Remove the corn and shake off any excess water. Spread the corn out on a baking sheet.
STEP 3: BAKE THE CORN
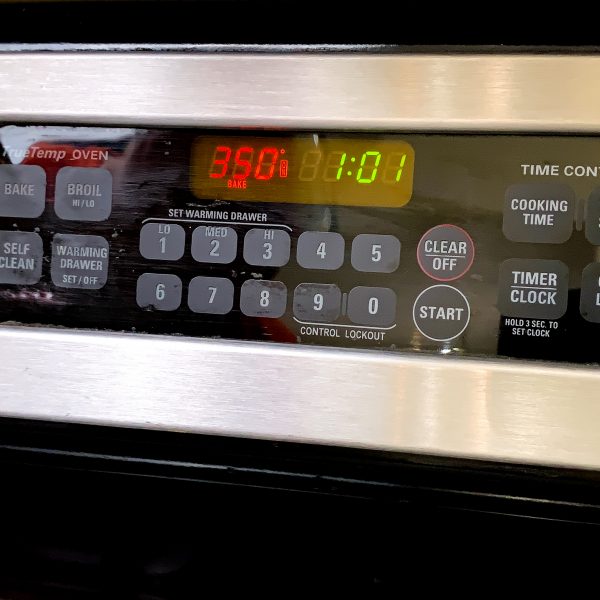
Bake the corn at 350℉ for 30-40 minutes. Avoid opening the oven while baking to retain heat.
STEP 4: REMOVE THE CORN AND LET COOL

Remove the corn from the oven and let it cool for approximately five minutes. You don’t want it to get cold, but also want to avoid burning your hands while tying the corn husks.
STEP 5: TIE THE CORN HUSK HANDLES
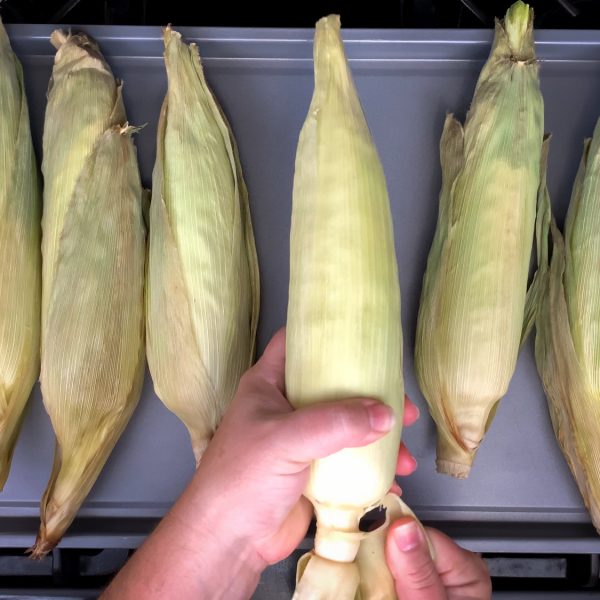
Peel back the outer husks, tear them off and discard them.
Peel down the remaining husks and remove the corn silks.
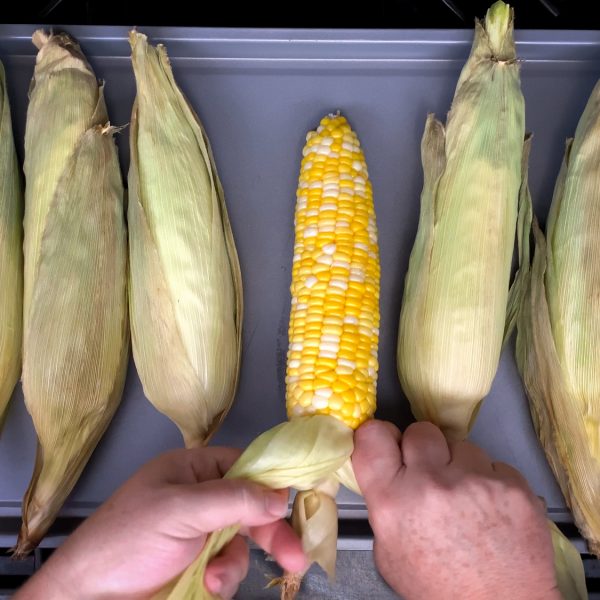
Divide the husks into two parts and tie with an overhand knot.

Pull tightly. Repeat.
The Perfect Oven-Roasted Corn On The Cob Recipe
Knowing how to roast corn in the oven is a great trick to have up your sleeve. It’s a convenient and easy way to add variety to most any meal. We like to eat it with fish, burgers, or just by itself.
Ingredients
- 4-6 ears of fresh corn in husks. Plan on 1-1.5 ears of corn per person.
- Desired seasoning (I like garlic salt, creole, pepper, or just about anything)
Instructions
- Use a pair of kitchen scissors to trim the silks, husks, and end of the corn. Place the corn in your sink and fill it with water until the corn can be completely submerged when held underwater. Place a lid or pan on the corn to hold it underwater. Wait 15-30 minutes. Soaking the corn ensures it will not dry out during the roasting process.
- Preheat the oven to 350℉. Remove the corn and shake off any excess water. Spread the corn out on a baking sheet.
- Bake the corn at 350℉ for 30-40 minutes. Avoid opening the oven while baking to retain heat.
- Remove the corn from the oven and let it cool for approximately five minutes. You don’t want it to get cold, but also want to avoid burning your hands while tying the corn husks.
- Peel back the outer husks, tear them off and discard them. Peel down the remaining husks and remove the corn silks. Divide the husks into two parts and tie with an overhand knot. Pull tightly. Repeat.
Seasoning & Serving Ideas For Oven-Roasted Corn
Oven roasted corn on the cob is plenty flavorful on its own, but if you’re in the mood to dress it up, there are so many ways to go. You can keep things simple with butter and salt, or take it up a notch with bold spices, herbs, and toppings.
Here are a few of my favorite ways to serve it:
- Classic: A pat of butter, a sprinkle of sea salt, and a few cracks of black pepper.
- Zesty: A squeeze of lime juice, a dash of chili powder, and a sprinkle of garlic salt.
- Southern-style: Brush with melted butter and dust with Creole seasoning for a kick.
- Fresh and herby: Drizzle with olive oil and top with chopped cilantro or parsley.
- Street corn style: Add a smear of mayo, crumbled cotija cheese, lime, and a pinch of paprika.
This corn pairs beautifully with burgers, grilled fish, BBQ chicken, or honestly… just a second helping of corn. It’s a side dish that works at backyard cookouts, weeknight dinners, or even casual dinner parties.
A Naturally Vegan-Friendly Favorite
One of the best things about oven roasted corn on the cob? It’s naturally vegan, gluten-free, and allergy-friendly, making it a total crowd-pleaser no matter who’s at the table. As long as you skip the butter or dairy-based toppings, you’ve got a plant-based side dish that’s packed with flavor and texture.
If you like a little richness, olive oil makes a great alternative to butter. You can also drizzle it with flavored oils like chili or garlic-infused oil for a little extra flair. Want more brightness? Fresh lime juice and chopped herbs like cilantro or parsley go a long way.
It’s the kind of dish that doesn’t need much dressing up to shine. Roasting brings out a naturally sweet, almost creamy flavor that holds its own without anything added. Whether you’re serving vegans, vegetarians, or a mixed group, this recipe is a no-stress, full-flavor win.
How To Store & Reuse Corn on the Cob Leftovers
If you ever end up with leftover corn on the cob, don’t worry — it keeps beautifully and tastes just as good the next day. The key is to store it the right way so it stays juicy and tender instead of drying out when you reheat it.
Let the corn cool completely before refrigerating it. If you put it away while still warm, condensation can form and make the kernels soggy. Once it’s cooled, you can either store it on the cob or cut the kernels off, depending on how you plan to use it.
Here’s how to keep and reuse your corn the easy way
- Storing on the Cob: Wrap each ear tightly in plastic wrap or foil to lock in moisture. Store in the fridge for up to three days. To reheat, warm in the microwave for a minute or two, or in a 350°F oven for about 10 minutes.
- Storing Kernels: If you’d rather use the corn in other dishes, slice the kernels off the cob into a large bowl. Store them in an airtight container in the refrigerator for up to four days.
- Reusing in New Dishes: Leftover corn kernels are super versatile. Add them to black bean salsa, stir them into creamy potato soup, or fold them into cornbread batter. They’re also great tossed into a summer salad or sprinkled over nachos for extra flavor and texture.
With proper storage, you can enjoy that sweet, roasted corn flavor for days after cooking. It’s an easy way to stretch one side dish into several tasty meals.
Substitutions & Variations For Corn on the Cob
While my Spicy Creole Garlic Butter version is my favorite, this roasting method is the perfect base for all kinds of flavor twists. Think of it as a blank canvas you can season however you like — it’s flexible, simple, and fun to customize.
The easiest way to switch things up is by making a different compound butter. Start with softened butter and mix in any herbs, spices, or citrus zest you love. A quick flavor change can completely transform the dish, whether you want something fresh, smoky, or extra bold.
Here are a few ideas to try
- Flavor Swaps: Skip the Creole spice and go for chili-lime butter made with chili powder, cumin, and lime zest. For something light and herbal, mix butter with parsley, chives, and lemon zest. Or try a chipotle-adobo butter for a rich, smoky finish.
- Make it Mild: If you’re serving kids or guests who don’t like heat, leave out the Creole seasoning. A simple garlic butter with garlic powder, onion powder, and parsley is always a hit.
- Dairy-Free Option: Use a good vegan butter or olive oil instead of regular butter. Mix your seasonings into the oil and brush it over the corn once it’s roasted.
- Grilling Method: For smoky flavor, make this recipe on the grill. Soak the corn as usual, then grill over medium heat for 15–20 minutes, turning every 5 minutes until the husks are charred and the corn is tender. Peel and butter as usual.
Don’t be afraid to get creative. This recipe is forgiving and easy to adapt, so you can make it your own. Once you do, it’s the kind of corn your family will ask for every summer.
5 FAQs About Corn on the Cob
Here are some straightforward answers to the most common questions I receive about this oven-roasted corn on the cob recipe.
Can I make this oven-roasted corn on the cob on the grill?
You certainly can, and it’s a wonderful option for adding a delicious, smoky char to the corn. The process is very similar to the oven method, with just a few small adjustments. You’ll still want to follow the crucial first step of soaking the corn in its husk for at least 15 to 30 minutes. This is even more important on the grill, as the direct flames are much more intense than the ambient heat of an oven, and the wet husks will protect the corn from burning while allowing it to steam perfectly.
Preheat your grill to a medium heat, around 350-400°F. Place the soaked corn directly on the grill grates and close the lid. You’ll want to cook it for about 15 to 20 minutes, giving the ears a quarter turn every 5 minutes or so to ensure they cook evenly. The husks will get nicely charred, which is exactly what you want. Once the corn is tender, remove it from the grill and let it cool slightly before peeling back the husks, tying your handle, and slathering it with that delicious Creole garlic butter.
Why do you soak the corn on the cob before roasting?
This is probably the most important step in the entire recipe, and it’s one you should never skip. Soaking the corn in its husk serves two vital purposes. First and foremost, it thoroughly hydrates the husks. When you put the corn in the hot oven, that water in the husks turns to steam. This creates a perfect little steam-cooking environment right around the kernels, which is the secret to making the corn incredibly tender, juicy, and sweet. It cooks the corn gently from the inside out, concentrating its natural sugars.
Secondly, the moisture prevents the husks from drying out and catching fire in the oven. While a little char is perfectly fine and adds flavor, you don’t want them to burn completely before the corn inside has had a chance to cook through. This simple soaking step guarantees that the corn will be perfectly cooked every time, without fail. It’s a bit of old-fashioned kitchen wisdom that truly makes a world of difference in the final result.
What’s the easiest way to remove the silk from corn on the cob?
Ah, the dreaded corn silk. We’ve all been there, picking off those stubborn little strands one by one. Luckily, I’ve learned a few tricks over the years to make this process much easier. The best trick is to wait until after the corn has been cooked. The steaming process that happens inside the husk actually loosens the silks, making them release from the kernels much more easily than when the corn is raw.
Once you’ve roasted the corn and peeled back the husks, you can take a slightly damp paper towel or a clean kitchen towel and simply wipe down the ear of corn from top to bottom. The silks will cling to the towel and come right off. Another great tool is a soft-bristled vegetable brush. A few gentle strokes with the brush will remove any remaining stubborn strands without damaging the tender kernels. This method is quick, efficient, and saves you a lot of frustration.
How can I tell if my corn on the cob is fresh at the store?
Choosing the best corn is the foundation of this recipe. You can have the best technique in the world, but if you start with old, starchy corn, you’ll never get that sweet, delicious result you’re looking for. When you’re at the grocery store or farmers market, use your senses to pick the perfect ears. First, look at the husks. They should be a vibrant green color and wrapped snugly around the corn. Avoid any ears with yellow or brown, dry-looking husks.
Next, check the silks, the little tassels sticking out of the top. They should be pale yellow or even a little bit golden, and they should feel slightly damp and sticky. If the silks are dark brown, black, or completely dry and brittle, the corn is likely old. Finally, give the ear a gentle squeeze. It should feel firm and plump all the way around. You can also peel back just a tiny bit of the husk at the top to peek at the kernels. They should be plump, glossy, and arranged in tight rows. If they look shriveled or have gaps, put it back and find a better one.
Can I prepare this corn on the cob recipe ahead of time?
Yes, you can absolutely do some prep work ahead of time to make things easier, which is a huge help when you’re planning for a party or a big family dinner. The best thing to prepare in advance is the Spicy Creole Garlic Butter. You can mix the softened butter with all the seasonings, then scoop it onto a piece of plastic wrap, roll it into a log, and store it in the refrigerator for up to a week or in the freezer for several months. When you’re ready to cook, you can just slice off what you need and melt it.
As for the corn itself, it’s best roasted right before you plan to serve it for the optimal texture and flavor. However, you can do the trimming and soaking a few hours in advance. Just keep the soaked corn in the water in your sink or a large pot until you’re ready to put it in the oven. This little bit of prep can save you precious time when you’re busy getting the rest of the meal on the table.
Try These Recipes Next
If you enjoyed this recipe, here are three more from This Gal Cooks that pair beautifully with it:
Cheesy Chipotle Shrimp Corn Dip
Smoky, creamy dip packed with corn, chipotle, and shrimp — perfect for entertaining or snacking.
Blackened Shrimp and Grits
Creamy smoked gouda grits are topped with blackened shrimp, bacon and sprinkled with pickled jalapenos.
Creamy Mashed Potatoes
Rich, buttery mashed potatoes made extra smooth with Boursin cheese — the perfect side dish for any meal.