
The Secret to the Creamiest Restaurant-Style Queso Recipe
This is, without a doubt, the silkiest, most flavorful homemade queso you will ever dip a chip into.
I feel like I’ve been on a lifelong quest for the perfect queso. Not the kind from a jar, and certainly not the kind that’s just a melted block of processed cheese with a can of tomatoes dumped in. I’m talking about that glorious, velvety smooth, restaurant-style cheese dip that feels both indulgent and absolutely necessary for any gathering.
My journey really began a few years back at my sister-in-law’s annual football kickoff party. She always puts out an incredible spread, but her queso was the stuff of legends. It was creamy, had a little kick, and you just couldn’t stop eating it. For years, I begged her for the recipe, and she’d just laugh and say, “Oh, it’s just a little bit of this and a little of that.”
One afternoon, while I was trying to replicate her magic, I had a dip that was good, but it was missing… something. It was rich, it was cheesy, but it felt a little flat. My eyes scanned the counter and landed on a jar of pickled jalapeños I had out for another dish. On a whim, I measured out a couple of tablespoons of the brine and stirred it in. Oh, my goodness.
That was it. That was the secret. The subtle, vinegary tang of the jalapeño brine cut right through the richness of the cheese, brightening up all the other flavors and adding a layer of complexity that was simply divine. It was the pop of acidity it needed to go from good queso to unforgettable queso. Now, it’s my turn to bring the legendary dip to the party.
Why This Queso Recipe Works
Queso, which simply means “cheese” in Spanish, has become a beloved staple of Tex-Mex cuisine across the American South and beyond. It’s the ultimate party food, a comforting appetizer that brings everyone together around a warm, bubbling bowl of cheesy goodness. Its popularity comes from its simplicity and its deeply satisfying flavor profile. A great queso is a delicate balance of creamy texture, savory cheese flavor, and just the right amount of spice.
The problem with many homemade queso recipes is that they often fall short of that perfect restaurant quality. They can be grainy from pre-shredded cheese, oily from the cheese breaking, or one-note in flavor. This recipe is designed to solve all those common issues. We build a flavorful foundation by sautéing onion, fresh jalapeño, and garlic. Then, we create a stable, creamy base using a classic roux and evaporated milk. This technique ensures the sauce is thick enough to cling to a chip without being clumpy.
The real magic, however, comes from two key elements. First, the specific blend of cheeses. High-quality American cheese from the deli counter is non-negotiable for its emulsifying properties, which guarantee a smooth, non-greasy finish. Monterey Jack provides that beautiful melt and mild, creamy flavor, while a sharp cheddar adds a necessary depth and tang. Second, my twist ingredient, the pickled jalapeño brine, truly elevates this queso. The acidity from the brine cuts through the fatty richness of the cheese, balancing the dip and making it taste brighter and more complex. It adds a subtle tang that makes you come back for another scoop, again and again.
Ingredients for Queso
The key to an incredible queso is using high-quality ingredients. While the list might seem simple, each component plays a crucial role in creating the perfect texture and flavor. Don’t be tempted by shortcuts like pre-shredded cheese, as the results just won’t be the same.
The foundation of this recipe is a trio of cheeses, each chosen for a specific purpose. The American cheese is our stabilizer, ensuring a perfectly smooth and creamy dip that won’t separate. Monterey Jack brings the meltiness and classic cheese-pull, while sharp cheddar provides a robust, tangy flavor to stand up to the other ingredients. Evaporated milk, not regular milk, is another secret weapon here. Its lower water content helps create a much creamier, more stable sauce that holds up beautifully, even as it cools.
And of course, there’s our special twist ingredient. That splash of brine from a jar of pickled jalapeños is what makes this queso sing. It adds a bright, acidic note that wakes everything up and keeps the rich dip from feeling too heavy.
- 2 tbsp unsalted butter
- 1/2 white onion, finely chopped
- 1 fresh jalapeño, seeds removed and finely minced
- 2 cloves garlic, minced
- 2 tbsp all-purpose flour
- 1 (12 oz) can full-fat evaporated milk
- 8 oz Monterey Jack cheese, shredded from the block
- 4 oz sharp cheddar cheese, shredded from the block
- 4 oz high-quality white or yellow American cheese, from the deli counter, torn into small pieces
- 1 (4 oz) can diced green chiles, drained
- 1/2 tsp cumin
- 1/4 tsp chili powder
- Twist Ingredient: 2-3 tbsp brine from a jar of pickled jalapeños
- Chopped fresh cilantro, for garnish
- Diced Roma tomato, for garnish
Step-by-Step Instructions For Making Queso
Making this queso is a straightforward process, but paying attention to a few key techniques will guarantee you achieve that perfectly smooth, restaurant-quality result every single time. Grab a medium saucepan or a Dutch oven, which is great for holding heat evenly, and let’s get started.
Step 1: Shred Your Cheeses
Before you even turn on the stove, get your cheeses ready. Using a box grater or a food processor with a shredding attachment, shred the blocks of Monterey Jack and sharp cheddar. This step is the most important for avoiding a grainy queso. Packaged shredded cheeses are coated in starches like potato starch or cellulose to prevent clumping, but those same anti-caking agents will prevent the cheese from melting smoothly into your sauce. Take the extra five minutes, your final dip will thank you for it.
Step 2: Sauté the Aromatics
In your saucepan, melt the butter over medium heat. Once it’s shimmering, add your finely chopped white onion and minced fresh jalapeño. Sauté them, stirring occasionally, for about 5 to 7 minutes. You want them to become soft and translucent, not browned. This step builds the first layer of flavor for our queso, infusing the butter with a savory, slightly spicy base.
Step 3: Bloom the Garlic
Once the onions and jalapeños are soft, add the minced garlic. Stir it constantly for just about one minute until you can smell that wonderful, fragrant garlic aroma. Be careful not to let it burn, as burnt garlic will add a bitter taste to your dip. This quick step, called blooming, really brings out the garlic’s flavor.
Step 4: Make the Roux
Sprinkle the all-purpose flour over your cooked vegetables. Stir it constantly for one full minute. This is a crucial step to cook out the raw, pasty taste of the flour. You’re creating a simple roux, which will act as the thickener for our queso and ensure a stable, creamy base.
Step 5: Create the Creamy Base
Now, slowly begin to pour in the evaporated milk, a little bit at a time, while whisking continuously. This prevents lumps from forming and helps the roux smoothly incorporate into the liquid. Once all the milk is added, continue to whisk frequently until the mixture comes to a gentle simmer. You’ll notice it starts to thicken slightly, which should take about 3 to 4 minutes.
Step 6: Melt the Cheeses
Turn the heat down to low. This is very important. High heat is the enemy of cheese sauces and will cause them to break and become oily. Begin adding your cheeses one handful at a time, starting with the torn American cheese, which will help emulsify the sauce. Stir constantly until each addition is completely melted before adding the next. Patience is key here. Do not let the mixture boil.
Step 7: Add the Flavorings
Once all the cheese is incorporated and your queso is beautifully smooth, stir in the drained diced green chiles, the cumin, and the chili powder. These ingredients add that classic Tex-Mex flavor and a gentle warmth to the dip.
Step 8: The Final Twist
Now for my secret ingredient. Stir in 2 tablespoons of the pickled jalapeño brine. Give it a taste. The brine adds a wonderful tang that balances the richness of the cheeses. If you think it needs a little more “pop,” go ahead and add that third tablespoon. It really makes all the difference.
Step 9: Garnish and Serve
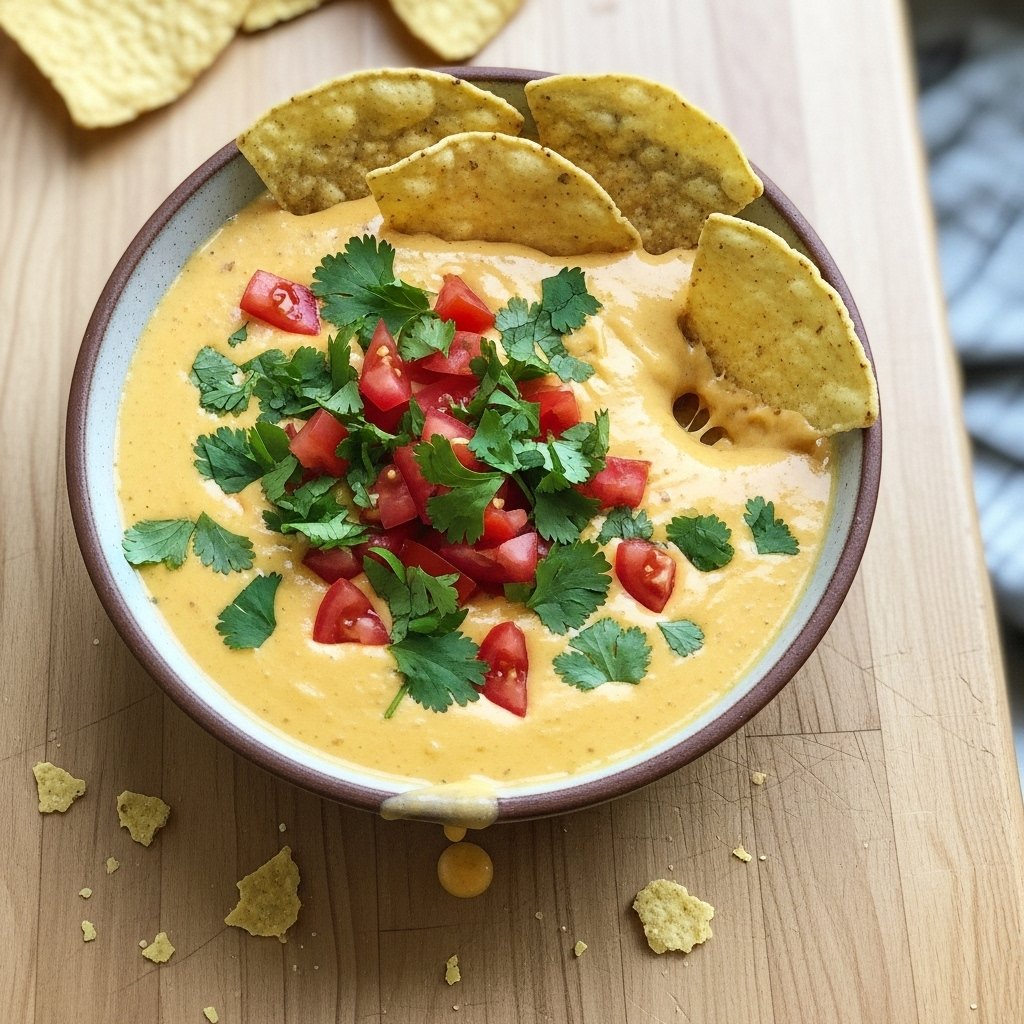
Transfer your glorious queso to a warm serving bowl. A small slow cooker set to “warm” is also perfect for parties. Garnish with a sprinkle of fresh, chopped cilantro and some diced Roma tomato for a bit of color and freshness. Serve it immediately with a big bowl of your favorite tortilla chips.
How To Serve Queso
Serving this queso is all about having fun and letting everyone dig in. While it’s absolutely perfect in its classic form, there are so many ways to present it and enjoy it beyond just a bowl and a bag of chips. The key is to serve it warm, as that’s when its texture is at its peak silkiness and the flavors are most vibrant.
For a party or gathering, I love to serve this queso in a mini 1.5-quart slow cooker set to the “warm” setting. This keeps it at the perfect temperature for hours without it getting too thick or forming a skin on top. Set out a huge platter of dippers so your guests have plenty of options to choose from. A good queso deserves a good vessel.
Here are some of my favorite ways to serve this dip:
- Classic Tortilla Chips: You can’t go wrong with the classic. A sturdy, restaurant-style corn tortilla chip is the perfect partner for this creamy dip.
- Creative Dippers: Think outside the chip bag. Set out bowls of Fritos Scoops, soft pretzel bites, toasted baguette slices, or even sturdy vegetable sticks like carrots, celery, and bell pepper strips.
- As a Topping: This queso is more than just a dip. Drizzle it over a pile of nachos, spoon it over a baked potato with all the fixings, or use it to upgrade your burgers and hot dogs.
- Build a Queso Bar: For a truly impressive spread, set out the warm queso alongside small bowls of extra toppings. Guests can customize their own creations with things like cooked chorizo, seasoned ground beef, pico de gallo, sour cream, and extra pickled jalapeños.
You can even use this queso as a sauce for main dishes. Try pouring it over steamed broccoli or cauliflower, or use it to make an incredible batch of smothered burritos. The possibilities are truly endless once you have this perfect queso recipe in your back pocket.
How To Store & Reuse Queso Leftovers
On the rare occasion that we have leftover queso in my house, it’s like finding a little treasure in the fridge the next day. Storing and reheating it properly is key to making sure it’s just as delicious the second time around. Cheese-based sauces can be a little fussy, but with a couple of simple tricks, your leftover queso will be just as smooth and creamy as when it was freshly made.
The first step is proper storage. Once the queso has cooled completely to room temperature, transfer it to an airtight container. I find that glass containers work especially well. Press a piece of plastic wrap directly onto the surface of the queso before putting the lid on. This helps prevent a skin from forming. It will keep beautifully in the refrigerator for up to 4 days.
When you’re ready to enjoy it again, I highly recommend reheating it on the stovetop for the best results. Here’s how to bring your queso back to life and some ideas for using it up:
- Stovetop Reheating: The gentle, even heat of the stovetop is the best way to reheat queso. Place the chilled queso in a small saucepan over low heat. Add a small splash of milk or evaporated milk, about a tablespoon to start. Stir it frequently as it warms up. The added liquid will help it return to its original silky consistency. Don’t be tempted to rush it with high heat, as that can cause it to separate.
- Microwave Reheating: If you’re in a hurry, you can use the microwave. Place the queso in a microwave-safe bowl. Microwave it at 50% power in 30-second intervals, stirring well between each interval until it’s hot and smooth. Again, adding a little splash of milk can help if it seems too thick.
- Creative Leftover Ideas: Don’t just serve it with chips again. Stir leftover queso into scrambled eggs for a decadent breakfast. Use it as a sauce for a quick and easy mac and cheese. Drizzle it over roasted vegetables or use it to make a fantastic base for a cheesy potato soup.
With these tips, you’ll be able to enjoy every last drop of your delicious homemade queso, ensuring that nothing goes to waste.
Substitutions & Variations For Queso
One of the best things about a foundational recipe like this is how easy it is to customize. Once you’ve mastered the basic technique for a smooth and stable cheese sauce, you can play around with different flavors and add-ins to make it your own. Whether you want to turn up the heat, add some smoky flavor, or incorporate some hearty protein, this queso recipe is the perfect canvas.
Feel free to experiment based on what you have in your pantry or what you’re in the mood for. Small changes can create a completely new dip experience. For example, simply swapping out one of the cheeses or adding a different type of pepper can make a big impact on the final flavor profile. Just remember to stick with good quality melting cheeses for the best results.
Here are a few of my favorite substitutions and variations to get your creativity flowing:
- Cheese Swaps: While the trio of American, Monterey Jack, and cheddar is my go-to, you can certainly mix it up. Try swapping the Monterey Jack for an equal amount of Pepper Jack to add an extra kick of spice throughout the dip. You could also use Colby or a mild Asadero cheese for a different flavor.
- Spice It Up: If you like your queso with more heat, you have several options. You can leave some of the seeds in your fresh jalapeño, or swap it for a spicier serrano pepper. A pinch of cayenne pepper or a dash of your favorite hot sauce stirred in at the end also works wonderfully.
- Add Some Meat: To make this a heartier, more substantial dip, add some cooked and crumbled meat. Brown a half-pound of chorizo, seasoned ground beef, or even spicy Italian sausage. Drain the fat very well before stirring it into the finished queso.
- Regional Spins: For a smoky, Southwestern flavor, try adding a finely chopped chipotle pepper in adobo sauce along with the garlic. You could also stir in a half cup of black beans and corn to give it more texture and flavor. A squeeze of fresh lime juice at the end can also brighten things up nicely.
The Best Homemade Queso with a Secret Twist
Description: A velvety, restaurant-style queso dip made with a blend of three cheeses and a secret ingredient that makes it pop. This is the perfect appetizer for game days, parties, or any time a cheese craving hits. It’s perfectly smooth, never grainy, and packed with flavor.
Yield: 6 cups | Category: Appetizer | Cuisine: Tex-Mex
Prep Time: 10 minutes | Cook Time: 20 minutes
Ingredients
- 2 tbsp unsalted butter
- 1/2 white onion, finely chopped
- 1 fresh jalapeño, seeds removed and finely minced
- 2 cloves garlic, minced
- 2 tbsp all-purpose flour
- 1 (12 oz) can full-fat evaporated milk
- 8 oz Monterey Jack cheese, shredded from the block
- 4 oz sharp cheddar cheese, shredded from the block
- 4 oz high-quality white or yellow American cheese, from the deli counter, torn into small pieces
- 1 (4 oz) can diced green chiles, drained
- 1/2 tsp cumin
- 1/4 tsp chili powder
- 2-3 tbsp brine from a jar of pickled jalapeños
- Chopped fresh cilantro, for garnish
- Diced Roma tomato, for garnish
Instructions
- Melt butter in a saucepan over medium heat. Sauté onion and jalapeño until soft, about 5-7 minutes. Add garlic and cook for 1 minute.
- Stir in flour and cook for 1 minute.
- Slowly whisk in evaporated milk until smooth. Bring to a simmer until slightly thickened, about 3-4 minutes.
- Reduce heat to low. Add cheeses one handful at a time, stirring until completely melted before adding the next. Do not boil.
- Once smooth, stir in green chiles, cumin, and chili powder.
- Stir in 2 tbsp of jalapeño brine. Taste and add more if desired.
- Transfer to a serving bowl, garnish with cilantro and tomato, and serve immediately.
Notes
For best results, use block cheese and shred it yourself. The anti-caking agents in pre-shredded cheese can make the queso grainy. Serve in a small slow cooker on the ‘warm’ setting to keep it smooth for a party.
Servings: 12 | Calories: 250 kcal | Fat: 20g | Carbohydrates: 5g | Protein: 13g
5 FAQs About Queso
Here are some straightforward answers to the most common questions I receive about this queso recipe.
How do I keep my queso from getting grainy?
A grainy texture is the most common frustration when making homemade queso, but it’s completely avoidable with the right ingredients and technique. The primary culprit is almost always pre-shredded cheese. Those convenient bags are coated with starches like cellulose and potato starch to prevent the shreds from sticking together. While helpful in the bag, these additives prevent the cheese from melting into a cohesive, silky sauce, resulting in a gritty or clumpy texture. The single most important thing you can do for smooth queso is to buy blocks of cheese and shred them yourself just before you start cooking.
The other key factor is heat management. Cheese proteins are delicate. If they get too hot too quickly, they will tighten up and squeeze out their fat, a process called “breaking.” This leads to a greasy, separated, and grainy sauce. Always reduce your stove’s heat to low before you begin adding the cheese. Add the cheese in small handfuls, stirring gently and constantly, and make sure each addition is fully melted before you add the next. Never, ever let your queso boil once the cheese has been added. Patience on low heat is the secret to a perfectly smooth dip.
Can I make this queso in a slow cooker?
Yes, you can absolutely adapt this recipe for a slow cooker, which is a fantastic option for parties as it makes serving a breeze. However, you can’t just dump all the ingredients in and walk away. To develop the best flavor and ensure a smooth texture, you should still perform the initial steps on the stovetop. Go ahead and sauté the onions, jalapeños, and garlic in a saucepan, make the roux with the flour, and whisk in the evaporated milk until you have a smooth, thickened base.
Once you have that creamy base, transfer it to your slow cooker. Then, you can stir in all your shredded cheeses, the green chiles, and the spices. Set the slow cooker to low, cover, and let it cook for 1-2 hours, stirring every 20-30 minutes, until all the cheese is completely melted and the queso is hot and bubbly. Once it’s ready, stir in the jalapeño brine and turn the slow cooker down to the “warm” setting. This will keep your queso at the perfect dipping temperature for your entire event without it scorching on the bottom.
Why did my queso separate or become oily?
A separated, oily queso is a sad sight, but it’s a common problem that happens for one main reason: the cheese got too hot. When cheese, which is an emulsion of fat, protein, and water, is heated too aggressively, the protein strands seize up and release the fat. This causes the oil to pool on the surface, and the remaining cheese sauce can become stringy or grainy. This is why it’s critical to turn the heat down to low on your stove before you start adding the shredded cheese to the milk base.
Another factor is the type of cheese used. This recipe relies on American cheese as a powerful emulsifier. The sodium citrate in American cheese helps keep the fats and proteins blended together, creating a stable sauce that is much less likely to break. If you skip the American cheese and only use natural cheeses like cheddar or Monterey Jack, your queso will be much more prone to separating. If your queso does break, you can sometimes save it. Remove it from the heat and try whisking in a small splash of acid, like a teaspoon of the jalapeño brine or lime juice, to help bring the emulsion back together.
What is the best cheese combination for homemade queso?
The perfect queso is all about a strategic blend of cheeses, with each type playing a specific role. You need a combination of flavor, meltability, and stability. My gold-standard combination is American, Monterey Jack, and sharp cheddar. The American cheese, specifically the kind you get sliced fresh from the deli counter, is the secret weapon for texture. It contains emulsifying salts that guarantee your queso will be smooth, creamy, and resistant to breaking or becoming greasy. It provides the texture backbone.
Next, Monterey Jack is an excellent melting cheese. It has a high moisture content and melts into a beautifully gooey, stretchy consistency without becoming oily. It provides that classic “cheese pull” and a mild, milky flavor that everyone loves. Finally, a good sharp cheddar is added purely for flavor. Its tangy, robust taste cuts through the richness and gives the queso a complex, savory depth that the other two milder cheeses lack. This trio provides the perfect balance, giving you the texture of American, the melt of Jack, and the taste of cheddar.
Can I make this queso ahead of time?
Absolutely! This queso recipe is a great candidate for making ahead, which can be a lifesaver when you’re planning for a party. You can prepare the entire dip one to two days in advance. Simply follow all the recipe steps as written, then allow the queso to cool completely to room temperature. Once cooled, transfer it to an airtight container. I recommend pressing a piece of plastic wrap directly on the surface of the dip before sealing the container to prevent a skin from forming.
When you’re ready to serve, the best way to reheat it is gently on the stovetop. Place the cold queso in a saucepan over low heat. It will be very thick, so add a splash of milk or evaporated milk (about 1-2 tablespoons) to help loosen it up as it heats. Stir frequently until it’s warmed through and has returned to its original creamy, smooth consistency. You can also reheat it in a slow cooker on low, stirring occasionally, for about an hour. Once it’s hot, garnish it with fresh cilantro and tomato just before serving.
Try These Recipes Next
If you loved the easy, crowd-pleasing nature of this homemade queso, you’ll love some of the other simple and delicious recipes I have on the site. Here are a few to get you started on your next kitchen adventure.