
The Secret to Extra Fluffy Buttermilk Pancakes
These are the absolute best buttermilk pancakes you will ever make.
I learned the art of a good pancake from my grandmother, who could whip up a batch from memory with her eyes closed. Her kitchen always smelled of vanilla and melting butter on a Saturday morning. Her pancakes were legendary, the kind that were perfectly fluffy on the inside with those beautiful, crisp, lacy edges.
For years, I tried to replicate them, getting close but never quite capturing that same magic. It became a bit of an obsession. I tweaked the sugar, tried different buttermilks, and played with resting times. One afternoon, while making milkshakes for the kids, I had a little stroke of genius. I saw the container of malted milk powder sitting on the counter.
I remembered the distinct, toasty, and slightly nutty flavor it added to ice cream. On a whim, I added a few spoonfuls to my pancake batter. The result was nothing short of a revelation. It was my grandmother’s recipe, elevated. The malt added a subtle depth and a beautiful golden-brown color that I never knew was missing. It gave these buttermilk pancakes a nostalgic, diner-style flavor that is simply irresistible. Now, they’re not just a weekend treat, they’re a treasured family tradition with my own special twist.
Why This Buttermilk Pancakes Recipe Works
Buttermilk pancakes are a cornerstone of American breakfast culture for a reason. They represent comfort, lazy weekend mornings, and family gatherings. The magic has always been in the buttermilk itself. Its acidity reacts with the leavening agents, like baking soda, creating carbon dioxide bubbles that give the pancakes their signature lift and airy texture.
This chemical reaction results in a pancake that is incredibly tender and fluffy, with a slight tangy flavor that beautifully balances the sweetness of maple syrup. It’s a classic combination that has stood the test of time, from farmhouse kitchens to bustling city diners. People love them because they are simple, satisfying, and feel like a special treat made with love.
So, how do we make a beloved classic even better? My secret is the malted milk powder. This isn’t just an extra ingredient, it’s a flavor enhancer that transforms the entire pancake. The malt powder introduces a subtle, toasted sweetness and a rich, nutty undertone that you can’t quite put your finger on but absolutely love. It also helps the pancakes achieve a gorgeous, uniform golden-brown crust when they hit the hot griddle.
It gives them a professional, diner-quality taste and appearance that will make your family think you ordered them from the best brunch spot in town. This one small addition takes a wonderful recipe and turns it into an unforgettable one. It’s the little detail that makes all the difference.
Ingredients for Buttermilk Pancakes
The beauty of a perfect pancake lies in using simple, quality ingredients. While the list might look standard, my special addition is what sets this recipe apart. Here’s exactly what you’ll need to create the fluffiest, most flavorful buttermilk pancakes.
- 2 cups all-purpose flour
- 3 tablespoons malted milk powder
- 2 tablespoons granulated sugar
- 2 teaspoons baking powder
- 1 teaspoon baking soda
- ½ teaspoon kosher salt
- 2 cups full-fat buttermilk
- 2 large eggs, lightly beaten
- 4 tablespoons unsalted butter, melted, plus more for the griddle
- 1 teaspoon vanilla extract
The true star here is the malted milk powder. This old-fashioned ingredient is the secret to getting that nostalgic, slightly sweet, and toasty flavor reminiscent of a classic diner milkshake. It adds a depth of flavor that plain sugar just can’t replicate and helps the pancakes brown beautifully.
For the best results, always use full-fat buttermilk. The fat content contributes to a richer flavor and a more tender crumb. While you can make a substitute in a pinch with milk and vinegar, real buttermilk provides a superior texture and tang that is essential for authentic buttermilk pancakes.
I also recommend using unsalted butter. This allows you to control the exact amount of salt in the recipe. Melting the butter before adding it to the wet ingredients ensures it incorporates smoothly, distributing that rich, buttery flavor evenly throughout every single pancake.
Step-by-Step Instructions For Making Buttermilk Pancakes
Making incredible buttermilk pancakes from scratch is all about technique. Follow these steps closely, and I promise you’ll have a stack of fluffy, golden perfection waiting for you at the end. Grab your favorite mixing bowl and a griddle, and let’s get started.
Step 1: Combine the Dry Ingredients
In a large mixing bowl, add your all-purpose flour, malted milk powder, granulated sugar, baking powder, baking soda, and kosher salt. Use a whisk to combine everything thoroughly. This is an important step because it ensures the leaveners are evenly distributed, which is key for a uniform rise. Once mixed, use your whisk or a spoon to create a small indentation, or well, in the center of the flour mixture.
Step 2: Whisk the Wet Ingredients
In a separate, medium-sized bowl or a large liquid measuring cup, pour in the buttermilk. Add the lightly beaten eggs, the melted unsalted butter, and the vanilla extract. Whisk these ingredients together just until they are combined. You don’t need to overdo it, just a few good whisks to break up the egg yolks and bring everything together.
Step 3: Gently Fold the Batter
Now, pour the wet ingredients into the well you made in the dry ingredients. Using a rubber spatula or a wooden spoon, gently fold the wet and dry ingredients together. The most common mistake is overmixing. You want to mix only until the flour streaks have just disappeared. The batter should, and must, be lumpy. Those lumps are pockets of future fluffiness.
Step 4: Let the Batter Rest
This step is non-negotiable for tender pancakes. Cover the bowl with a clean kitchen towel and let the batter rest at room temperature for about 10 to 15 minutes. This allows the gluten in the flour to relax, resulting in a softer pancake. It also gives the baking powder and soda time to react with the buttermilk, creating bubbles that will make your pancakes light and airy.
Step 5: Heat the Griddle and Cook
Place a large non-stick skillet or a griddle over medium heat. A well-heated surface is crucial. To test if it’s ready, flick a few drops of water on it. If they sizzle and dance before evaporating, you’re good to go. Add a small pat of butter and swirl it around to coat the cooking surface.
Step 6: Pour and Cook the First Side
Using a ¼ cup measure, pour the batter onto the hot griddle for each pancake. Be sure to leave a couple of inches of space between them so they have room to spread. Let them cook for about 2 to 3 minutes. You’ll know it’s time to flip when you see bubbles forming and popping on the surface and the edges start to look dry and set.
Step 7: Flip and Finish Cooking
With a thin, wide spatula, confidently flip each pancake. Cook the second side for another 1 to 2 minutes, or until it’s beautifully golden brown. The second side will always cook faster than the first. Transfer the finished pancakes to a plate and keep them warm while you repeat the process with the remaining batter, adding a little more butter to the griddle for each new batch.
How To Serve Buttermilk Pancakes
Serving up a fresh stack of these buttermilk pancakes is one of life’s simple joys. While they are absolutely divine on their own, the right toppings can turn a delicious breakfast into a truly memorable experience. You can go classic and simple or get creative and decadent.
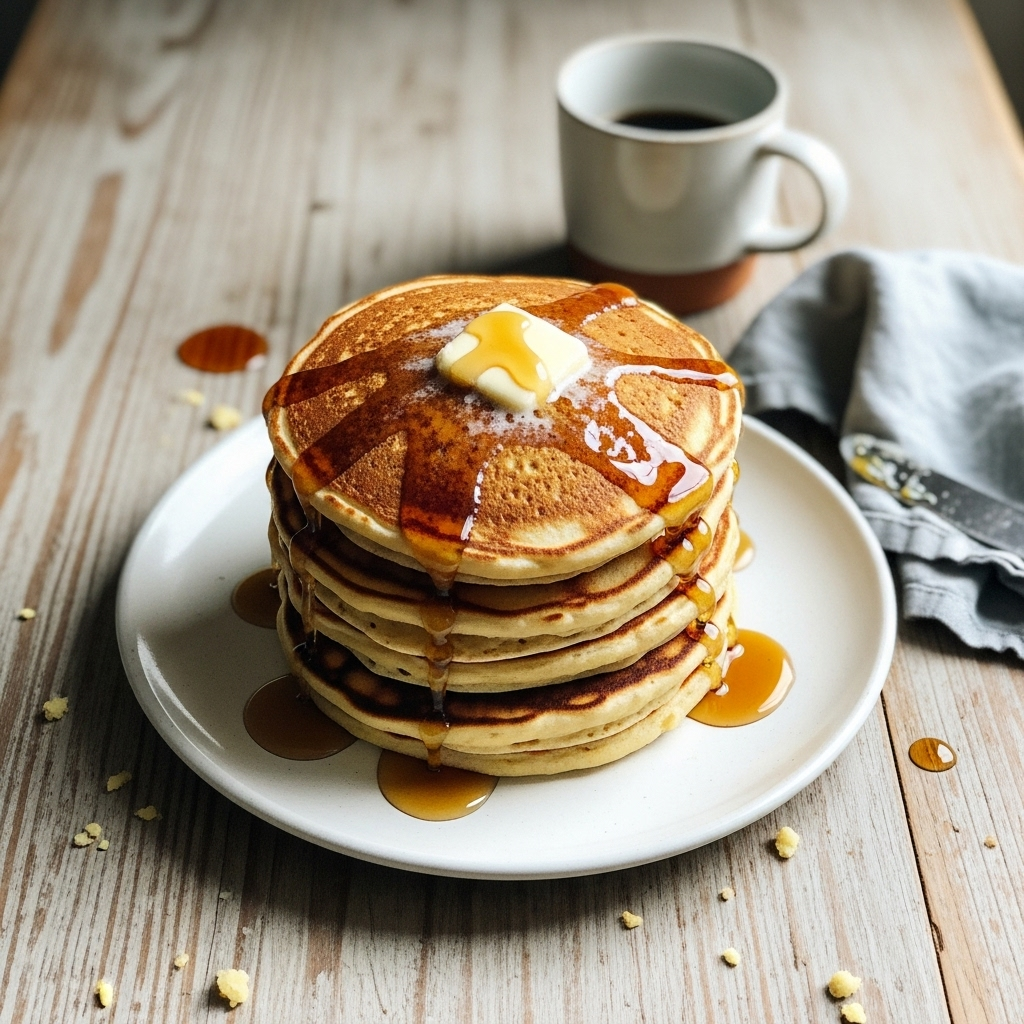
The most traditional way, of course, is with a generous pat of softened butter melting into the warm pancakes, followed by a liberal drizzle of pure maple syrup. It’s a combination that never fails to satisfy. For a little extra something, a light dusting of powdered sugar can make the plate look as wonderful as it tastes.
If you’re looking to build a more elaborate breakfast plate, here are some of my favorite ways to serve these pancakes:
- Fresh Fruit and Cream: Top a stack with a dollop of homemade whipped cream or tangy Greek yogurt and a handful of fresh berries like blueberries, strawberries, or raspberries. Sliced bananas or peaches are also wonderful.
- Sweet and Savory: For a true Southern-style breakfast, serve these pancakes alongside crispy bacon or savory sausage patties. The combination of sweet syrup and salty meat is simply heavenly. You could even go all out and top them with a piece of fried chicken for a take on chicken and waffles.
- Decadent Delights: Turn breakfast into dessert by adding chocolate chips, a drizzle of warm Nutella, or a spoonful of caramel sauce. A sprinkle of toasted pecans or walnuts adds a lovely crunch.
- Fruity Compotes: Instead of syrup, try spooning a warm fruit compote over the top. A simple blueberry or apple cinnamon compote is easy to make and adds a gourmet touch.
No matter how you choose to serve them, these pancakes are best enjoyed hot off the griddle with a fresh cup of coffee or a tall glass of cold milk. Gather the family around the table and enjoy a breakfast made with a little extra love.
How To Store & Reuse Buttermilk Pancakes Leftovers
On the rare occasion that we have leftover pancakes in our house, it’s actually a wonderful thing. These buttermilk pancakes store beautifully and make for an incredibly quick and easy breakfast on a busy morning. The key is to store them properly to maintain their texture and flavor.
First, make sure the pancakes are completely cooled to room temperature before you store them. Storing them while warm will create condensation, which can make them soggy. Once cooled, you have a couple of great options for storage depending on how soon you plan to eat them.
Here’s how I handle storing and reheating leftover pancakes:
- Refrigerator Storage: For short-term storage, stack the cooled pancakes with a small piece of parchment or wax paper between each one. This prevents them from sticking together. Place the stack in an airtight container or a resealable plastic bag. They will keep well in the refrigerator for up to 3 days.
- Freezer Storage: For longer storage, the freezer is your best friend. Lay the cooled pancakes in a single layer on a baking sheet and pop them in the freezer for about 30 minutes, or until they are firm. This is called flash-freezing. Once firm, you can stack them with parchment paper in between and place them in a freezer-safe bag or container. They will last for up to 2 months.
- Reheating: The best way to reheat pancakes is in the toaster or toaster oven. It crisps up the edges perfectly, just like they were freshly made. You can also warm them in the microwave for about 20-30 seconds, but they will be softer. For a large batch, you can lay them on a baking sheet and warm them in a 350°F oven for about 5-10 minutes.
Leftover pancakes also make a fun base for other treats. You can make little “sandwiches” with peanut butter and jelly, or even cut them into strips and use them as a dipper for yogurt or fruit dip. It’s a great way to make sure nothing goes to waste.
Substitutions & Variations For Buttermilk Pancakes
While this recipe is pretty close to perfect in my book, I know that sometimes you need to make a swap based on what’s in your pantry or for dietary needs. The great news is that this buttermilk pancakes recipe is quite forgiving and easy to adapt. You can easily customize it to make it your own.
Whether you’re adding mix-ins or need a gluten-free option, these pancakes provide a fantastic base for experimentation. Just remember that changing core ingredients like flour or buttermilk can slightly alter the final texture, but the results will still be delicious.
Here are a few trusted substitutions and fun variations to try:
- Gluten-Free Buttermilk Pancakes: You can substitute the all-purpose flour with a good quality one-to-one gluten-free baking flour blend. Look for one that contains xanthan gum. The texture will be slightly different, but still wonderfully tender.
- Dairy-Free Buttermilk Substitute: If you don’t have buttermilk, you can make a quick substitute. For every cup of buttermilk, use 1 cup of a dairy-free milk (like almond or soy) mixed with 1 tablespoon of lemon juice or white vinegar. Let it sit for 5-10 minutes to curdle. Use a dairy-free butter substitute as well.
- Flavorful Mix-Ins: This is where you can really get creative. Gently fold in about ¾ cup of your favorite additions into the batter right before you let it rest. Classic choices include fresh blueberries, chocolate chips, or chopped bananas.
- Spice It Up: Add a teaspoon of ground cinnamon and a pinch of nutmeg to the dry ingredients for a warm, spiced pancake. This is especially lovely during the fall and winter months. A little bit of orange zest can also brighten up the flavor beautifully.
Feel free to play around with these ideas. Cooking should be fun, and this recipe is a wonderful canvas for your culinary creativity. You might just discover your own secret ingredient that makes these buttermilk pancakes a signature dish in your home.
The Best Buttermilk Pancakes with a Secret Twist
Description: Classic, fluffy buttermilk pancakes made even better with the addition of malted milk powder for a rich, toasty, diner-style flavor and a perfect golden-brown crust. A simple recipe for an unforgettable breakfast.
Yield: 12-14 pancakes | Category: Breakfast | Cuisine: American
Prep Time: 15 minutes | Cook Time: 15 minutes
Ingredients
- 2 cups all-purpose flour
- 3 tablespoons malted milk powder
- 2 tablespoons granulated sugar
- 2 teaspoons baking powder
- 1 teaspoon baking soda
- ½ teaspoon kosher salt
- 2 cups full-fat buttermilk
- 2 large eggs, lightly beaten
- 4 tablespoons unsalted butter, melted, plus more for the griddle
- 1 teaspoon vanilla extract
Instructions
- In a large bowl, whisk together the flour, malted milk powder, sugar, baking powder, baking soda, and salt. Make a well in the center.
- In a separate bowl, whisk together the buttermilk, eggs, melted butter, and vanilla extract.
- Pour the wet ingredients into the dry ingredients and gently fold until just combined. The batter should be lumpy. Do not overmix.
- Let the batter rest for 10-15 minutes at room temperature.
- Heat a lightly buttered griddle or non-stick skillet over medium heat.
- Pour ¼ cup of batter for each pancake onto the griddle. Cook for 2-3 minutes, until bubbles appear on the surface.
- Flip and cook for another 1-2 minutes until golden brown. Serve immediately.
Notes
For the fluffiest pancakes, ensure your baking powder and baking soda are fresh. Do not press down on the pancakes with the spatula after flipping, as this will deflate them.
Servings: 6 | Calories: 350 kcal | Fat: 14g | Carbohydrates: 45g | Protein: 10g
5 FAQs About Buttermilk Pancakes
Here are some straightforward answers to the most common questions I receive about this buttermilk pancakes recipe.
Why are my buttermilk pancakes flat?
Flat pancakes are one of the most common frustrations, and there are usually a few key culprits. The first thing to check is your leavening agents, the baking powder and baking soda. These ingredients lose their potency over time. If your containers have been open for more than six months, they might not be providing the lift you need. You can test baking powder by dropping a spoonful into hot water; if it fizzes vigorously, it’s still good. For baking soda, add a splash of vinegar; it should bubble up immediately.
Another major reason for flat pancakes is overmixing the batter. When you stir flour and liquid together, you develop gluten. A little gluten is good for structure, but too much makes pancakes tough, dense, and flat instead of light and fluffy. You should only mix until the wet and dry ingredients are just combined. A lumpy batter is a good batter. Finally, letting the batter rest for at least 10 minutes is crucial. This gives the leaveners time to work their magic and create the air bubbles needed for a good rise.
Can I make buttermilk pancakes without buttermilk?
Absolutely! While real buttermilk provides the best flavor and texture, you can certainly make a fantastic substitute at home when you’re in a pinch. The purpose of buttermilk is its acidity, which activates the baking soda. You can easily replicate this with regular milk and an acid. The most common method is to use milk and either lemon juice or plain white vinegar.
The standard ratio is one tablespoon of acid for every one cup of milk. For this recipe, you would measure out two tablespoons of lemon juice or vinegar into a liquid measuring cup, then add enough milk to reach the 2-cup line. Give it a gentle stir and let it sit on the counter for about 5 to 10 minutes. The milk will start to curdle slightly, and that’s when you know it’s ready to use. You can also use plain yogurt or sour cream thinned with a little milk to achieve a similar tangy result.
What is the secret to fluffy buttermilk pancakes?
The secret to wonderfully fluffy buttermilk pancakes isn’t one single thing, but a combination of a few important techniques. First, as I mentioned, do not overmix your batter. Embrace the lumps! Overmixing develops too much gluten, which leads to rubbery, flat pancakes. Mix just until you no longer see dry streaks of flour.
Second, always let your batter rest. That 10-15 minute rest period is essential. It lets the gluten relax and allows the chemical reaction between the buttermilk and the leaveners to begin, creating a network of bubbles in the batter. Third, make sure your griddle is at the correct temperature. If it’s too low, the pancakes will spread out too much before setting, and if it’s too high, the outside will burn before the inside is cooked. Medium heat is your friend. Finally, once you flip the pancake, resist the urge to press down on it with your spatula. This just pushes out all that beautiful air you worked so hard to create.
Can I make the buttermilk pancakes batter ahead of time?
While you might be tempted to mix the batter the night before for a quicker morning, I generally advise against it. The reason goes back to the leavening agents. Baking powder and baking soda are activated as soon as they come into contact with the wet ingredients. Most of the chemical reaction that creates the bubbles for lift happens within the first 15-20 minutes after mixing.
If you let the batter sit overnight, the leaveners will lose most of their power, and you’ll likely end up with flat, dense pancakes. For the best, fluffiest results, it’s always best to make the batter right before you plan to cook it. If you want to save time in the morning, you can pre-measure and mix all of your dry ingredients in a bowl the night before. Then, in the morning, all you have to do is whisk your wet ingredients and combine the two.
Why is malted milk powder in this buttermilk pancakes recipe?
This is my favorite question because it gets to the heart of what makes this recipe so special. The malted milk powder is my secret weapon. It’s a simple, old-fashioned ingredient made from malted barley, wheat flour, and evaporated milk powder. It adds a unique flavor profile that you just can’t get from sugar alone. It introduces a subtle, toasty, and slightly nutty sweetness that is incredibly comforting and delicious.
Beyond the amazing flavor, malted milk powder also contributes to the texture and appearance of the pancakes. The sugars in the powder caramelize on the hot griddle, helping the pancakes develop a beautiful, even, golden-brown color that you typically only see in diners. It makes them look as good as they taste. It’s a small addition that makes a huge impact, elevating a simple breakfast staple into something truly memorable and impressive.
Try These Recipes Next
I hope you and your family love these buttermilk pancakes as much as mine does. They have become a weekend staple in our home, and I’m so happy to share my little secret with you all. A good breakfast really does set the tone for the whole day.
If you’re looking for more delicious and dependable recipes to add to your rotation, I have plenty of ideas that are perfect for any occasion, from busy weekday mornings to leisurely family dinners. Here are a few collections to get you started on your next kitchen adventure.
- For more morning inspiration, be sure to check out my collection of Easy Breakfast Ideas. You’ll find everything from quick grab-and-go options to other wonderful weekend treats.
- If you’re planning meals on a budget without sacrificing flavor, you’ll love my list of Cheap Meal Ideas. There are so many hearty and satisfying recipes that are kind to your wallet.
- And for those nights when you’re wondering what to make, I’ve got you covered with over 110 Easy Dinner Ideas that are perfect for any night of the week.