
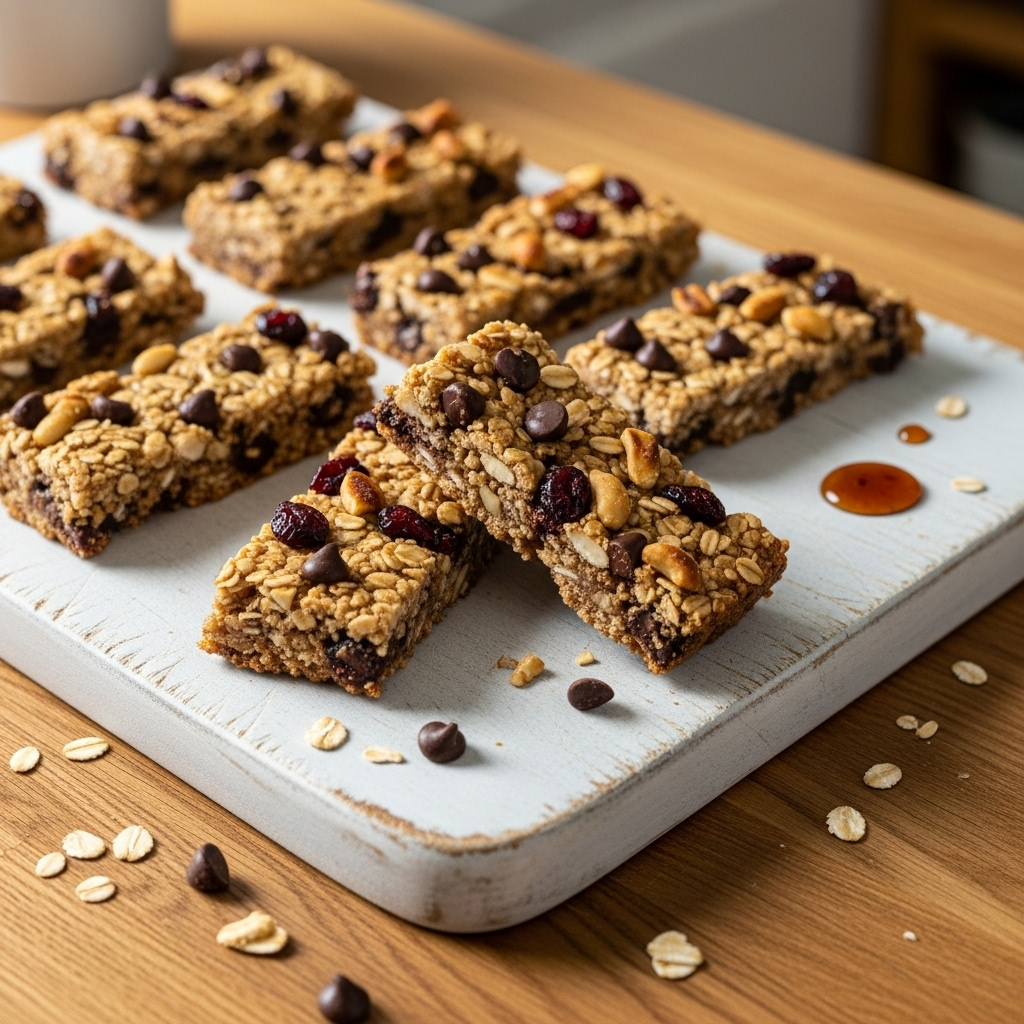
Chewy Brown Butter Chocolate Chip Craisin Granola Bars
There are certain smells that just transport you, don’t they? For me, one of those is the scent of toasted oats and warm honey. It reminds me of my own mama’s kitchen on a Saturday morning. She never made granola bars, though. We were a boxed-cereal kind of family, and any “bars” we had came wrapped in shiny plastic with a list of ingredients a mile long.
When my own kids started school, I found myself staring at those same shiny wrappers in the grocery aisle, feeling a little bit defeated. I wanted to give them something homemade, something I could feel good about. So, my quest for the perfect granola bar began. My first few attempts were, let’s just say, learning experiences. Some were too crumbly, others were tooth-achingly sweet.
The breakthrough came one afternoon when I was a little distracted. I let the butter for the binder melt a little too long on the stove. Just as I started to panic, this incredibly rich, nutty aroma filled the kitchen. It was brown butter! I decided to just go with it, and mercy, am I glad I did. That one happy accident transformed the entire recipe. It gave the bars a depth and warmth that was simply missing before. I added just a tiny splash of almond extract to enhance that nutty flavor, and that was it. My signature Chocolate Chip Craisin Granola Bars were born. They’re chewy, just sweet enough, and packed with a flavor that will make you swear off the store-bought kind forever.
Why This Chocolate Chip Craisin Granola Bars Recipe Works
Homemade granola bars have been a staple in lunchboxes and hiking packs for decades. They promise a wholesome, satisfying snack that’s easy to make and customize. The classic combination of oats, a sweetener, and fun mix-ins like chocolate chips and dried fruit is beloved for a reason. It hits all the right notes: chewy, sweet, and a little bit salty.
These bars are popular because they offer a sense of control. You know exactly what’s going into them, with no strange preservatives or high-fructose corn syrup in sight. They feel like a treat, but they’re built on a foundation of hearty rolled oats and protein-rich nuts.
So, what makes my recipe for Chocolate Chip Craisin Granola Bars stand out in a sea of good recipes? The secret is all in the butter. Instead of just melting it, we take a few extra minutes to brown it. This simple French technique, known as beurre noisette, is a game-changer. By cooking the butter solids until they toast, you create an incredibly deep, nutty, and almost caramel-like flavor.
This brown butter base infuses every single oat and pecan with a rich, sophisticated taste that you just can’t get from melted butter alone. It elevates the entire bar from a simple kid’s snack to something truly special. To complement this, I add a mere quarter teaspoon of almond extract. It’s not enough to scream “almond,” but it beautifully enhances the nuttiness of the brown butter and the pecans, creating a harmony of flavors that is just irresistible. The tart Craisins and sweet chocolate chips then pop against this warm, nutty background. It’s a simple twist that makes all the difference.
Ingredients for Chocolate Chip Craisin Granola Bars
The beauty of this recipe is its simplicity. We’re using pantry staples but combining them in a way that creates something truly special. The magic is in the technique, and having the right ingredients on hand makes it foolproof. Here’s what you’ll need to make the best Chocolate Chip Craisin Granola Bars you’ve ever had.
- 1/2 cup (1 stick) unsalted butter
- 2 cups old-fashioned rolled oats
- 1/2 cup chopped raw pecans or walnuts
- 1/2 cup packed light brown sugar
- 1/3 cup honey
- 1 teaspoon vanilla extract
- 1/4 teaspoon almond extract
- 1/2 teaspoon fine sea salt
- 3/4 cup semi-sweet chocolate chips
- 2/3 cup dried cranberries (Craisins)
The two ingredients that provide my signature twist are the unsalted butter and the almond extract. Using unsalted butter is key because it allows you to control the salt level perfectly. More importantly, it allows the milk solids to toast properly when you’re making the brown butter, which is the heart of this recipe’s unique flavor. Don’t substitute it with salted butter, as the final product could be too salty.
The almond extract is my other little secret. A tiny amount goes a long way in enhancing the nutty notes from the brown butter and the pecans. Be sure to use pure almond extract, not imitation, for the best and most authentic flavor.
For the other ingredients, a few notes can make a difference. Always use old-fashioned rolled oats, not quick oats or steel-cut. Rolled oats provide the perfect chewy, hearty texture that holds up in a bar. Quick oats can become mushy. For the chocolate chips, I prefer semi-sweet to balance the sweetness of the honey and brown sugar, but feel free to use milk or dark chocolate if that’s your preference. Finally, using fine sea salt helps it dissolve evenly into the butter mixture, ensuring a well-seasoned bar in every single bite.
Step-by-Step Instructions For Making Chocolate Chip Craisin Granola Bars
Alright, let’s get down to business. I’ll walk you through each step to make sure your granola bars turn out perfectly chewy and delicious every single time. Grab your apron and let’s get started!
Step 1: Preheat Oven and Prep Your Pan
First things first, preheat your oven to 350°F (175°C). Proper temperature is key for toasting our oats. While it heats up, prepare your 8×8 inch baking pan. I can’t stress this enough, use parchment paper! Cut a piece that’s long enough to cover the bottom and hang over two opposite sides. These little “handles” will make it incredibly easy to lift the entire block of bars out for cutting later. No sticking, no fuss.
Step 2: Toast the Oats and Nuts
Spread your rolled oats and chopped nuts in a single, even layer on a large baking sheet. Pop them into the preheated oven for about 8 to 10 minutes. The goal here is to awaken their flavor. You’ll know they’re ready when your kitchen starts to smell wonderfully toasty and the oats are just beginning to turn a light golden color. Give them a stir about halfway through to ensure they toast evenly. Once done, set them aside to cool down a bit.
Step 3: Make the Brown Butter
This is the magical step! Place your stick of unsalted butter in a medium saucepan, preferably one with a light-colored bottom so you can see the color changing. Melt it over medium heat. Once melted, keep it going. It will start to foam and sputter. Swirl the pan gently every so often. Soon, the foam will subside, and you’ll see little brown specks forming at the bottom. The smell will change from buttery to deeply nutty and rich. The moment you see those specks and smell that aroma, pull the pan off the heat immediately. Brown butter can go from perfect to burnt in a matter of seconds!
Step 4: Create the Sweet Binder
With the saucepan off the heat, stir the packed brown sugar, honey, and fine sea salt directly into that gorgeous hot brown butter. Return the pan to the stove over medium-low heat. Keep stirring constantly for about 1 to 2 minutes. You want the sugar to dissolve completely, creating a smooth, bubbly, and fragrant syrup. This ensures your bars won’t have a grainy texture.
Step 5: Add the Flavor Extracts
Remove the pan from the heat for good this time. Now, stir in your vanilla and almond extracts. The mixture might sizzle a bit, which is perfectly normal. Stirring them in off the heat prevents the alcohol in the extracts from cooking off too quickly, preserving their full flavor.
Step 6: Combine Everything
In a large mixing bowl, combine your toasted oats and nuts, the semi-sweet chocolate chips, and the dried cranberries. Pour the hot brown butter syrup all over the dry ingredients. Use a sturdy spatula to mix everything together until every last oat is coated in that delicious liquid gold.
Step 7: Let It Cool Slightly
This is a quick but important step. Let the mixture sit in the bowl for about 5 minutes. This allows it to cool just enough so that when you press it into the pan, the chocolate chips don’t melt into oblivion. You’ll still get some melty goodness, but the chips will largely hold their shape.
Step 8: Press the Mixture Firmly
Transfer the granola mixture into your parchment-lined pan. Now comes the most critical part for ensuring your bars don’t crumble: you must press it down very, very firmly. I use the back of my spatula, but you can also place another piece of parchment on top and use your hands or the bottom of a flat glass to really compact the mixture into a dense, even layer. Press it into every corner.
Step 9: Chill Until Firm
Cover the pan and place it in the refrigerator to chill for at least 2 hours. This time allows the brown butter binder to solidify completely, which is what holds the bars together. You can leave it in longer if you like; you can’t over-chill it.
Step 10: Slice and Serve
Once the bars are completely firm, use your parchment paper handles to lift the whole block out of the pan and onto a cutting board. Use a large, sharp knife to slice them into your desired size. You can make 12 bars or 16 smaller squares. Now they’re ready to enjoy!
How To Serve Chocolate Chip Craisin Granola Bars
These bars are so versatile, they feel right at home in almost any situation. Of course, the most obvious way to serve them is exactly as they are. They are a perfect grab-and-go breakfast on a busy morning, a fantastic addition to a school lunchbox, or a much-needed energy boost during that mid-afternoon slump at the office.
I always pack a few when we go on family hikes or a long car ride. They hold up beautifully and are so much more satisfying than anything you can buy at a gas station. There’s just something about a homemade treat that makes any adventure feel a little more special.
But you don’t have to stop there! Think of these Chocolate Chip Craisin Granola Bars as a delicious component you can use to elevate other dishes. Here are a few of my favorite creative ways to serve them:
- Yogurt Parfait Topping: Crumble one of the bars over a bowl of Greek yogurt and fresh berries. It adds a wonderful crunchy, chewy texture that’s so much more interesting than plain granola.
- Ice Cream Sundae Star: Warm a bar in the microwave for just 10-15 seconds until it’s soft and the chocolate is melty. Serve it alongside a scoop of vanilla bean ice cream for an incredible dessert.
- Dessert Charcuterie Board: Cut the bars into small, bite-sized squares and add them to a dessert board with fresh fruit, different kinds of chocolate, and maybe a sweet dip. They add a lovely homemade touch.
- With Coffee or Tea: Sometimes the simplest way is the best. A small square served with a hot cup of coffee or tea is a perfectly civilized and comforting afternoon treat.
No matter how you choose to serve them, these bars are sure to be a hit. They have that perfect balance of wholesome and indulgent that pleases both kids and grown-ups alike. I love seeing the look on people’s faces when they take their first bite and realize this isn’t just any old granola bar.
How To Store & Reuse Chocolate Chip Craisin Granola Bars Leftovers
One of the best things about making a batch of these Chocolate Chip Craisin Granola Bars is that they store beautifully, so you can enjoy your hard work for days to come. Proper storage is key to keeping them fresh, chewy, and delicious. Because they’re held together with a butter-based binder, they need to be kept cool.
The best way to store the bars is in an airtight container in the refrigerator. I like to place small squares of parchment paper between the layers to prevent them from sticking together, especially in warmer weather. Stored this way, they will stay fresh and hold their shape for up to a week. They are fantastic straight from the fridge, firm and chewy.
If you want to keep them for longer, these bars also freeze exceptionally well. This is a great option if you want to make a double batch to have on hand for later. Here’s how I do it:
- For Freezing: First, slice the bars into individual portions. Wrap each bar tightly in plastic wrap, then place all the wrapped bars into a larger freezer-safe zip-top bag or container. This double-wrapping method is the best defense against freezer burn.
- For Thawing: When you’re ready for a snack, you can either let a bar thaw on the counter for about 20-30 minutes, or simply pack a frozen one in a lunchbox. It will be perfectly thawed and ready to eat by lunchtime! They will keep well in the freezer for up to 3 months.
As for reusing leftovers, it’s rare that we have any! But if you find yourself with a few bars that are getting a bit old or have crumbled, don’t throw them out. Crumble them up completely and use the pieces as a topping for yogurt, oatmeal, or ice cream, just as I suggested for serving. You can even toast the crumbles on a baking sheet for a few minutes to crisp them up and create a truly decadent granola for your morning parfait. It’s a delicious way to make sure not a single crumb goes to waste.
Substitutions & Variations For Chocolate Chip Craisin Granola Bars
While I think this recipe is pretty perfect as is, I’m a huge believer in making a recipe your own! The basic formula for these Chocolate Chip Craisin Granola Bars is wonderfully adaptable, so feel free to play around with the mix-ins to suit your family’s tastes or what you happen to have in your pantry. A little creativity can lead to a whole new favorite snack.
The key is to keep the ratio of dry ingredients to the wet binder mixture roughly the same to ensure the bars hold together properly. As long as you stick to about 2 cups of mix-ins (nuts, fruit, chocolate, etc.), you should be in great shape. Here are some of my favorite substitutions and variations to get you started:
- Nut Swaps: Not a fan of pecans or walnuts? No problem! Try using chopped almonds, pistachios, or even cashews. For a nut-free version, you can substitute pumpkin seeds (pepitas) or sunflower seeds for the nuts. Just be sure to toast them along with the oats to bring out their flavor.
- Dried Fruit Variations: The tartness of the Craisins is a wonderful complement to the sweet chocolate, but other dried fruits work beautifully too. Try swapping them for dried cherries, chopped dried apricots, or raisins.
- Chocolate Choices: I use semi-sweet chocolate chips, but you can easily substitute them for dark chocolate, milk chocolate, or even white chocolate chips. Mini chocolate chips are also a great option. For a different flavor profile, try butterscotch or peanut butter chips.
- Spice It Up: Add a little warmth to your bars by mixing in 1/2 teaspoon of ground cinnamon or a 1/4 teaspoon of nutmeg with the dry ingredients. A pinch of cardamom would also be lovely.
- Make Them Gluten-Free: To make these bars gluten-free, simply use certified gluten-free rolled oats. All the other ingredients are naturally gluten-free, making this a very easy dietary adjustment.
- Extra Protein Punch: For an added boost of protein and nutty flavor, you can mix in a tablespoon or two of flaxseed meal or chia seeds along with the oats and nuts.
Don’t be afraid to mix and match these ideas. A batch with almonds, dried cherries, and dark chocolate chips sounds absolutely divine, doesn’t it? Have fun experimenting and finding your family’s perfect combination.
Brown Butter Chocolate Chip Craisin Granola Bars
Description: Chewy, homemade granola bars made with toasted oats, pecans, tart Craisins, and chocolate chips, all brought together with a rich, nutty brown butter binder. An easy and delicious snack that’s worlds better than store-bought!
Yield: 12 bars | Category: Snack | Cuisine: American
Prep Time: 15 minutes | Cook Time: 12 minutes
Ingredients
- 1/2 cup (1 stick) unsalted butter
- 2 cups old-fashioned rolled oats
- 1/2 cup chopped raw pecans or walnuts
- 1/2 cup packed light brown sugar
- 1/3 cup honey
- 1 teaspoon vanilla extract
- 1/4 teaspoon almond extract
- 1/2 teaspoon fine sea salt
- 3/4 cup semi-sweet chocolate chips
- 2/3 cup dried cranberries (Craisins)
Instructions
- Preheat oven to 350°F (175°C). Line an 8×8 inch pan with parchment paper, leaving an overhang.
- Toast oats and nuts on a baking sheet for 8-10 minutes until fragrant.
- In a saucepan, cook butter over medium heat until it foams, then brown specks appear and it smells nutty. Remove from heat immediately.
- Stir brown sugar, honey, and salt into the brown butter. Cook on low for 1-2 minutes until sugar dissolves.
- Remove from heat and stir in vanilla and almond extracts.
- In a large bowl, combine toasted oats/nuts, chocolate chips, and Craisins. Pour butter mixture over top and stir to coat.
- Let mixture cool for 5 minutes, then transfer to the prepared pan.
- Press the mixture down very firmly and evenly.
- Chill in the refrigerator for at least 2 hours until firm.
- Lift from pan using parchment handles and slice into bars.
Notes
Pressing the mixture firmly into the pan is the most critical step for ensuring the bars do not fall apart. Don’t be shy, use some muscle! Store bars in an airtight container in the refrigerator for up to one week.
Servings: 12 | Calories: 295 kcal | Fat: 16g | Carbohydrates: 37g | Protein: 4g
5 FAQs About Chocolate Chip Craisin Granola Bars
Here are some straightforward answers to the most common questions I receive about this Chocolate Chip Craisin Granola Bars recipe.
Why are my chocolate chip craisin granola bars falling apart?
This is by far the most common issue people have with homemade granola bars, and there are usually two culprits. The first, and most important, is not pressing the mixture firmly enough into the pan. You really need to compact the mixture as tightly as you can. I like to use the bottom of a measuring cup or a flat drinking glass to press everything down evenly and with significant force. This compression is what helps the binder hold onto all the oats and mix-ins, creating a dense, sliceable bar.
The second reason is not chilling them long enough. The chill time is not optional! The brown butter, honey, and sugar mixture is soft when warm, but it solidifies beautifully when cold. Chilling the bars in the refrigerator for at least two full hours allows that binder to set up completely. If you try to slice them too early, they will definitely be crumbly. If you’ve done both of these things and still have some crumbling, double-check your measurements. Too many dry ingredients or not enough binder can also lead to a crumbly result.
Can I make these granola bars gluten-free?
Absolutely! This is one of the easiest recipes to adapt for a gluten-free diet. The only ingredient you need to be concerned with is the old-fashioned rolled oats. While oats are naturally gluten-free, they are often processed in facilities that also handle wheat, barley, and rye, leading to cross-contamination. To ensure your bars are truly gluten-free, you must purchase oats that are specifically labeled as “certified gluten-free.”
All the other ingredients in this recipe, including the butter, nuts, brown sugar, honey, extracts, chocolate chips, and Craisins, are naturally gluten-free. However, it’s always a good practice to check the labels on your chocolate chips and other packaged goods just to be safe, especially if you are baking for someone with a severe gluten allergy or celiac disease. The method and taste will be exactly the same, so it’s a simple and effective swap.
What’s the best way to brown butter for granola bars?
Browning butter is simple, but it requires your full attention for a few minutes. The key is to use a light-colored saucepan so you can accurately see the color of the milk solids as they toast. Start by melting the butter over medium heat. Once it’s fully melted, it will begin to foam and sizzle. This is the water cooking out of the butter. Keep swirling the pan occasionally. After a few minutes, the foam will subside, and you’ll be able to see the bottom of the pan. This is when you need to watch closely.
You’ll start to see little golden-brown specks, which are the toasted milk solids, forming at the bottom. At the same time, you’ll smell a wonderfully rich, nutty aroma. This is the sweet spot! The moment you see those brown specks and smell that nutty fragrance, remove the pan from the heat immediately. There is a very fine line between perfectly browned butter and burnt butter. Pouring it into another container or adding the sugar and honey right away helps stop the cooking process and prevents it from burning from the residual heat of the pan.
Can I use quick oats instead of rolled oats in this recipe?
I strongly recommend using old-fashioned rolled oats for this recipe. The texture is a huge part of what makes these bars so good. Rolled oats are whole oats that have been steamed and flattened, so they maintain their shape and provide a wonderful, hearty chewiness. They are sturdy enough to stand up to the wet binder without turning to mush.
Quick oats, on the other hand, are rolled oats that have been chopped into smaller pieces and rolled even thinner to cook faster. If you use them in these no-bake bars, they tend to absorb the liquid binder differently and can result in a softer, mushier, and pastier texture. Your bars won’t have that distinct chew and will be more prone to falling apart. For the best texture and structure in your Chocolate Chip Craisin Granola Bars, stick with the old-fashioned rolled oats.
How long do homemade granola bars last?
Properly stored, these homemade granola bars have a pretty good shelf life. Because of the butter content, they must be stored in the refrigerator. In an airtight container, they will stay fresh, chewy, and delicious for up to one week. I find their texture is actually best on the second day, after the flavors have had a chance to meld together.
If you want to store them for a longer period, the freezer is your best friend. As I mentioned earlier, you can wrap them individually in plastic wrap and then place them in a freezer bag. They will keep beautifully in the freezer for up to three months without a significant loss in quality. This is a perfect solution for meal prepping snacks for the weeks ahead. Just pull one out whenever you need a quick, homemade treat!
Try These Recipes Next
If you loved the ease and flavor of these Brown Butter Chocolate Chip Craisin Granola Bars, you’ll surely enjoy some of my other homemade snack bar and granola recipes.
- No Bake Chocolate Peanut Butter Granola Bars: For the peanut butter lovers out there, these are an absolute must-try. They’re incredibly easy and have that classic flavor combination everyone adores.
- Chocolatey Fruit n’ Pecan Granola: If you prefer your granola loose for sprinkling on yogurt, this is the recipe for you. It’s packed with chocolate, fruit, and nuts, and it’s wonderfully crunchy.
- Homemade Cranberry Almond Granola: A truly classic granola flavor profile that’s perfect for breakfast or a healthy snack. The combination of tart cranberries and crunchy almonds is timeless.
I hope you have fun trying these out in your own kitchen!