
The Best Manicotti Recipe with a Bright and Creamy Lemon Ricotta Filling
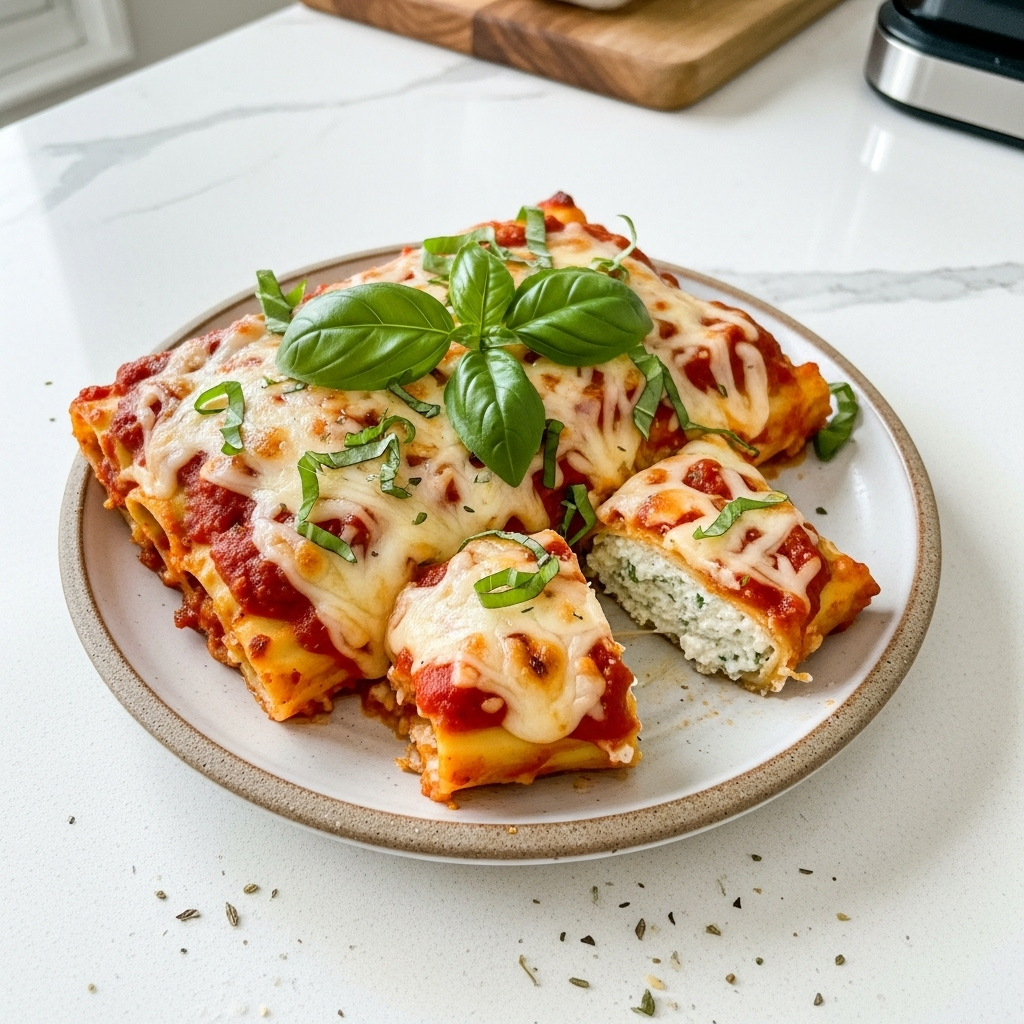
This lemon ricotta manicotti is the ultimate cheesy, comforting baked pasta dish that’s elegant enough for company and cozy enough for a Sunday supper.
I’ll never forget the first time I had real, homemade manicotti. It wasn’t at some fancy Italian restaurant. It was in my friend Anna’s kitchen, the summer after my first year of college. Her grandmother, Nonna Maria, was visiting from Italy, and she ruled that kitchen with a tiny, flour-dusted fist. We were all put to work, carefully boiling the big pasta tubes and trying our best not to tear them.
Nonna Maria’s filling was classic, simple, and absolutely heavenly. It was pure comfort. Years later, when I started making manicotti for my own family, I always felt like something was missing. The ricotta filling, while delicious, could sometimes feel a little heavy on the palate. I wanted that same comfort, but with a little something extra to make it sing.
One afternoon, while getting ready to make a batch, I had a lemon sitting on the counter for a pitcher of sweet tea. On a whim, I decided to zest it right into the ricotta mixture. The moment that bright, citrusy aroma hit the creamy cheese, I knew I was onto something. That little bit of lemon zest was the secret. It didn’t make the dish taste like lemon, it just cut through the richness of the cheeses, making the entire filling feel lighter, brighter, and unbelievably fresh. It’s the twist that took a beloved classic and made it my own signature dish.
Why This Manicotti Recipe Works
Manicotti, which translates to “little sleeves” in Italian, has been a staple of Italian-American comfort food for generations. It’s one of those dishes that just feels like a warm hug. Large pasta tubes are stuffed with a creamy cheese filling, smothered in a rich tomato sauce, and baked until bubbly and golden. It’s a celebration of simple, beautiful ingredients coming together perfectly.
This particular manicotti recipe works because it honors that tradition while elevating the flavors and textures. The first key is the technique for the filling. Instead of just stirring the ricotta with the other ingredients, we take a minute to whip it with a hand mixer. This simple step transforms the ricotta from potentially grainy to impossibly smooth and airy. It creates a filling that’s luxuriously creamy and light, not dense or heavy.
The second, and most important, reason this recipe is a showstopper is my secret ingredient: fresh lemon zest. This is the twist that truly makes the dish pop. The bright, fragrant oils from the zest cut through the richness of the three cheeses, preventing the filling from feeling too heavy. It adds a subtle, fresh brightness that you can’t quite put your finger on, but you’d miss it if it were gone. It enhances the fresh herbs and makes the whole dish taste more vibrant.
Finally, we use high-quality ingredients. Whole milk ricotta and mozzarella provide the best flavor and melting texture, and freshly grated Parmesan adds a nutty, salty depth that you just can’t get from the pre-shredded kind. It’s a recipe built on solid technique and a little bit of sunshine.
Ingredients for Manicotti
The beauty of a classic baked pasta dish like this one is its reliance on simple, high-quality ingredients. There’s no need to overcomplicate things when each component is chosen with care. Here’s what you’ll need to have on hand to create this beautiful manicotti.
- 1 box (8 oz) manicotti pasta shells: These are the large pasta tubes that will hold our delicious filling.
- 32 oz whole milk ricotta cheese, strained of excess liquid: Using whole milk ricotta is essential for a rich, creamy filling. Make sure to strain it well to avoid a watery result.
- 1 ½ cups shredded low-moisture, whole milk mozzarella cheese, divided: Low-moisture mozzarella melts beautifully without releasing too much water. We’ll use it in the filling and on top.
- 1 cup freshly grated Parmesan cheese, divided: Please, grate your own! It melts better and has a much more complex, nutty flavor than the pre-grated kind.
- 1 large egg, lightly beaten: The egg acts as a binder, helping the cheese filling set up nicely as it bakes.
- Twist Ingredient: Zest of 1 large lemon: This is the magic ingredient! It adds a wonderful brightness that elevates the entire dish.
- ⅓ cup chopped fresh parsley: Adds a clean, peppery freshness to the cheese mixture.
- ¼ cup chopped fresh basil, plus more for garnish: Its sweet, aromatic flavor is a classic pairing with tomato and cheese.
- ¼ tsp freshly grated nutmeg: A pinch of nutmeg is a classic addition to cheese and cream sauces, adding a subtle warmth and depth.
- 1 tsp salt: Essential for bringing out all the flavors.
- ½ tsp black pepper: For a little bit of gentle spice.
- 32 oz high-quality marinara sauce: Since the sauce is a major component, using a good quality store-bought sauce or your favorite homemade recipe will make a big difference.
A note on the cheese. I can’t stress enough how much of a difference using whole milk ricotta makes. It’s creamier and has a much richer flavor than part-skim. The same goes for the mozzarella. That bag of pre-shredded cheese is convenient, but it’s often coated in starches to prevent clumping, which can affect how it melts. Taking a few extra minutes to shred a block of low-moisture, whole milk mozzarella will reward you with that glorious, stringy cheese pull we all love.
Step-by-Step Instructions For Making Manicotti
This recipe might look impressive, but it’s truly straightforward to put together. Just follow these steps, and you’ll have a perfect pan of manicotti ready for the oven. We’ll break it down into preparing the components, assembling the dish, and baking it to perfection.
1. Prepare the Oven and Baking Dish
First things first, let’s get the oven ready. Go ahead and preheat it to 375°F (190°C). While it’s heating up, grab your trusty 9×13-inch baking dish and give it a light coating of cooking spray or a little olive oil. This will keep the manicotti from sticking to the bottom.
2. Cook the Manicotti Shells
Bring a large pot of water to a rolling boil and salt it generously, like you’re making pasta for any other occasion. Add the manicotti shells and cook them for 2 to 3 minutes less than the package directs. We’re looking for pliable but still very firm, or al dente. They will finish cooking in the oven. Carefully drain them and immediately rinse with cold water to stop them from cooking further. A great trick is to lay them out in a single layer on a baking sheet lined with parchment paper. This prevents them from sticking together or tearing while you prepare the filling.
3. Whip the Ricotta Filling
In a large bowl, place your strained ricotta cheese. Using a hand mixer or a sturdy whisk, whip the ricotta for about one to two minutes. You will see it transform from dense to a much lighter, smoother, and creamier texture. This step is key to a non-grainy, fluffy filling!
4. Combine the Filling Ingredients
To your beautifully whipped ricotta, add 1 cup of the mozzarella, ½ cup of the Parmesan, the beaten egg, that gorgeous lemon zest, chopped parsley, chopped basil, nutmeg, salt, and pepper. Use a spatula to gently fold everything together until it’s just combined. Don’t overmix it.
5. Prep the Baking Dish with Sauce
Spread about 1 ½ cups of your marinara sauce evenly across the bottom of the greased baking dish. This creates a bed for the manicotti to rest on, preventing them from sticking and ensuring they soak up flavor from the bottom.
6. Fill the Manicotti Shells
The easiest, cleanest way to fill the shells is with a piping bag. If you don’t have one, a large zip-top plastic bag works just as well. Just spoon the filling into the bag, push it down to one corner, and snip off the tip. Carefully pipe the cheese mixture into each cooked manicotti shell until it’s full.
7. Arrange the Manicotti
As you fill each shell, arrange it in a single, snug layer in the baking dish right on top of the sauce. It’s okay if they’re touching, you want them to be cozy in there.
8. Top with Remaining Sauce and Cheese
Pour the rest of the marinara sauce over the filled manicotti. Make sure you cover them completely so the pasta doesn’t dry out in the oven. Then, sprinkle the remaining ½ cup of mozzarella and ½ cup of Parmesan cheese evenly over the top.
9. Bake the Manicotti
Cover the dish tightly with aluminum foil. This traps the steam and helps the pasta cook through evenly. Bake for 25 minutes. Then, carefully remove the foil and pop it back in the oven to bake for another 15 to 20 minutes. You’ll know it’s done when the sauce is bubbly and the cheese on top is melted and turning a lovely light golden brown.
10. Rest and Serve
This might be the hardest step! Let the manicotti rest on the counter for about 10 minutes before you serve it. This allows the filling to set, making it much easier to slice and serve without it falling apart. Garnish with a little fresh basil for a pop of color and flavor, and then enjoy!
How To Serve Manicotti
Once that gorgeous, bubbly pan of manicotti comes out of the oven and has had a few minutes to rest, it’s ready for its moment in the spotlight. Serving this dish is all about complementing its rich, comforting flavors without overpowering them. It’s a hearty main course, so you don’t need much to turn it into a memorable meal.
My favorite way to serve manicotti is family style, right from the baking dish. It makes for a beautiful, rustic presentation on the dinner table. Just be sure to have a good spatula or server to lift out those delicate pasta tubes cleanly. For a complete meal, consider a few simple but delicious pairings.
- A Crisp Green Salad: A simple salad with a bright, tangy vinaigrette is the perfect counterpoint to the rich cheese and tomato sauce. Think mixed greens, cherry tomatoes, cucumbers, and maybe some red onion, all tossed in a lemon or red wine vinaigrette. The acidity cuts through the richness beautifully.
- Garlic Bread or Crusty Italian Bread: You absolutely need something to sop up all that delicious marinara sauce left in the pan! A warm, crusty loaf of Italian bread or some homemade garlic bread is practically non-negotiable in my house.
- Simple Steamed or Roasted Vegetables: If you want to add more green to the plate, simple steamed asparagus with a squeeze of lemon or roasted broccoli with a little garlic and olive oil works wonderfully. They add texture and nutrition without competing with the main event.
- A Glass of Wine: For the adults at the table, a nice glass of wine can elevate the meal. A medium-bodied red like a Chianti or a Merlot complements the tomato sauce, while a crisp white like a Pinot Grigio can be a refreshing contrast to the creamy cheese.
No matter what you serve it with, make sure to garnish with a little extra fresh basil or parsley right before serving. That little touch of fresh green not only looks pretty but adds a final burst of fresh, herbaceous aroma that makes the dish even more inviting.
How To Store & Reuse Manicotti Leftovers
One of the best things about a big pan of baked pasta is that the leftovers are often just as delicious, if not more so, as the flavors have had time to meld together. Storing and reheating this manicotti properly is key to enjoying it the next day. You can also prepare it ahead of time, which makes it a fantastic dish for entertaining or busy weeknights.
If you have leftovers from dinner, allow the manicotti to cool down completely before storing. This prevents condensation from forming inside the container, which can make things soggy. Once cooled, you have a couple of good options for storage.
- Refrigerating: You can either cover the original baking dish tightly with plastic wrap or foil, or transfer individual portions into airtight containers. Leftovers will keep well in the refrigerator for up to 3 to 4 days.
- Freezing Baked Manicotti: This dish freezes wonderfully. For best results, freeze it in the baking dish, covered tightly with a layer of plastic wrap and then a layer of aluminum foil. It can be frozen for up to 3 months. To reheat, you can bake it directly from frozen, though it will take longer. Cover it with foil and bake at 350°F for about an hour, then uncover and bake for another 15-20 minutes until hot and bubbly.
- Freezing Unbaked Manicotti (Make-Ahead): You can also assemble the entire dish and freeze it before baking. Prepare the recipe right up to the point of putting it in the oven. Cover tightly with plastic wrap and foil and freeze for up to 3 months. When ready to bake, you can thaw it in the refrigerator overnight and bake as directed, or bake from frozen, adding about 30-40 minutes to the initial covered baking time.
When it comes to reheating smaller portions from the fridge, the microwave works in a pinch, but the best method is in the oven. Place the manicotti in a small, oven-safe dish, add a splash of water or a little extra marinara sauce to prevent it from drying out, cover with foil, and bake at 350°F until it’s heated through, usually about 20-25 minutes. This helps the cheese get melty and delicious all over again.
Substitutions & Variations For Manicotti
While this lemon ricotta manicotti recipe is a star just as it is, I’m all for making a recipe your own! It’s a wonderful base that you can easily adapt to suit your taste, your dietary needs, or simply what you have on hand in your pantry. Here are a few of my favorite ways to switch things up.
Feel free to mix and match these ideas to create your perfect pan of manicotti. The key is to keep the filling creamy and the sauce flavorful, and you really can’t go wrong. Cooking is all about creativity, so have fun with it!
- Add Some Protein: To make this a heartier meal, you can easily add meat to the filling or the sauce. Try browning 1 pound of mild Italian sausage or lean ground beef with some onion and garlic, draining the fat, and then stirring it into your marinara sauce. You could also mix cooked, crumbled sausage or finely chopped chicken into the cheese filling itself.
- Sneak in Some Veggies: For an extra dose of nutrients, wilted spinach is a classic addition. Sauté about 10 ounces of fresh spinach until wilted, squeeze out all the excess water very well, chop it finely, and mix it into the ricotta filling. Finely chopped sautéed mushrooms or zucchini also work beautifully.
- Change Up the Cheeses: While the ricotta, mozzarella, and Parmesan combination is classic, you can play around with it. For an extra creamy and tangy filling, try substituting up to a quarter of the ricotta with goat cheese or mascarpone. For a smokier flavor on top, use smoked mozzarella or a little bit of smoked provolone.
- Make it Spicy: If you like a little heat, it’s easy to spice this dish up. Add ¼ to ½ teaspoon of red pepper flakes to your marinara sauce or directly into the cheese filling. You could also use a spicy arrabbiata sauce instead of a traditional marinara.
- Dietary Adjustments: For a gluten-free version, simply substitute the regular manicotti shells with your favorite brand of gluten-free large tube pasta. The rest of the recipe is naturally gluten-free. While I haven’t tested it with dairy-free cheeses, there are many great dairy-free ricotta and mozzarella alternatives available now that could be worth experimenting with.
Julie’s Lemon Ricotta Manicotti
Description: A classic Italian-American comfort dish with a bright twist. Creamy, whipped ricotta filling with a hint of lemon zest is piped into tender pasta shells, smothered in marinara, and baked to bubbly, cheesy perfection.
Yield: 6-8 servings | Category: Main Course | Cuisine: Italian-American
Prep Time: 25 minutes | Cook Time: 45 minutes
Ingredients
- 1 box (8 oz) manicotti pasta shells
- 32 oz whole milk ricotta cheese, strained of excess liquid
- 1 ½ cups shredded low-moisture, whole milk mozzarella cheese, divided
- 1 cup freshly grated Parmesan cheese, divided
- 1 large egg, lightly beaten
- Zest of 1 large lemon
- ⅓ cup chopped fresh parsley
- ¼ cup chopped fresh basil, plus more for garnish
- ¼ tsp freshly grated nutmeg
- 1 tsp salt
- ½ tsp black pepper
- 32 oz high-quality marinara sauce
Instructions
- Preheat oven to 375°F (190°C). Grease a 9×13-inch baking dish.
- Cook manicotti shells 2-3 minutes less than package directions. Drain, rinse with cold water, and lay flat to prevent sticking.
- In a large bowl, whip the strained ricotta with a hand mixer for 1-2 minutes until light and creamy.
- Gently stir in 1 cup mozzarella, ½ cup Parmesan, egg, lemon zest, herbs, nutmeg, salt, and pepper.
- Spread 1 ½ cups of marinara in the bottom of the baking dish.
- Transfer cheese filling to a piping bag and fill each manicotti shell.
- Arrange filled shells in the dish. Top with remaining marinara, ensuring shells are covered.
- Sprinkle with remaining ½ cup mozzarella and ½ cup Parmesan.
- Cover with foil and bake for 25 minutes. Remove foil and bake for another 15-20 minutes, until bubbly and golden.
- Rest for 10 minutes before garnishing and serving.
Notes
Straining the ricotta is a crucial step to prevent a watery filling. Simply place it in a fine-mesh sieve set over a bowl in the fridge for a few hours or overnight.
Servings: 8 | Calories: 550 kcal | Fat: 30g | Carbohydrates: 38g | Protein: 32g
5 FAQs About Manicotti
Here are some straightforward answers to the most common questions I receive about this manicotti recipe.
1. Can I make this manicotti ahead of time?
Absolutely! This is one of my favorite dishes to prepare in advance, which makes it perfect for dinner parties or for a busy weeknight when you know you won’t have time to cook from scratch. You have two main options. The first is to assemble the entire dish, cover it tightly with plastic wrap or foil, and store it in the refrigerator for up to 24 hours before baking. When you’re ready to eat, just pop it into the preheated oven. You may need to add about 10-15 minutes to the initial covered baking time since it will be starting from cold.
The second option is to freeze it. You can assemble the whole pan, cover it very well with a layer of plastic wrap followed by a layer of heavy-duty foil, and freeze it for up to three months. You can bake it from frozen by covering it with foil and baking at 350°F for about an hour to an hour and a half, then uncovering for the last 15-20 minutes to brown the cheese. You can also thaw it in the refrigerator overnight and then bake according to the original recipe instructions. It’s a lifesaver for new parents or as a thoughtful meal to drop off for a friend.
2. Why is my manicotti filling watery?
A watery filling is the most common issue people run into when making manicotti, and it almost always comes down to one thing: excess moisture in the ricotta cheese. Ricotta naturally contains a lot of whey, which is the liquid part of the milk. If you don’t remove this excess liquid, it will release into your filling as it bakes, resulting in a runny, separated texture. The fix is simple but so important. You must strain your ricotta before mixing the filling.
To do this, line a fine-mesh sieve with cheesecloth or a couple of coffee filters, place it over a bowl, and dump the ricotta in. Let it sit in the refrigerator for at least a few hours, or even better, overnight. You will be amazed at how much liquid drains out. Using whole milk ricotta also helps, as it tends to be thicker and creamier than part-skim varieties. Finally, be sure to use low-moisture mozzarella, as fresh mozzarella balls also contain a lot of water that can contribute to a watery dish.
3. What is the easiest way to fill manicotti shells without them tearing?
Ah, the age-old struggle of filling manicotti! Those delicate tubes can be tricky. The number one tip is to undercook the pasta slightly, as mentioned in the instructions. If the shells are too soft, they will tear easily. You want them just pliable enough to handle. After cooking, laying them out on parchment paper prevents them from gluing themselves together, which is a major cause of tearing.
By far, the best tool for the job is a piping bag or a large zip-top bag with the corner snipped off. Trying to fill them with a spoon is a recipe for frustration and torn pasta. Simply spoon your cheese filling into the bag, twist the top, and gently squeeze the filling directly into the shell. It’s fast, clean, and fills the tube evenly without putting stress on the pasta. If a shell does tear slightly, don’t worry. Just place the torn side down in the baking dish, cover it with sauce and cheese, and no one will ever know.
4. Should I use no-boil manicotti shells for this recipe?
While no-boil lasagna noodles are a fantastic shortcut, I personally do not recommend using no-boil manicotti shells for this specific recipe. The main reason is texture and control. No-boil shells are designed to absorb a large amount of liquid from the sauce to cook properly. This can sometimes lead to a finished dish that is either too dry, if your sauce isn’t liquidy enough, or a pasta texture that can be a bit gummy or tough.
Boiling the shells yourself for just a few minutes gives you complete control. It ensures the pasta is perfectly al dente before it even goes into the oven, leading to a much better final texture. It also makes them pliable and easy to fill. The extra step of boiling the pasta is well worth the 10 minutes of effort for the superior quality of the finished manicotti. If you are in an extreme hurry, they can be used, but you may need to add an extra ½ to 1 cup of liquid (like water or broth) to your sauce to ensure they cook through.
5. What’s the difference between manicotti and cannelloni?
This is a great question, as the two are often used interchangeably and look very similar! The primary difference lies in the pasta itself. Traditional manicotti are pre-formed, ridged tubes of pasta that you boil and then stuff. Cannelloni, on the other hand, translates to “large reeds” and often starts as flat sheets of pasta, either fresh or dried rectangles (similar to lasagna noodles), that you cook and then roll around the filling. So, manicotti is a stuffed pasta tube, while cannelloni is a rolled pasta sheet.
In the United States, the lines have become very blurred. Many companies sell pasta tubes labeled as either manicotti or cannelloni. The fillings are often very similar, typically ricotta-based for manicotti and sometimes a meat or vegetable mixture for cannelloni, though there are no strict rules. Essentially, if you are stuffing a pre-made tube, you are likely making what most Americans would call manicotti. If you are rolling a sheet of pasta around a filling, you are making cannelloni.
Try These Recipes Next
If you loved the comforting, crowd-pleasing nature of this manicotti, I know you’ll enjoy these other collections of recipes. They’re full of ideas that are perfect for any night of the week and any occasion!