
Grown-Up Gluten-Free Mac-and-Cheese Recipe with Caramelized Onions
My sister-in-law announced she was going gluten-free right before our annual family potluck, and my mind immediately went to my famous baked mac and cheese. It’s the dish everyone requests, the one that disappears first. The thought of her missing out on that creamy, cheesy goodness just felt wrong.
So, I set out on a mission. I wasn’t just going to make a passable gluten-free mac and cheese. I was going to make one that nobody, not even my discerning husband, could tell was any different. My first few attempts were, let’s just say, a learning experience. Gummy pasta and grainy sauces were not what I was aiming for.
But I kept at it, tweaking and testing. I discovered that the key was in building layers of flavor to make up for any textural differences in the pasta. That’s when the idea struck me. What if I folded in something deeply savory and sweet? I thought about the French onion soup I love, with its rich, complex flavor from slowly cooked onions.
That was the lightbulb moment. I spent a good half-hour patiently caramelizing sweet onions until they were jammy and golden. Then I added a pinch of smoked paprika to the cheese sauce for a subtle, smoky depth. The result was pure magic. This wasn’t just a substitute dish, it was a spectacular new creation. It’s a creamy, decadent, and deeply flavorful gluten-free mac and cheese that now has its very own fan club at our family gatherings.
Why This Gluten-Free Mac And Cheese Recipe Works
Macaroni and cheese is the undisputed heavyweight champion of comfort food. It’s a dish with a rich history, tracing its roots back centuries in European kitchens before Thomas Jefferson helped popularize it in America. Its appeal is universal, a simple combination of pasta and cheese that feels like a warm hug in a bowl. For decades, it has been the go-to dish for family dinners, potlucks, and holidays. It’s reliable, it’s beloved, and it’s pure comfort.
When you take gluten out of the equation, however, things can get tricky. Gluten-free pasta can sometimes be finicky, and creating that perfectly smooth, luscious cheese sauce without a traditional flour roux presents a challenge. Many gluten-free mac and cheese recipes can fall flat, ending up with a gritty texture or a bland flavor profile that just doesn’t satisfy that comfort food craving.
This recipe doesn’t just work, it absolutely shines. The secret lies in building an incredible depth of flavor that more than makes up for any gluten-free adjustments. The star players are the caramelized onions. We’re not just sautéing them, we are slow-cooking them until they release their natural sugars and transform into sweet, savory, golden ribbons of flavor. This process adds a sophisticated, almost French-onion-soup-like complexity to the dish.
Then, we introduce a pinch of smoked paprika. This isn’t just for color. It infuses the creamy cheese sauce with a subtle, smoky warmth that perfectly complements the sharp cheddar and nutty Gruyère. These two additions elevate the entire dish from a simple side to a main course-worthy masterpiece. It’s a grown-up take on a childhood favorite, proving that gluten-free mac and cheese can be just as decadent and satisfying as the original.
Ingredients for Gluten-Free Mac And Cheese
The magic of this recipe is in how a few thoughtful ingredients come together to create something truly special. We use high-quality staples and a couple of key flavor-boosters to make this the best gluten-free mac and cheese you’ll ever have. Here’s exactly what you’ll need to get started.
- 12 ounces gluten-free elbow macaroni or other short pasta
- 2 tablespoons olive oil
- 2 large sweet onions, thinly sliced
- 4 tablespoons unsalted butter
- 1/4 cup sweet rice flour (or a gluten-free all-purpose blend)
- 3 cups whole milk, warmed
- 1 teaspoon smoked paprika
- 1/2 teaspoon dry mustard powder
- 1/4 teaspoon cayenne pepper (optional, for a little heat)
- Salt and freshly ground black pepper to taste
- 4 cups (16 ounces) shredded sharp cheddar cheese
- 1 cup (4 ounces) shredded Gruyère cheese
- 1/2 cup gluten-free panko-style breadcrumbs
- 1 tablespoon melted butter
Let’s talk about a few of these ingredients. The caramelized sweet onions are non-negotiable for this recipe’s signature flavor. Using sweet varieties like Vidalia or Walla Walla will give you the best results. Be patient with them, it’s worth the wait! For the roux, I find that sweet rice flour (also called mochiko) creates an exceptionally smooth and silky sauce that rivals any traditional flour-based version. If you can’t find it, a good quality gluten-free all-purpose blend that contains xanthan gum will also work well.
When it comes to cheese, quality makes a huge difference. I strongly recommend buying blocks of sharp cheddar and Gruyère and shredding them yourself. Pre-shredded cheeses are often coated in anti-caking agents that can make your sauce grainy. The sharp cheddar provides that classic mac and cheese tang, while the Gruyère adds a wonderful nutty, salty flavor and melts beautifully. Finally, don’t skip the smoked paprika. It’s the secret weapon that adds that lovely, warm, smoky undertone that makes everyone ask, “What is in this? It’s amazing!”
Step-by-Step Instructions For Making Gluten-Free Mac And Cheese
This recipe comes together in a few distinct stages, but each step is simple and straightforward. We’ll cook the pasta, caramelize those beautiful onions, make our velvety cheese sauce, and then bring it all together for a final bake. Just follow along, and you’ll have a show-stopping dish in no time.
1. Cook the Gluten-Free Pasta
Start by bringing a large pot of generously salted water to a rolling boil. Add your gluten-free pasta and cook according to the package directions, but aim for the lower end of the time range to get a perfect al dente texture. Gluten-free pasta can go from firm to mushy very quickly, and since it will cook more in the oven, it’s crucial not to overdo it at this stage. Once cooked, drain the pasta and immediately rinse it with cool water. This stops the cooking process and washes away excess starch, which helps prevent it from becoming sticky or clumpy.
2. Caramelize the Onions
While your pasta water is coming to a boil, you can get the onions going. In a large, heavy-bottomed skillet or a Dutch oven, heat the olive oil over medium-low heat. Add your thinly sliced onions, give them a stir to coat them in the oil, and then let them do their thing. The key here is low and slow. You want to coax the sugars out, not fry them. Stir them occasionally for about 25 to 30 minutes. You’ll know they’re ready when they are soft, jammy, and a deep golden-brown color. Scoop them out of the skillet and set them aside for later.
3. Make the Roux and Cheese Sauce
Using the same skillet (no need to wash it!), melt the four tablespoons of butter over medium heat. Once it’s fully melted and bubbly, whisk in the sweet rice flour. Keep whisking constantly for about one minute. This cooks out the raw flour taste and forms a paste, which is your gluten-free roux. Now, gradually pour in the warmed milk, whisking vigorously as you go to prevent any lumps. Continue cooking and whisking often for about 5 to 7 minutes, until the sauce has thickened enough to coat the back of a spoon.
4. Finish the Sauce and Assemble
Remove the sauce from the heat. This is an important step to prevent the cheese from becoming stringy or oily. Stir in the smoked paprika, dry mustard, and cayenne pepper if you’re using it. Season with salt and pepper. Now, add the shredded cheddar and Gruyère a handful at a time, stirring until each addition is completely melted before adding the next. Once you have a smooth, glorious cheese sauce, gently fold in the cooked pasta and the reserved caramelized onions. Mix until everything is beautifully combined.
5. Bake to Perfection
Pour the macaroni and cheese mixture into a greased 9×13-inch baking dish and spread it into an even layer. In a small bowl, combine the gluten-free panko breadcrumbs with the one tablespoon of melted butter, tossing to coat. Sprinkle this buttery breadcrumb mixture evenly over the top of the mac and cheese. Bake in a preheated 375°F oven for 20 to 25 minutes. You’re looking for a bubbly sauce and a crispy, golden-brown topping. Let it rest for a few minutes before diving in, this allows the sauce to set up just a bit.
How To Serve Gluten-Free Mac And Cheese
This Caramelized Onion and Smoked Paprika Gluten-Free Mac and Cheese is so rich and flavorful, it can easily stand on its own as a main course. When I serve it as the star of the show, I like to balance its richness with something fresh and green. A simple side salad with a tangy vinaigrette is the perfect counterpoint. The acidity of the dressing cuts through the creamy cheese sauce beautifully, cleansing the palate with each bite.
Steamed or roasted vegetables are also a wonderful companion. Think crisp-tender broccoli, vibrant green beans, or roasted asparagus. Their fresh, earthy flavors provide a lovely contrast to the decadent pasta. For a truly Southern-style meal, you can’t go wrong with a side of collard greens or a fresh tomato and cucumber salad in the summertime.
If you’re serving this as part of a larger spread for a holiday or potluck, it pairs wonderfully with a variety of classic dishes. Here are a few of my favorite pairings:
- Hearty Proteins: Serve it alongside savory roasted chicken, pulled pork, or even a perfectly grilled steak. The mac and cheese acts as a luxurious side that complements almost any meat.
- Barbecue Favorites: This dish is a natural fit for a barbecue menu. It’s fantastic with smoked brisket, ribs, or grilled chicken wings. Its smoky notes from the paprika echo the flavors of the grill.
- Holiday Feasts: Place this on your Thanksgiving or Christmas table next to the turkey or ham. It’s a guaranteed crowd-pleaser that will have everyone, gluten-free or not, coming back for seconds.
No matter how you serve it, this dish is meant to be enjoyed hot and bubbly, straight from the oven. The contrast between the creamy interior and the crunchy panko topping is best when it’s fresh. Just be sure to let it rest for five to ten minutes before serving to allow the sauce to set up slightly.
How To Store & Reuse Gluten-Free Mac And Cheese Leftovers
While this gluten-free mac and cheese is at its absolute best fresh from the oven, the leftovers are still incredibly delicious. Storing it properly is key to making sure it’s just as good the next day. The most important thing is to let the mac and cheese cool down completely before you put it away. Storing it while it’s still warm can create condensation, which can make the pasta a bit soggy.
Once it has cooled to room temperature, you have a couple of options for storage. You can either cover the entire baking dish tightly with plastic wrap or foil, or you can transfer individual portions into airtight containers. I prefer using individual containers because it makes reheating for a quick lunch or dinner so much easier. In the refrigerator, your leftover mac and cheese will stay fresh and tasty for up to four days.
When it comes to reheating, you want to avoid drying out the sauce. Here are my go-to methods:
- In the Oven: This is my favorite method for retaining that “just baked” quality. Place the leftovers in an oven-safe dish, add a splash of milk (about a tablespoon per serving), and stir gently. Cover with foil and bake at 350°F for about 15-20 minutes, or until it’s heated through. For the last few minutes, you can remove the foil to crisp up the topping again.
- On the Stovetop: For a quicker option, place a serving in a small saucepan over low heat. Add a splash of milk and stir frequently until it’s warmed through. This method keeps the sauce nice and creamy.
- In the Microwave: This is the fastest way, perfect for a work lunch. Place a portion in a microwave-safe bowl, add a splash of milk, and cover it loosely. Heat in 30-second intervals, stirring in between, until it reaches your desired temperature. The milk is essential here to prevent the sauce from separating or becoming oily.
With these simple tips, you can enjoy your delicious gluten-free mac and cheese leftovers without sacrificing that wonderful creamy texture and rich flavor. It’s the comfort food that keeps on giving!
Substitutions & Variations For Gluten-Free Mac And Cheese
One of the things I love about a great base recipe is how easily you can adapt it to your own tastes or what you have on hand in the pantry. This gluten-free mac and cheese is incredibly versatile. While I adore the combination of caramelized onions and smoked paprika, feel free to use this recipe as a starting point for your own culinary adventures.
Maybe you’re out of a specific ingredient or want to try a different flavor profile. No problem! There are plenty of simple swaps and fun additions you can make. Just remember that changing key components might alter the final taste and texture slightly, but that’s all part of the fun of cooking. Experimentation is how we discover new family favorites.
Here are a few substitutions and variations that work beautifully with this dish:
- Cheese Swaps: The cheese combination is easily adaptable. If you don’t have Gruyère, you could substitute it with fontina, Monterey Jack, or even a good white cheddar. For a spicier kick, try using a pepper jack cheese in place of some of the sharp cheddar. A sprinkle of Parmesan with the breadcrumbs adds a salty, nutty crunch.
- Flavor Add-ins: This is where you can get really creative. Try adding cooked, crumbled bacon or pancetta for a salty, savory element. Roasted vegetables like broccoli florets, butternut squash cubes, or mushrooms can be stirred in with the pasta. For a little heat, a finely diced jalapeño caramelized along with the onions is a fantastic addition.
- Different Flours: If you can’t find sweet rice flour, a high-quality gluten-free all-purpose baking blend that contains xanthan gum is the next best choice. I have also had success using cassava flour, although it can sometimes result in a slightly thicker sauce, so you may need to add a splash more milk.
- Topping Twists: Instead of gluten-free panko, you could use crushed gluten-free crackers or even crushed, gluten-free fried onions for a different kind of crunchy topping. Adding fresh herbs like chopped parsley or chives to the breadcrumb mixture can also bring a fresh, bright flavor to the dish.
Don’t be afraid to make this recipe your own. Whether you’re adding a new ingredient or swapping one out, the core technique of building a flavorful, creamy sauce will ensure your gluten-free mac and cheese is a resounding success.
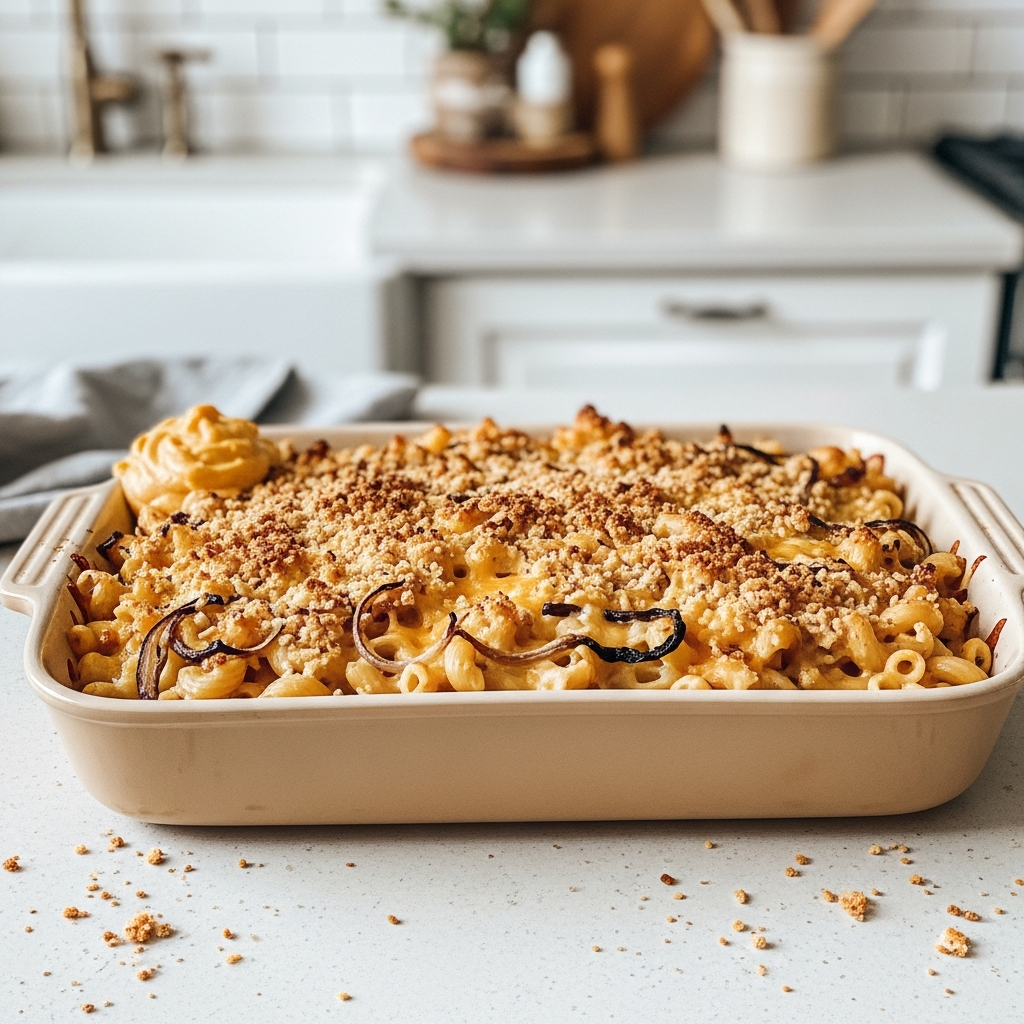
Gluten-Free Mac and Cheese with a Caramelized Onion and Smoked Paprika Twist
Description: A rich, creamy, and deeply flavorful baked gluten-free mac and cheese featuring sweet caramelized onions and a hint of smoky paprika. It’s the ultimate comfort food, elevated to a whole new level.
Yield: 8 servings | Category: Main Course, Side Dish | Cuisine: American
Prep Time: 15 minutes | Cook Time: 50 minutes
Ingredients
- 12 ounces gluten-free elbow macaroni or other short pasta
- 2 tablespoons olive oil
- 2 large sweet onions, thinly sliced
- 4 tablespoons unsalted butter
- 1/4 cup sweet rice flour (or a gluten-free all-purpose blend)
- 3 cups whole milk, warmed
- 1 teaspoon smoked paprika
- 1/2 teaspoon dry mustard powder
- 1/4 teaspoon cayenne pepper (optional)
- Salt and freshly ground black pepper to taste
- 4 cups (16 ounces) shredded sharp cheddar cheese
- 1 cup (4 ounces) shredded Gruyère cheese
- 1/2 cup gluten-free panko-style breadcrumbs
- 1 tablespoon melted butter
Instructions
- Preheat oven to 375°F (190°C). Cook gluten-free pasta al dente according to package directions. Drain, rinse with cool water, and set aside.
- While pasta cooks, heat olive oil in a large skillet over medium-low heat. Add onions and cook slowly for 25-30 minutes until deeply golden and caramelized. Remove from skillet and set aside.
- In the same skillet, melt 4 tbsp butter over medium heat. Whisk in sweet rice flour and cook for 1 minute.
- Gradually whisk in warm milk until smooth. Cook, whisking frequently, for 5-7 minutes until thickened.
- Remove from heat. Stir in smoked paprika, mustard powder, cayenne, salt, and pepper.
- Gradually stir in shredded cheeses until melted and smooth.
- Gently fold in cooked pasta and caramelized onions.
- Pour into a greased 9×13-inch baking dish.
- Toss gluten-free panko with 1 tbsp melted butter and sprinkle over the top.
- Bake for 20-25 minutes, until bubbly and golden. Let rest before serving.
Notes
For the creamiest sauce, be sure to shred your own cheese from blocks. Pre-shredded cheese can contain additives that make the sauce grainy.
Servings: 8 | Calories: 580 kcal | Fat: 35g | Carbohydrates: 42g | Protein: 25g
5 FAQs About Gluten-Free Mac And Cheese
Here are some straightforward answers to the most common questions I receive about this gluten-free mac and cheese recipe.
How do you keep gluten-free mac and cheese from getting mushy?
This is probably the most frequent concern when working with gluten-free pasta, and it’s a valid one! The key to avoiding mushy mac and cheese lies in a few critical steps. First, and most importantly, undercook your pasta slightly. Check the package directions and cook it for 1-2 minutes less than the recommended al dente time. The pasta will continue to absorb liquid and cook further in the oven, so giving it a firm starting point is crucial. If it’s fully cooked before it even hits the cheese sauce, it’s destined for a soft texture.
My second tip is to rinse the pasta with cool water immediately after draining. This does two things: it halts the cooking process in its tracks, and it washes away the excess starch that sits on the surface of gluten-free pasta. This excess starch can contribute to a gummy or sticky texture if it’s not rinsed off. While this is often a culinary no-no for traditional wheat pasta, it’s a non-negotiable step for achieving the best texture in a gluten-free baked pasta dish. Following these two simple rules will give you a final dish where each noodle holds its shape beautifully within the creamy sauce.
Can I make this gluten-free mac and cheese ahead of time?
Yes, you absolutely can, which makes this recipe a fantastic choice for holidays or entertaining. To make it ahead, you can assemble the entire dish right up until the final baking step. Prepare the pasta, the onions, and the cheese sauce, then combine everything in your greased baking dish. Instead of adding the breadcrumb topping, cover the dish tightly with plastic wrap or foil and refrigerate it for up to two days. Letting the components sit together can actually deepen the flavors.
When you’re ready to bake, remove the dish from the refrigerator about 30 minutes before it goes into the oven to let it come closer to room temperature. This helps it bake more evenly. Toss your gluten-free panko with the melted butter and sprinkle it over the top right before baking. You will likely need to add about 10-15 minutes to the total baking time since you’re starting with a cold dish. Just keep an eye on it and bake until it’s hot all the way through, the sauce is bubbly, and the topping is golden brown.
What is the best cheese for gluten-free mac and cheese?
The best cheese is really a matter of personal preference, but the secret to a great mac and cheese is using a combination of cheeses. You want one cheese for a sharp, classic flavor and another for superior meltability and creaminess. That’s why I use a duo of sharp cheddar and Gruyère in this recipe. The sharp cheddar provides that iconic, tangy mac and cheese taste that we all know and love. It’s the backbone of the flavor profile.
The Gruyère, on the other hand, is a fantastic melting cheese. It adds a wonderful, nutty complexity and a savory depth that elevates the dish. It also contributes to an incredibly smooth and silky sauce. Other great melting cheeses you could use in place of Gruyère are fontina or provolone. No matter which cheeses you choose, the most important tip is to buy them in blocks and shred them yourself. Pre-shredded cheese contains starches and anti-caking agents that can prevent the cheese from melting smoothly, often resulting in a gritty or oily sauce.
Why is my gluten-free mac and cheese sauce grainy?
A grainy cheese sauce is a common frustration, but it’s usually preventable. There are two main culprits. The first, as mentioned above, is using pre-shredded cheese. The cellulose powder and other additives used to keep the shreds from clumping in the bag can interfere with the melting process and create a gritty texture. Taking the extra five minutes to shred a block of cheese yourself is the number one thing you can do to ensure a silky-smooth sauce.
The second cause is adding the cheese when the sauce is too hot. If your milk-based sauce is boiling or even at a strong simmer when you add the cheese, the proteins in the cheese can tighten up and separate, causing the fats to leach out and creating that dreaded grainy, oily texture. That’s why my instructions specify removing the sauce from the heat *before* stirring in the cheese. This allows the residual heat of the sauce to gently melt the cheese without shocking it, resulting in a perfectly smooth, emulsified, and creamy sauce every single time.
Can I make this gluten-free mac and cheese on the stovetop instead of baking it?
Certainly! If you’re short on time or just prefer a creamier, saucier mac and cheese, you can easily adapt this recipe for the stovetop. You’ll simply skip the final baking steps. Follow the recipe all the way through making the cheese sauce and folding in the cooked pasta and caramelized onions. At that point, instead of pouring it into a baking dish, you can serve it directly from the skillet.
The result will be a looser, more “liquid” cheese sauce, similar to a classic stovetop mac and cheese. You will miss out on the crispy baked topping, but you can still get that crunchy element. A simple way to do this is to toast the buttered gluten-free panko in a separate small skillet over medium heat for a few minutes until it’s golden brown and fragrant. Then, you can sprinkle the toasted breadcrumbs over each individual serving. It’s a faster way to get to that delicious comfort food, perfect for a busy weeknight.
Try These Recipes Next
If you loved this twist on a classic comfort food, I have a few other recipes I think you’ll enjoy just as much.
- Gluten Free Pasta Casserole: A hearty and satisfying casserole that’s perfect for a weeknight family dinner.
- Southern Style Homemade Mac and Cheese: For those times you’re not cooking gluten-free, this is my classic, crowd-pleasing Southern recipe.
- Panera Mac and Cheese Copycat Recipe: Get that signature creamy, cheesy flavor of the restaurant favorite right in your own kitchen.
Each one is packed with flavor and sure to become a new favorite in your home.