
Easy, Rich and Fudgy: Tahini Swirl Brownies Recipe
These are not your average potluck brownies, honey.
I’ll never forget the first time I tried a brownie like this. My husband and I were on a little anniversary getaway in Charleston, wandering through those beautiful, historic streets. We popped into a tiny little bakery that smelled like heaven itself, and there they were, these gorgeous, marbled squares sitting in the case.
The sign said “Chocolate Tahini Brownies.” Now, I’ve used tahini in my hummus for years, but in a brownie? I was intrigued. I took one bite and my whole world shifted. The deep, dark chocolate was perfectly balanced by this nutty, savory, almost toasty flavor from the tahini. It was rich without being too sweet, and utterly sophisticated.
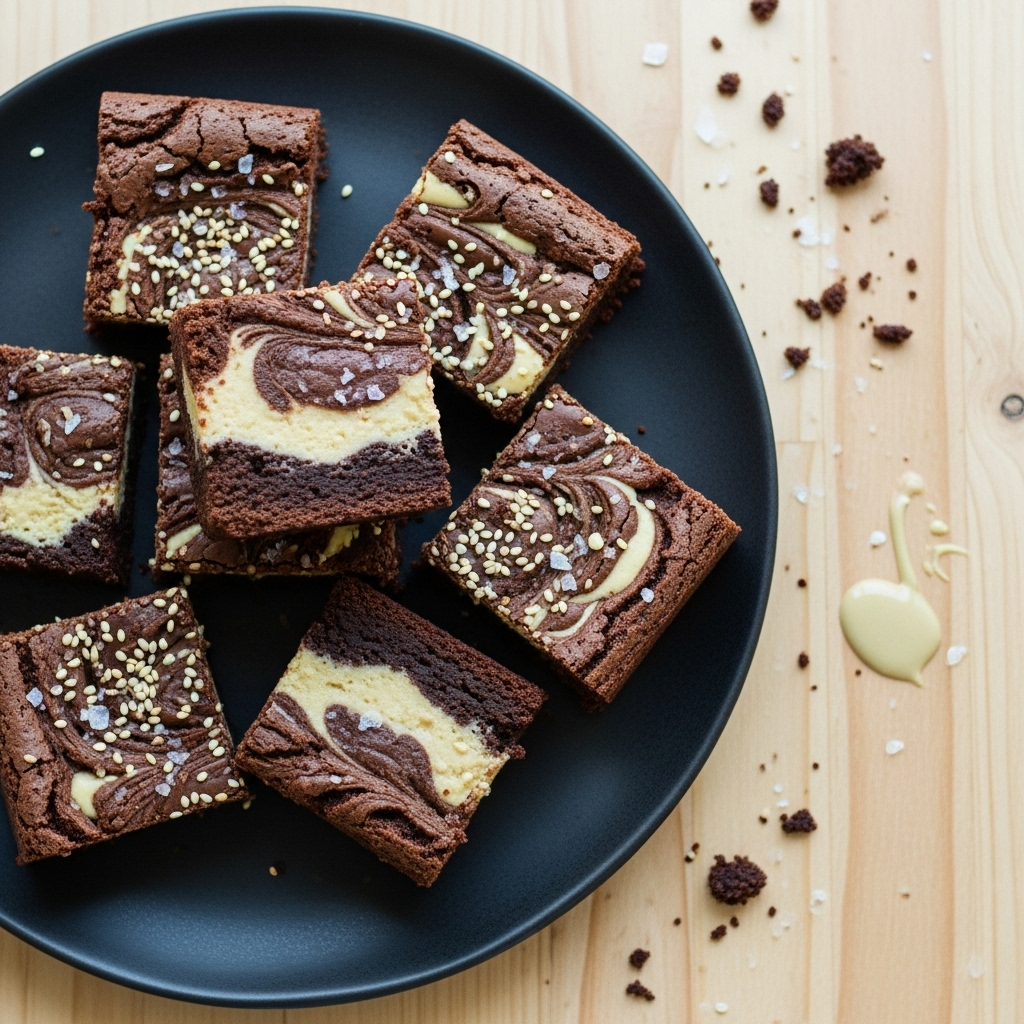
Of course, the first thing I did when we got home was head straight to my kitchen. I knew I had to recreate that magic. I started with my tried and true fudgy brownie recipe, the one that has never failed me. But I wanted to make that tahini swirl the star. After a few batches, I landed on this exact recipe. It has that perfect, dense, and fudgy center, a beautiful sesame swirl, and a little sprinkle of flaky sea salt on top to make every single flavor pop. These brownies are a showstopper, and they’re deceptively easy to whip up.
Why This Brownies Recipe Works
Brownies have been a beloved American dessert for over a century, a staple at bake sales, family gatherings, and quiet nights in. Their beauty lies in their simplicity, that perfect marriage of chocolate, butter, sugar, and flour. Most recipes fall into one of two camps, cakey or fudgy, and let’s be honest, the best ones are always fudgy. They are dense, moist, and intensely chocolatey.
This recipe builds on that classic, fudgy foundation but introduces an element that takes them from simply delicious to truly unforgettable. The secret is the tahini swirl. Tahini, a paste made from ground sesame seeds, is traditionally used in savory Middle Eastern dishes. But when you pair it with chocolate, something magical happens.
The slightly bitter, nutty, and earthy notes of the tahini cut through the richness of the bittersweet chocolate, creating a complex and beautifully balanced flavor profile. It prevents the brownies from being overwhelmingly sweet. The tahini also adds to the incredible texture, creating pockets of creamy, savory goodness within the dense chocolate base.
We don’t stop there. The addition of instant espresso powder doesn’t make the brownies taste like coffee. Instead, it deepens and intensifies the chocolate flavor, making it taste more like itself. Finally, a sprinkle of toasted sesame seeds and flaky sea salt on top provides a delightful crunch and one last flavor explosion. This isn’t just a brownie, it’s a sophisticated dessert experience that will have everyone asking for your secret.
Ingredients for Brownies
The key to truly spectacular brownies is using high-quality ingredients. Since there are relatively few components, each one plays a crucial role in the final texture and flavor. Don’t be tempted to skimp, especially on the chocolate and tahini!
Our star ingredient here is, without a doubt, the tahini. You want to find a good quality, runny tahini. Some brands can be thick and clumpy, which will be difficult to swirl. Give the jar a good stir before measuring to ensure it’s smooth and pourable. The flavor should be nutty and rich, not overly bitter.
For the chocolate, I insist on a high-quality bittersweet variety, somewhere in the 60 to 70 percent cacao range. Using both melted chocolate and Dutch-processed cocoa powder creates layers of deep chocolate flavor and contributes to that perfect fudgy texture. And please, use real unsalted butter. It makes all the difference in the world for richness and mouthfeel.
Here’s everything you’ll need to get started:
- For the Brownies:
- 1/2 cup (113g) unsalted butter, cubed
- 4 oz (113g) high-quality bittersweet chocolate (60-70% cacao), chopped
- 1 cup (200g) granulated sugar
- 1/4 cup (55g) packed light brown sugar
- 3 large eggs, at room temperature
- 1 tsp vanilla extract
- 1 tsp instant espresso powder
- 3/4 cup (90g) all-purpose flour
- 1/4 cup (25g) Dutch-processed cocoa powder
- 1/2 tsp fine sea salt
- For the Tahini Swirl:
- 1/3 cup (80g) well-stirred, runny tahini
- 2 tbsp powdered sugar
- 1/8 tsp salt
- Toasted sesame seeds, for topping
- Flaky sea salt, for topping
Step-by-Step Instructions For Making Brownies
Making these brownies is a straightforward process, but paying attention to a few key techniques will guarantee that perfect fudgy texture and beautiful marbled top. We’ll be moving through this gently, so don’t you worry. Just follow along, and you’ll have a pan of bakery-worthy brownies cooling on your counter in no time.
Step 1: Prep Your Pan and Melt the Chocolate
First things first, preheat your oven to 350°F. The most important prep step is lining your 8×8 inch pan with parchment paper. Grease the pan, then lay a sheet of parchment inside, leaving some hanging over on two opposite sides. These little “handles” will make lifting the cooled brownies out a breeze. Set that aside. Now, in a heatproof bowl set over a saucepan of simmering water, melt your cubed butter and chopped chocolate together. Stir it occasionally until it’s completely smooth and glossy. You can also do this in the microwave in 30-second bursts, stirring in between.
Step 2: Build the Brownie Batter Base
Once the chocolate mixture is melted and smooth, remove it from the heat. Whisk in the granulated and brown sugars. It will look a bit grainy at this point, and that’s perfectly fine. Now for the most important part for getting that crackly top, add your room temperature eggs one at a time. After each egg, you need to whisk vigorously for a good 30 seconds. You’ll see the batter transform, becoming thick, glossy, and emulsified. After the last egg, whisk in your vanilla extract and the instant espresso powder.
Step 3: Combine Wet and Dry Ingredients
In a separate little bowl, whisk your all-purpose flour, Dutch-processed cocoa powder, and fine sea salt together. This ensures everything is evenly distributed. Now, gently fold this dry mixture into your wet chocolate mixture using a rubber spatula. The key word here is fold. You want to mix until just a few streaks of flour remain. Overmixing develops the gluten in the flour and will give you tough, cakey brownies, and nobody wants that.
Step 4: Pour, Swirl, and Top
Pour the thick, luscious batter into your prepared pan and spread it evenly. In that small bowl you used for the dry ingredients, whisk together the runny tahini, powdered sugar, and a pinch of salt until smooth. Dollop spoonfuls of this tahini mixture all over the top of the brownie batter. Take a butter knife or a skewer and gently drag it through the dollops to create a beautiful marbled pattern. Don’t overdo it, you want distinct swirls. Finally, sprinkle generously with toasted sesame seeds and flaky sea salt.
Step 5: Bake and Cool Completely
Bake for 30 to 35 minutes. The edges should look set, and a toothpick inserted into the center should come out with moist, fudgy crumbs, but not wet batter. Now for the hardest part, you must let the brownies cool completely in the pan on a wire rack. I mean it. At least two hours. This allows the center to set up perfectly. If you try to cut them while they’re warm, you’ll have a gooey mess instead of clean, beautiful squares.
How To Serve Brownies
Serving these tahini brownies is just as fun as making them. While they are absolutely divine all on their own, a few simple additions can turn them into a truly showstopping dessert for any occasion. Their rich, complex flavor pairs beautifully with a variety of accompaniments.
For a simple, elegant presentation, a light dusting of powdered sugar just before serving can highlight the beautiful swirls and add a touch of sweetness. If you’re serving them after dinner, a strong cup of coffee or an espresso is the perfect partner to balance the deep chocolate notes. The bitterness of the coffee beautifully complements the nutty tahini and rich chocolate.
If you’re looking to create a more decadent dessert experience, consider some of these ideas:
- A La Mode: The classic for a reason. Serve a slightly warmed brownie with a generous scoop of high-quality vanilla bean ice cream. The contrast between the warm, fudgy brownie and the cold, creamy ice cream is pure bliss. Coffee or salted caramel ice cream would also be fantastic choices.
- With a Drizzle: A light drizzle of warm salted caramel sauce or even a high-quality chocolate sauce can elevate the brownies even further. It adds another layer of flavor and makes for a beautiful plate.
- Fruit Pairing: Fresh raspberries or sliced strawberries on the side provide a bright, tart contrast that cuts through the richness of the brownie. The little bit of acidity is a welcome partner to the deep chocolate.
- Creamy Topping: A dollop of freshly whipped cream or a tangy crème fraîche can add a light, airy element to balance the dense, fudgy texture of the brownies.
No matter how you choose to serve them, these brownies are meant to be savored. Cut them into neat squares and arrange them on a pretty platter for guests, or just grab one straight from the pan for a midnight snack. There’s no wrong way to enjoy them.
How To Store & Reuse Brownies Leftovers
If you find yourself with leftover brownies, first of all, congratulations on your self-control. Storing them properly is key to keeping them fresh and fudgy for as long as possible. The goal is to keep them from drying out, so an airtight container is your best friend.
For best results, I recommend storing them at room temperature. Simply place the cut brownies in an airtight container, or if they’re still in the pan, cover it tightly with plastic wrap or foil. They will stay perfectly moist and delicious for up to four days. Some people prefer storing brownies in the refrigerator, which can extend their shelf life slightly. However, be aware that chilling can make them firmer and denser. If you do refrigerate them, I suggest letting them sit out at room temperature for about 15 to 20 minutes before serving to restore their soft texture.
Should you need to store them for longer, these brownies also freeze beautifully. Here are a couple of ways to do it, plus a fun idea for any crumbles:
- Freezing Brownies: For long-term storage, you can freeze them for up to three months. I recommend wrapping each brownie square individually in plastic wrap and then placing them all in a larger freezer-safe bag or container. This way, you can just pull one out whenever a craving hits. Thaw them at room temperature or give them a quick 10 to 15-second zap in the microwave.
- Reheating: To bring back that fresh-from-the-oven warmth, you can reheat a brownie in the microwave for about 15 seconds. It will become extra gooey and delicious, perfect for serving with a scoop of ice cream.
- Creative Leftovers: If you have any broken pieces or end bits, don’t throw them away. Crumble them up and use them as a topping for ice cream sundaes, or blend them into a vanilla milkshake for an incredible brownie-flavored treat. It’s a delicious way to make sure not a single crumb goes to waste.
Proper storage ensures that you can enjoy every last bite of these delicious tahini swirl brownies, whether it’s the next day or a month from now.
Substitutions & Variations For Brownies
One of the best things about a solid brownie recipe is that it can serve as a canvas for your own creativity. While I think this tahini swirl version is pretty close to perfect, there are plenty of ways to tweak it to suit your tastes or what you have on hand in your pantry. Don’t be afraid to experiment a little, you might just discover your new favorite combination.
The most obvious swap is the tahini itself. If you’re not a fan or can’t find it, you can easily substitute other nut or seed butters. A creamy, natural peanut butter would create a classic chocolate peanut butter combination. Almond butter, cashew butter, or even sunflower seed butter would also work beautifully, each lending its own unique flavor to the swirl. Just be sure to use a smooth, runny variety for the best swirling results.
If you want to add more texture or different flavor notes, here are a few fun ideas to get you started:
- Add Chocolate Chips: For an even more intense chocolate experience, you can fold in a cup of semi-sweet or dark chocolate chips into the batter right before pouring it into the pan.
- Nutty Additions: Toasted walnuts, pecans, or chopped pistachios would be a fantastic addition. Fold about a cup of chopped nuts into the batter for a wonderful crunch that complements the fudgy texture.
- Spice It Up: For a little warmth and complexity, try adding half a teaspoon of cinnamon or a pinch of cayenne pepper to the dry ingredients. The subtle heat of cayenne with chocolate and tahini is a surprisingly delicious combination.
- Gluten-Free Brownies: To make this recipe gluten-free, you can substitute the all-purpose flour with a good quality, one-to-one gluten-free baking flour blend that contains xanthan gum. The results are wonderfully fudgy and just as delicious.
Feel free to mix and match these ideas. Maybe you’ll make a peanut butter swirl brownie with chocolate chips, or an almond butter version with a hint of cinnamon. The possibilities are endless, so have fun making this incredible brownie recipe your own.
Fudgy Chocolate Tahini Brownies
Description: Deeply fudgy and intensely chocolatey brownies with a beautiful, nutty tahini swirl and a sprinkle of flaky sea salt. The perfect balance of sweet and savory in one sophisticated dessert.
Yield: 16 squares | Category: Dessert | Cuisine: American
Prep Time: 15 minutes | Cook Time: 35 minutes
Ingredients
- For the Brownies:
- 1/2 cup (113g) unsalted butter, cubed
- 4 oz (113g) high-quality bittersweet chocolate (60-70% cacao), chopped
- 1 cup (200g) granulated sugar
- 1/4 cup (55g) packed light brown sugar
- 3 large eggs, at room temperature
- 1 tsp vanilla extract
- 1 tsp instant espresso powder
- 3/4 cup (90g) all-purpose flour
- 1/4 cup (25g) Dutch-processed cocoa powder
- 1/2 tsp fine sea salt
- For the Tahini Swirl:
- 1/3 cup (80g) well-stirred, runny tahini
- 2 tbsp powdered sugar
- 1/8 tsp salt
- Toasted sesame seeds, for topping
- Flaky sea salt, for topping
Instructions
- Preheat oven to 350°F (175°C). Grease and line an 8×8 inch pan with parchment paper, leaving an overhang.
- Melt butter and chopped chocolate together over a double boiler or in the microwave until smooth.
- Remove from heat and whisk in granulated and brown sugars.
- Add eggs one at a time, whisking vigorously for 30 seconds after each addition. Whisk in vanilla and espresso powder.
- In a separate bowl, whisk together flour, cocoa powder, and salt. Gently fold the dry ingredients into the wet ingredients until just combined.
- Pour batter into the prepared pan.
- In a small bowl, whisk tahini, powdered sugar, and salt until smooth. Dollop over the brownie batter.
- Use a knife to gently swirl the tahini into the chocolate batter.
- Sprinkle with toasted sesame seeds and flaky sea salt.
- Bake for 30-35 minutes, until a toothpick inserted in the center comes out with moist crumbs.
- Cool completely in the pan before lifting out and cutting into squares.
Notes
For the fudgiest texture and cleanest cuts, it is absolutely essential to let the brownies cool completely for at least 2 hours before slicing.
Servings: 16 | Calories: 220 kcal | Fat: 14g | Carbohydrates: 23g | Protein: 4g
5 FAQs About Brownies
Here are some straightforward answers to the most common questions I receive about this brownies recipe.
Why did my brownies come out cakey instead of fudgy?
This is the most common brownie dilemma, and the answer usually lies in two areas, the ingredients and the technique. Fudgy brownies typically have a higher fat-to-flour ratio. This recipe is specifically designed to be fudgy by using both melted butter and melted chocolate, which adds a significant amount of fat and moisture. Cakey brownies, on the other hand, often rely more on cocoa powder and less butter, and sometimes include a leavening agent like baking powder.
The biggest culprit for turning fudgy brownies cakey is overmixing the batter after you add the flour. When you mix flour with wet ingredients, you begin to develop gluten. A little gluten provides structure, but too much will result in a tough, dry, and cake-like texture. That’s why I stress folding the dry ingredients in gently with a spatula until just a few streaks of flour remain. You want to mix as little as possible at this final stage to keep the brownies dense and fudgy.
Can I make these tahini brownies gluten-free?
Absolutely! This recipe adapts wonderfully to be gluten-free. The rich, dense nature of these brownies means they don’t rely heavily on gluten for their structure, which makes substitution quite simple. To make them gluten-free, you’ll want to replace the 3/4 cup of all-purpose flour with a high-quality, measure-for-measure gluten-free baking flour blend.
Look for a blend that contains xanthan gum, as this will help provide the structure and binding that gluten normally would. Brands like Bob’s Red Mill 1-to-1 Baking Flour or King Arthur Measure for Measure Flour work very well in this recipe. You don’t need to make any other adjustments to the ingredients or the method. Simply swap the flour, and you’ll have delicious, fudgy, gluten-free tahini brownies that everyone can enjoy.
What is the best type of chocolate to use for brownies?
The quality and type of chocolate you use will have the single biggest impact on the final flavor of your brownies. For a deep, rich, and complex chocolate flavor, I strongly recommend using high-quality bittersweet chocolate with a cacao percentage between 60 and 70 percent. This level provides a perfect balance, it’s intensely chocolatey without being overly sweet or too bitter. Look for chocolate bars or wafers specifically designed for baking, often found in the baking aisle, rather than chocolate chips.
Baking chocolate is formulated to melt smoothly and evenly, whereas chocolate chips often contain stabilizers to help them hold their shape, which can affect the final texture. This recipe also uses Dutch-processed cocoa powder in addition to the melted chocolate. Dutch-processed cocoa has been treated to neutralize its acidity, resulting in a darker color and a smoother, less bitter flavor that contributes to the ultra-fudgy texture. Using both types of chocolate creates a wonderful depth of flavor you can’t get from just one.
How do I get that perfect crackly top on my brownies?
Ah, the coveted shiny, paper-thin, crackly brownie top. It’s a sign of a truly great brownie, and the secret lies in the eggs and sugar. That beautiful crust is essentially a very thin layer of meringue that forms on top of the brownies as they bake. You create this by dissolving the sugar properly and whipping plenty of air into the eggs.
In this recipe, two steps are crucial for achieving this. First, whisking the sugar into the warm, melted butter and chocolate mixture helps the sugar begin to dissolve. The second, and most important step, is adding the eggs one at a time and whisking vigorously for about 30 seconds after each addition. This vigorous whisking does two things: it ensures the sugar is fully dissolved and it incorporates air into the batter, which helps create that light, crackly meringue top once it hits the heat of the oven. So, don’t be shy with your whisk!
Can I use a different type of pan for these brownies?
Yes, you can, but you will need to adjust your baking time accordingly. This recipe is developed for an 8×8 inch metal baking pan, which results in thick, fudgy brownies. Metal pans are excellent conductors of heat and will give you those nice, chewy edges. If you use a 9×9 inch pan, your brownies will be thinner and will require less baking time. Start checking for doneness around the 25-minute mark.
You can also use a glass or ceramic pan, but keep in mind that these materials conduct heat differently than metal. They take longer to heat up but retain that heat for longer. If using a glass or ceramic pan, you may need to decrease the oven temperature by 25°F to prevent the edges from overbaking before the center is cooked through. Regardless of the pan you use, the toothpick test is your most reliable guide for doneness. You’re looking for moist, fudgy crumbs, not wet batter.
Try These Recipes Next
Once you’ve mastered these showstopping brownies, you’ll be ready to tackle even more delicious recipes in your kitchen. Whether you’re looking for a quick weeknight meal or a new breakfast favorite, I’ve got you covered. These are a few of my go-to collections when I need a little inspiration.
When life gets busy, having a list of reliable dinner ideas is a lifesaver. This collection is packed with recipes that are both easy to make and full of flavor. You’ll find everything from comforting pasta dishes to quick chicken recipes that the whole family will love. They are perfect for taking the stress out of your weeknight cooking.
I also believe that starting the day with a delicious meal sets the right tone for everything else. If you’re tired of the same old routine, this list of breakfast ideas will bring some excitement back to your mornings. And if you’re cooking on a budget, you don’t have to sacrifice flavor. My collection of cheap meal ideas proves you can eat well without breaking the bank.