
You Will Absolutely LOVE This Easy Sweet Potato Rolls Recipe
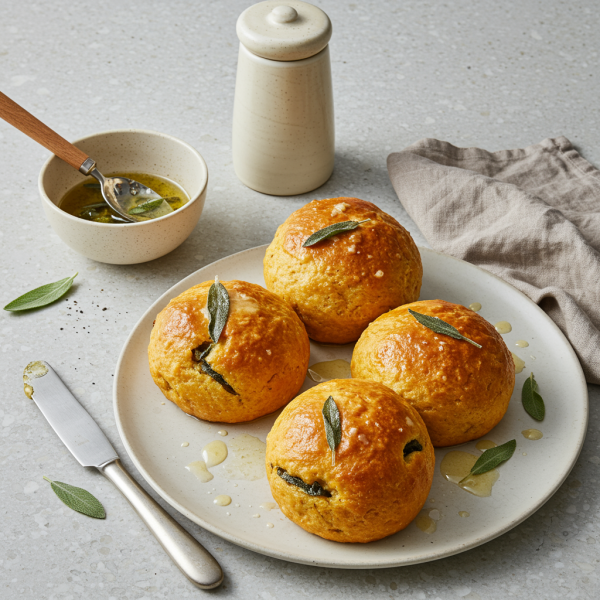
These Brown Butter & Sage Sweet Potato Rolls are the softest, most flavorful dinner rolls you will ever bake.
I first had a sweet potato roll at a church potluck years ago, brought by a sweet older lady named Mrs. Gable. They were good, don’t get me wrong, wonderfully soft and with a lovely orange hue. But in my kitchen, “good” is just the starting point. I knew I could take that classic comfort and give it a little something special, a twist that would make folks’ eyes light up when they took their first bite.
My mind immediately went to my favorite fall flavors. I thought about the nutty, intoxicating aroma of butter browning in a saucepan, how it can transform anything it touches. Then I pictured the silvery-green leaves of the sage plant in my herb garden, so earthy and savory. What if I combined those two with the natural sweetness of the sweet potato?
Well, honey, the result was pure magic. The brown butter adds this incredible depth and richness, a toasty flavor that perfectly complements the sweet potato. The sage cuts through the sweetness with a fragrant, savory note that makes these rolls just as perfect alongside a Thanksgiving turkey as they are with a simple weeknight soup. These aren’t just dinner rolls anymore, they’re an experience.
Why This Sweet Potato Rolls Recipe Works
Sweet potato rolls have been a staple on Southern tables for generations, especially during the holidays. They are beloved for good reason. The sweet potato itself is a powerhouse ingredient in baking, lending a beautiful, warm color, natural sweetness, and an incredible amount of moisture. This moisture is the secret to a roll that stays pillowy soft for days, long after other dinner rolls have turned dry and sad.
This recipe honors that tradition but elevates it from a simple, sweet bread to a truly memorable savory bake. The magic is in the details, and the science behind them proves why this combination is just so special. It all starts with the brown butter. When you gently heat butter, the milk solids toast and caramelize, creating a complex, nutty flavor profile that you simply cannot get from regular melted butter. It adds a layer of sophistication that is absolutely irresistible.
Then comes the fresh sage. Infusing the browning butter with fresh, finely chopped sage allows its earthy, slightly peppery oils to release into the fat. This savory herb provides the perfect counterpoint to the sweetness from the potato and the sugar in the dough. It creates a beautiful balance, preventing the rolls from being one-note or overly sweet. Finally, a sprinkle of flaky sea salt on top right after baking doesn’t just look pretty, it provides a tiny, delightful crunch and a final pop of flavor that wakes up all the other ingredients. This isn’t just a recipe, it’s a symphony of flavors that work in perfect harmony.
Ingredients for Sweet Potato Rolls
The success of these rolls comes down to a few simple, high-quality ingredients working together. While the list might look standard at first glance, the preparation of a couple of key items is what makes all the difference. Here is exactly what you will need to get started.
- 1 large sweet potato (about 12 oz.), baked and peeled
- 6 tablespoons unsalted butter
- 1 tablespoon fresh sage, finely chopped
- 1/2 cup whole milk, warmed to 110°F
- 1/4 cup granulated sugar
- 2 1/4 teaspoons active dry yeast (1 standard packet)
- 2 large eggs, lightly beaten
- 1 1/2 teaspoons fine sea salt
- 4 to 4 1/2 cups all-purpose flour, plus more for dusting
- 2 tablespoons unsalted butter, melted, for brushing
- Flaky sea salt, for finishing
The true stars of this recipe are, without a doubt, the brown butter and fresh sage. This is the twist that will make your guests ask for the recipe. It is crucial to use fresh sage here. Dried sage has a completely different, more muted flavor and won’t give you that vibrant, aromatic quality we’re looking for. When you’re browning the butter, choose a good quality unsalted butter. A higher-fat butter, like a European-style one, will yield more of those nutty brown bits, which means more flavor.
For the sweet potato, baking it yourself instead of using canned puree makes a world of difference. When you bake a sweet potato whole, its natural sugars concentrate and caramelize, giving you a much deeper, richer flavor. Just be sure to let the mashed potato cool to lukewarm before adding it to the dough, as any excess heat could harm the yeast. Using whole milk also adds richness to the dough, contributing to that wonderfully soft and tender crumb that makes these sweet potato rolls so addictive.
Step-by-Step Instructions For Making Sweet Potato Rolls
Making yeast dough from scratch can seem intimidating, but I promise you, this recipe is straightforward and so rewarding. Just follow along with me step by step, and you’ll have a pan of beautiful, golden-brown rolls in no time. The smell alone is worth it!
Step 1: Prepare the Sweet Potato
First things first, let’s get our main ingredient ready. You will want to have your large sweet potato already baked and peeled. The easiest way is to prick it a few times with a fork and bake it at 400°F for about 45 to 60 minutes, until it’s very tender. Once it’s cool enough to handle, peel the skin away and mash the flesh until it is completely smooth. A potato ricer is a fantastic tool for this job if you have one, as it ensures no stringy bits are left behind. Measure out exactly one cup of the mash and set it aside to cool down to lukewarm.
Step 2: Make the Brown Butter and Sage Mixture
This is where the magic begins. In a small, light-colored saucepan over medium heat, melt your 6 tablespoons of butter. Using a light-colored pan helps you see the color change. Once melted, add the finely chopped fresh sage. Let it cook, swirling the pan every so often. You’ll see it foam up, and then the foam will subside. Listen for the sputtering to quiet down and watch for little golden-brown specks to form at the bottom. The whole kitchen will start to smell wonderfully nutty. This takes about 3 to 5 minutes. As soon as you see those brown bits, pull it off the heat immediately to prevent burning and let it cool slightly.
Step 3: Activate the Yeast
In the large bowl of your stand mixer, combine the warm milk, granulated sugar, and the packet of active dry yeast. Make sure your milk is around 110°F, like warm bathwater. If it’s too hot, it will kill the yeast. Give it a gentle stir and then just let it be for about 5 to 10 minutes. You’ll know it’s ready when the surface becomes foamy and smells distinctly of yeast. This step, called proofing, ensures your yeast is alive and ready to make your rolls rise beautifully.
Step 4: Combine the Wet Ingredients
Once your yeast is nice and foamy, it’s time to add the rest of the wet ingredients. Pour in the cooled mashed sweet potato, the cooled brown butter and sage mixture, the lightly beaten eggs, and the salt. It’s important that the potato and butter have cooled so they don’t harm the yeast. Use the paddle attachment on your mixer and mix on low speed until everything is just barely combined into a lumpy, orange mixture.
Step 5: Knead the Dough
Now, switch from the paddle to the dough hook attachment. With the mixer running on low speed, begin adding 4 cups of the all-purpose flour, one cup at a time. Once the flour is incorporated, let the mixer knead the dough for 8 to 10 minutes. The dough will transform from a shaggy mess into a smooth, elastic ball that pulls away cleanly from the sides of the bowl. If it still seems overly sticky after a few minutes of kneading, add the remaining half cup of flour, just one tablespoon at a time, until it’s just right.
Step 6: Let the Dough Rise
Take your beautiful ball of dough and place it in a large bowl that you’ve lightly oiled. Turn the dough over once so the top gets a light coating of oil too, which prevents a dry skin from forming. Cover the bowl with plastic wrap or a clean kitchen towel. Find a warm, draft-free spot in your house and let it rise for 1 to 1 1/2 hours. It should double in size.
Step 7: Shape the Rolls
Grease a 9×13-inch baking pan. Once the dough has doubled, gently punch it down to release the air. Turn it out onto a lightly floured countertop. Using a bench scraper or a knife, divide the dough into 12 equal portions. For perfectly uniform rolls, I like to use a kitchen scale. To shape each roll, flatten a portion slightly and then tuck the edges into the center, pinching them together at the bottom to create a taut, smooth ball.
Step 8: The Second Rise
Arrange the 12 dough balls in your prepared baking pan. They’ll be spaced out at first, but don’t you worry. Cover the pan loosely with your towel or plastic wrap and let them rise again in that same warm spot for another 30 to 45 minutes. You’re looking for them to get puffy and grow so they are just about touching each other.
Step 9: Preheat the Oven
While the rolls are having their second rise, go ahead and preheat your oven to 375°F. This ensures the oven is perfectly hot and ready to go, which helps the rolls get a good “oven spring” or initial puff when they start to bake.
Step 10: Brush with Butter
Just before they go into the oven, take the 2 tablespoons of melted butter and gently brush the tops of all the puffy rolls. This little step is what helps them get that beautiful, deep golden-brown color as they bake.
Step 11: Bake the Rolls
Place the pan in the preheated oven and bake for 20 to 25 minutes. They are done when the tops are a rich, deep golden brown. The most reliable way to check for doneness is with an instant-read thermometer. The internal temperature of the center roll should register 190°F. This guarantees they are cooked through but still perfectly moist.
Step 12: The Finishing Touch
As soon as you pull the pan from the oven, while the rolls are still piping hot, sprinkle them with a pinch of flaky sea salt. The heat and melted butter on top will help the salt stick perfectly. Let them cool in the pan for a few minutes before serving them warm. Just try to resist eating three of them right away!
How To Serve Sweet Potato Rolls
These Brown Butter & Sage Sweet Potato Rolls are so versatile, they feel right at home on just about any table. Of course, they are an absolute showstopper for holiday meals. Imagine a basket of these golden beauties on your Thanksgiving or Christmas table, sitting right next to the turkey and dressing. They are perfect for sopping up every last bit of gravy.
But please don’t save them just for special occasions. Their savory-sweet character makes them a wonderful companion to all sorts of everyday meals. A warm roll is the perfect sidekick to a hearty bowl of soup, a chili, or a rich beef stew. The slight sweetness of the roll is a lovely balance to spicy or deeply savory dishes. I love serving them with a simple weeknight roasted chicken and some green beans for a meal that feels extra special with minimal effort.
If you really want to make them shine, here are a few of my favorite ways to serve them:
- With Flavored Butter: While they are divine with simple salted butter, try serving them with a homemade honey butter or a cinnamon maple butter for a sweeter treat. For a more savory option, a garlic and herb butter would also be fantastic.
- As Sliders: These rolls make the absolute best sliders. Their soft but sturdy texture holds up beautifully. Fill them with leftover holiday turkey or ham, some sharp cheddar cheese, and a dollop of cranberry sauce or a spicy mustard.
- For Breakfast: Who says rolls are just for dinner? Split one in half, toast it lightly, and spread it with apple butter, a little cream cheese, or even use it to make a small breakfast sandwich with a sausage patty and a folded egg.
No matter how you serve them, the best way is always warm from the oven. The aroma alone is enough to make everyone happy and hungry, and that first bite of a warm, pillowy, buttery roll is pure comfort.
How To Store & Reuse Sweet Potato Rolls Leftovers
One of the best things about these sweet potato rolls is that, thanks to the moisture from the sweet potato, they stay wonderfully fresh and soft for longer than most homemade breads. If you happen to have any leftovers, storing them properly is key to enjoying them for the next few days. Let the rolls cool completely, then place them in an airtight container or a zip-top bag. They will keep beautifully at room temperature for up to 3 or 4 days.
When you are ready to enjoy one, you can certainly eat it at room temperature, but I think they are best when reheated. To bring back that fresh-from-the-oven warmth and softness, you have a couple of options. For a single roll, a quick 10 to 15 seconds in the microwave does the trick. If you want to reheat several rolls at once, wrap them in aluminum foil and place them in a 350°F oven for about 10 minutes. They will emerge soft, warm, and ready to be slathered in butter.
If your rolls get a little past their prime after a few days, don’t you dare throw them out! They can be transformed into something new and delicious. Here are some ideas for giving those leftovers a second life:
- Savory Bread Pudding: This is my favorite way to use them up. Cube the leftover rolls and use them as the base for a savory bread pudding with eggs, cheese, and maybe some sausage or bacon. The brown butter and sage flavor already in the rolls adds a wonderful base note.
- Homemade Croutons: Cut the rolls into bite-sized cubes. Toss them with a little olive oil, salt, pepper, and maybe some garlic powder. Bake at 375°F until they are golden and crunchy. They are perfect for topping a fall-inspired salad or a creamy tomato soup.
- Mini French Toast: Slice the rolls into thick pieces, dip them in a classic egg and milk mixture, and pan-fry them for a delightful mini French toast. Drizzle with maple syrup for a truly decadent breakfast treat.
Substitutions & Variations For Sweet Potato Rolls
I absolutely adore this recipe just the way it is, but a good recipe should always have a little wiggle room for you to make it your own. Whether you have a dietary need or just want to experiment with different flavors, there are plenty of ways to put your own spin on these delicious sweet potato rolls. Remember that baking is a science, so some changes may affect the texture or rise time slightly, but that’s all part of the fun of cooking!
Here are a few substitutions and variations that work beautifully:
- Herb Variations: If sage isn’t your favorite, feel free to swap it out. Finely chopped fresh rosemary would be a wonderful, woodsy alternative. Fresh thyme would also be lovely, especially paired with a sprinkle of Parmesan cheese on top before baking.
- Add Some Spice: To lean into the sweet side of things, you can add warm spices to the dry ingredients. A half teaspoon of cinnamon and a quarter teaspoon of nutmeg or cardamom would give the rolls a flavor reminiscent of sweet potato pie.
- Sweetener Swaps: You can easily substitute the granulated sugar with an equal amount of light brown sugar for a subtle molasses note. A few tablespoons of maple syrup or honey could also be used, but you might need to reduce the milk slightly to compensate for the added liquid.
- Flour Alternatives: For a heartier roll with a chewier texture, you can replace half of the all-purpose flour with bread flour. You could also substitute up to one cup of the all-purpose flour with whole wheat flour, which will give the rolls a nuttier flavor and denser crumb. You may need to add an extra tablespoon or two of milk if using whole wheat flour.
- Topping Ideas: The flaky sea salt is classic, but you can get creative here too. Before baking, try sprinkling the butter-brushed tops with everything bagel seasoning, toasted sesame seeds, or even raw pumpkin seeds (pepitas) for a little crunch.
Feel free to mix and match these ideas to create your own signature sweet potato roll. No matter which path you choose, the core of the recipe, the moist sweet potato and rich dough, will ensure a delicious result.
Brown Butter & Sage Sweet Potato Rolls
Description: Incredibly soft, pillowy sweet potato rolls made with a nutty brown butter and fresh sage infusion. The perfect savory-sweet side for any holiday or family meal.
Yield: 12 rolls | Category: Bread | Cuisine: Southern American
Prep Time: 2 hours | Cook Time: 25 minutes
Ingredients
- 1 large sweet potato (about 12 oz.), baked and peeled
- 6 tablespoons unsalted butter
- 1 tablespoon fresh sage, finely chopped
- 1/2 cup whole milk, warmed to 110°F
- 1/4 cup granulated sugar
- 2 1/4 teaspoons active dry yeast (1 packet)
- 2 large eggs, lightly beaten
- 1 1/2 teaspoons fine sea salt
- 4 to 4 1/2 cups all-purpose flour
- 2 tablespoons unsalted butter, melted, for brushing
- Flaky sea salt, for finishing
Instructions
- Mash baked sweet potato until very smooth. Measure 1 cup and let cool to lukewarm.
- In a saucepan, melt 6 tbsp butter with sage over medium heat until milk solids turn golden brown. Let cool slightly.
- In a stand mixer bowl, combine warm milk, sugar, and yeast. Let sit for 5-10 minutes until foamy.
- Add mashed sweet potato, brown butter mixture, eggs, and salt to the yeast mixture. Mix to combine.
- Using a dough hook, gradually add 4 cups of flour and knead for 8-10 minutes until smooth and elastic. Add more flour if needed.
- Place dough in an oiled bowl, cover, and let rise in a warm place for 1 to 1.5 hours, until doubled.
- Punch down dough, divide into 12 equal pieces, and shape into balls. Arrange in a greased 9×13-inch pan.
- Cover and let rise for another 30-45 minutes until puffy.
- Preheat oven to 375°F.
- Brush tops of rolls with 2 tbsp melted butter.
- Bake for 20-25 minutes until golden brown (190°F internal temp).
- Sprinkle with flaky sea salt immediately after removing from oven. Serve warm.
Notes
For the best flavor, bake your sweet potato fresh rather than using canned puree. Ensure your milk is not hotter than 110°F to avoid killing the yeast. A light-colored saucepan makes it easier to monitor the butter as it browns.
Servings: 12 | Calories: 250 | Fat: 8g | Carbohydrates: 38g | Protein: 6g
5 FAQs About Sweet Potato Rolls
Here are some straightforward answers to the most common questions I receive about this Brown Butter & Sage Sweet Potato Rolls recipe.
Can I make these sweet potato rolls ahead of time?
Yes, you absolutely can, which is one of the reasons they are so perfect for busy holiday cooking! You have two excellent options for making them ahead. The first method, which I prefer for the freshest taste, is to prepare the dough through the shaping step. After you have arranged the shaped rolls in your greased baking pan, cover them tightly with plastic wrap and place the entire pan in the refrigerator. You can do this up to 18 hours in advance.
When you are ready to bake, take the pan out of the refrigerator and let it sit on the counter at room temperature for about an hour to an hour and a half. This allows the dough to warm up and complete its second rise. Then, simply bake as directed in the recipe. The second option is to bake the rolls completely, let them cool, and store them in an airtight container for up to two days. When it’s time to serve, just reheat them in a 350°F oven for about 10 minutes until warmed through.
Can I use canned sweet potato puree for these rolls?
You can use canned sweet potato puree in a pinch, but I highly recommend using a freshly baked sweet potato if you have the time. The flavor difference is quite noticeable. When you bake a sweet potato, its sugars caramelize and concentrate, giving you a much deeper, richer, and sweeter flavor than the steamed puree you find in a can. Canned puree also tends to have a higher water content.
If you do use canned puree, make sure you buy pure sweet potato puree and not sweet potato pie filling, which has added sugar and spices. You will need 1 cup of the puree. Because of the extra moisture, you will likely need to use the full 4 1/2 cups of flour, and possibly even a tablespoon or two more, to get the dough to the right consistency. The rolls will still be delicious and soft, but for that truly special, roasted flavor, baking your own potato is the way to go.
My sweet potato roll dough didn’t rise. What went wrong?
Oh, that is the most frustrating feeling in the kitchen, but don’t worry, we can usually figure out the culprit. The most common reason for dough failing to rise is an issue with the yeast. Your yeast could have been old or expired, so always check the date on the packet. Another possibility is that your milk was too hot when you added the yeast. Yeast is a living organism, and liquid that is too hot (above 120°F) will kill it. Your milk should feel like a comfortably warm bath, around 110°F. If your yeast didn’t get foamy in the first step, that’s a sure sign it’s not active, and you’ll need to start over with fresh yeast.
Another factor could be the temperature of your kitchen. Yeast thrives in a warm environment. If your house is chilly, the rise will be very slow or may not happen at all. Try finding a cozy spot for your dough, like inside an oven with just the light turned on, or on top of the refrigerator. Finally, make sure you kneaded the dough long enough to develop the gluten structure needed to trap the gasses produced by the yeast. A well-kneaded dough will be smooth and elastic.
How do I get my sweet potato rolls to be the same size?
Getting uniformly sized rolls isn’t just for looks, although it does make for a beautiful presentation. It also ensures that all the rolls bake evenly in the same amount of time. The most accurate and foolproof method is to use a digital kitchen scale. It’s one of my most-used kitchen tools. After the first rise, place your entire ball of dough on the scale to get its total weight. Then, divide that number by 12.
For example, if your dough weighs 36 ounces, each roll should weigh 3 ounces. Simply tear off pieces of dough and weigh them individually until you have 12 equal portions. If you don’t have a scale, you can still get them pretty close by eye. Gently pat the dough into an even rectangle on your counter and use a bench scraper or knife to cut the dough in half, then cut each half into six relatively equal squares. From there, shape each square into a ball.
Can I freeze these sweet potato rolls?
Yes, these rolls freeze exceptionally well, making them a fantastic recipe to prepare well in advance. You can freeze them either before or after baking. To freeze the unbaked dough, follow the recipe through shaping the rolls and placing them in the pan. Instead of letting them rise a second time, place the pan in the freezer for about an hour, or until the rolls are frozen solid. Then you can transfer the individual dough balls to a freezer-safe bag, where they’ll keep for up to 3 months.
To bake from frozen, arrange the dough balls back in your greased pan, cover them, and let them thaw and rise at room temperature. This can take anywhere from 3 to 5 hours. Once they are puffy, bake as directed. To freeze already baked rolls, let them cool completely first. Then wrap them tightly in plastic wrap and a layer of aluminum foil to prevent freezer burn. They can also be frozen for up to 3 months. To serve, thaw them at room temperature and reheat in a 350°F oven for 10-12 minutes.
Try These Recipes Next
If these sweet potato rolls hit the spot, I have a feeling you’ll fall in love with some of my other favorite recipes too.
- Easy Sweet Potato Pie, the classic warm spices and smooth texture you love, but with a kick.
- Sweet Potato Casserole with Pecan Streusel, semi-sweet, fluffy and topped with pecan streusel.
- Honey Butter Dinner Rolls, for another fluffy, buttery roll that’s a guaranteed crowd pleaser.
Let me know what you try next!