
Easy, Homemade Olive Garden Breadsticks (Copycat Recipe)
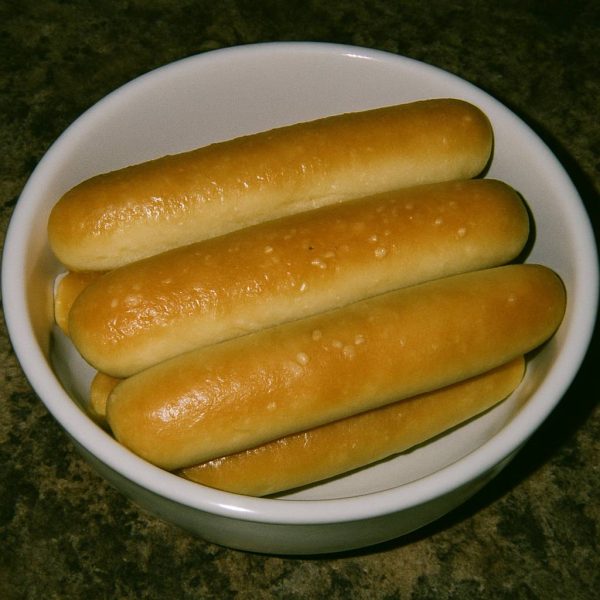
There is truly nothing quite like a basket of warm, buttery breadsticks set on the table.
My first memory of Olive Garden is from a family trip to a bigger city when I was just a little girl. We didn’t have many chain restaurants in my hometown, so going there felt like the height of fancy dining. I remember being so impressed by the big, bustling dining room, but what really stuck with me were those endless baskets of amazing breadsticks. They were soft, salty, and just dripping with garlic butter. It was pure magic.
For years, I’ve been making copycat Olive Garden Breadsticks at home, especially when I’m serving up a big pot of soup or a hearty pasta dish. The family just can’t get enough of them. But you know me, I can never leave well enough alone. I’m always lookin’ for a little something extra to make a good recipe truly great.
After a bit of tinkering in the kitchen, I found my secret. Just a touch of buttermilk powder in the dough. It adds this subtle, pleasant tang and makes the bread so incredibly tender, it practically melts in your mouth. Then, for the topping, I jazz up the standard garlic butter with a sprinkle of dried rosemary and thyme. That little hint of herbs makes them taste so much more special and homemade. It’s a simple twist, but honey, it makes all the difference.
Why This Olive Garden Breadsticks Recipe Works
Let’s be honest, for many of us, the breadsticks are the main event at Olive Garden. They’ve become a cultural icon, synonymous with comfort, generosity, and that feeling of a never-ending meal with loved ones. The reason they’re so popular is simple. They hit all the right notes. They are pillowy soft on the inside with just enough chew, and the outside is drenched in a salty, savory garlic butter that is simply irresistible.
This recipe works because it honors that classic combination of texture and flavor while elevating it just a bit. We’re not reinventing the wheel here, just making it roll a little smoother. The foundation is a simple, reliable yeast dough that creates that signature light and airy crumb. It’s a forgiving dough, so even if you’re new to bread making, you can achieve fantastic results.
The real magic, and why this specific recipe will become your go-to, lies in those two little tweaks I mentioned. The buttermilk powder is a baker’s secret weapon. It tenderizes the gluten in the flour, resulting in a softer, richer breadstick. It also adds a very subtle background tang that balances the sweetness of the dough and the richness of the butter topping.
And that herb-infused garlic butter? Well, that’s the finishing touch that takes these from a simple copycat to a signature bake. The warm, earthy notes of rosemary and thyme complement the garlic perfectly, giving the breadsticks a more complex, restaurant-quality flavor that will have everyone reaching for just one more. This recipe captures the nostalgia of the original while adding a touch of homemade charm that makes them uniquely yours.
Ingredients for Olive Garden Breadsticks
To make these heavenly breadsticks, you’ll need a handful of simple pantry staples. But as with any recipe, the quality of your ingredients can make a noticeable difference, especially our secret ingredient that gives them that special something.
For the Breadstick Dough:
- Warm Water: 1 1/2 cups. It should feel like a warm bath, around 110°F. If it’s too hot, it will kill the yeast.
- Active Dry Yeast: 2 1/4 teaspoons (which is one standard packet).
- Granulated Sugar: 2 tablespoons. This not only feeds the yeast but also adds a touch of sweetness to the dough, just like the original.
- Olive Oil: 2 tablespoons. Use a decent quality extra virgin olive oil for the best flavor.
- Salt: 1 1/2 teaspoons. I prefer using fine sea salt for bread making.
- All-Purpose Flour: 4 to 4 1/2 cups, plus more for dusting. You can also use bread flour if you want an even chewier breadstick.
- Buttermilk Powder: 2 tablespoons. This is my secret weapon! It adds a wonderful tenderness and a slight tang to the dough that really makes it special. You can find it in the baking aisle near the powdered milk.
For the Garlic Herb Topping:
- Unsalted Butter: 1/2 cup (1 stick), melted. Using unsalted butter lets you control the saltiness of the final product.
- Garlic Powder: 1 teaspoon. Don’t be shy with this! It’s essential for that classic flavor.
- Salt: 1/2 teaspoon. A coarse sea salt or kosher salt is lovely here for a little texture.
- Dried Rosemary: 1/4 teaspoon, lightly crushed between your fingers.
- Dried Thyme: 1/4 teaspoon. This herb pairing is what gives the topping its signature twist.
A note on the yeast: Make sure your yeast is fresh. If it doesn’t get foamy and bubbly in the warm water and sugar mixture after about 5-10 minutes, it’s likely expired, and your breadsticks won’t rise properly. It’s always a good idea to test it first before you add all your other ingredients.
Step-by-Step Instructions For Making Olive Garden Breadsticks
Follow these steps closely, and you’ll have a basket of warm, buttery breadsticks that are even better than the restaurant’s. Don’t be intimidated by the yeast, it’s easier than you think!
- Activate the Yeast: In the bowl of a stand mixer (or a large mixing bowl), combine the 1 1/2 cups of warm water, 2 tablespoons of sugar, and 2 1/4 teaspoons of active dry yeast. Give it a gentle stir and let it sit for about 5 to 10 minutes. You’re looking for the mixture to become foamy and bubbly on top. This is how you know your yeast is alive and ready to work.
- Mix the Dough: Once the yeast is activated, add the 2 tablespoons of olive oil, 1 1/2 teaspoons of salt, 2 tablespoons of buttermilk powder, and 4 cups of all-purpose flour to the bowl. Using the dough hook attachment on your stand mixer, mix on low speed until a shaggy dough forms. Increase the speed to medium and knead for 5 to 7 minutes, or until the dough is smooth and elastic. If kneading by hand, turn the dough out onto a lightly floured surface and knead for 8 to 10 minutes. If the dough is too sticky, add the remaining 1/2 cup of flour, one tablespoon at a time.
- First Rise: Lightly grease a large bowl with olive oil. Form your dough into a ball and place it in the bowl, turning it once to coat the top with oil. Cover the bowl with plastic wrap or a clean kitchen towel. Let it rise in a warm, draft-free spot for 60 to 90 minutes, or until it has doubled in size.
- Shape the Breadsticks: Gently punch down the risen dough to release the air. Transfer it to a lightly floured surface and divide it into 12 equal portions. A kitchen scale is your best friend here for perfectly uniform breadsticks. Roll each portion into a rope about 8 to 9 inches long. Place the shaped breadsticks on a large baking sheet lined with parchment paper, leaving a little space between them.
- Second Rise: Cover the baking sheet loosely with a kitchen towel and let the breadsticks rest for another 15 to 20 minutes. They will puff up slightly. While they rest, preheat your oven to 400°F.
- Bake to Perfection: Bake the breadsticks for 12 to 15 minutes, or until they are a beautiful golden brown.
- Add the Topping: While the breadsticks are baking, melt the 1/2 cup of butter in a small bowl. Stir in the 1 teaspoon of garlic powder, 1/2 teaspoon of salt, 1/4 teaspoon of dried rosemary, and 1/4 teaspoon of dried thyme. As soon as the breadsticks come out of the oven, use a pastry brush to generously coat them with the garlic herb butter. Serve them immediately while they’re hot and fresh.
How To Serve Olive Garden Breadsticks
Serving these breadsticks hot from the oven is an absolute must. The warmth makes them impossibly soft, and the garlic herb butter just melts right into every nook and cranny. Of course, the most classic way to serve these beauties is alongside your favorite Italian-inspired dishes.
Imagine a big family-style bowl of spaghetti and meatballs or a creamy chicken alfredo, with a basket of these breadsticks right in the center of the table for dipping and sopping up every last bit of sauce. They are also the perfect companion for a hearty soup. I love serving them with a copycat Zuppa Toscana or a rich, creamy tomato soup. There’s nothing better on a chilly evening.
But don’t feel like you have to stop there! These versatile breadsticks can be the star of the show in other ways too. Here are a few of my favorite creative ways to serve them:
- Build a Dipping Sauce Bar: Set out small bowls of warm marinara sauce, creamy Alfredo sauce, and maybe even a pesto cream cheese dip. Let everyone choose their own dipping adventure. It’s a fun and interactive way to serve an appetizer at a party.
- Turn Them into Sliders: Slice a breadstick in half lengthwise and fill it with a small meatball and some mozzarella cheese for an irresistible meatball slider. You could also do mini chicken parmesan or Italian cold cut sliders.
- Make Gourmet Croutons: If you have any leftovers (which is a big “if”!), slice them into cubes, toss with a little more olive oil, and bake until crispy. They make the most incredible croutons for a Caesar salad.
- Serve with a Charcuterie Board: Instead of crackers, place these warm breadsticks on a board with cured meats, cheeses, olives, and jams. The soft, savory bread is a wonderful contrast to the other textures and flavors.
No matter how you serve them, just make sure you have plenty on hand. I promise you, they will disappear in a flash. A warm basket of these homemade Olive Garden Breadsticks is the very definition of comfort and hospitality.
How To Store & Reuse Olive Garden Breadsticks Leftovers
In the unlikely event that you have leftover breadsticks, storing them properly is key to enjoying them the next day. The most important thing is to keep them from drying out. That soft, pillowy texture is what makes them so special, and we want to preserve that for as long as possible.
Once they have cooled completely to room temperature, place them in an airtight container or a zip-top plastic bag. You can keep them on the counter for up to two days. I would advise against storing them in the refrigerator, as the cold air tends to make bread stale and dry much faster.
When you’re ready to enjoy them again, a little reheating will bring them right back to life. They won’t be quite as perfect as they were fresh from the oven, but they’ll still be mighty delicious. Here are the best ways to warm them up and a few ideas for reusing them:
- In the Oven or Toaster Oven: This is my preferred method. Preheat your oven to 350°F. Wrap the breadsticks loosely in aluminum foil to keep them from getting too brown and to help steam them a bit. Heat for 5 to 7 minutes, or until they are warmed through and soft again.
- In the Air Fryer: If you want them warmed up in a hurry with a slightly crisp exterior, the air fryer is a great option. Place them in the basket in a single layer and heat at 350°F for 2 to 3 minutes.
- In the Microwave: This is the fastest method, but be careful not to overdo it, or they can become tough and chewy. Wrap a breadstick in a slightly damp paper towel and microwave in 15-second intervals until it’s warm.
- Make Quick Garlic Toast: For a tasty reuse idea, slice the breadsticks in half lengthwise. Brush them with a little more melted butter and a sprinkle of Parmesan cheese. Broil for 1 to 2 minutes until the cheese is bubbly and the edges are golden. These are perfect for dipping in soup!
With these tips, you can make sure that not a single one of your delicious homemade breadsticks goes to waste. A quick warm-up and they’re almost as good as new, ready to be enjoyed with another meal or as a simple snack.
Substitutions & Variations For Olive Garden Breadsticks
One of the best things about a solid base recipe like this one is how easy it is to adapt to your tastes or what you happen to have in your pantry. While my version with buttermilk powder and herbs is my family’s favorite, feel free to play around and make it your own! Here are some tried-and-true substitutions and fun variations for these Olive Garden Breadsticks.
Whether you need to accommodate a dietary restriction or you just feel like trying something new, these tweaks can help you customize the recipe perfectly. Just remember that changing ingredients, especially in baking, can sometimes alter the final texture and flavor.
Here are a few ideas to get you started:
- Flour Swaps: For a heartier, nuttier flavor, you can substitute up to half of the all-purpose flour with whole wheat flour. If you want an even chewier breadstick, using bread flour in place of all-purpose flour works beautifully, as it has a higher protein content.
- Make Them Dairy-Free: To make this recipe dairy-free, simply omit the buttermilk powder from the dough. They will still be wonderfully soft and delicious. For the topping, use a high-quality plant-based butter substitute in place of the dairy butter.
- Sweetener Options: If you prefer not to use granulated sugar, you can substitute it with an equal amount of honey or maple syrup. Just be aware that this might add a subtle flavor change to the dough.
- Yeast Variations: If you only have instant yeast (also called rapid-rise yeast), you can use that instead of active dry yeast. The good news is you can skip the proofing step and just mix it in with the flour and other dry ingredients.
- Get Creative with Toppings: The garlic butter is just the beginning! After brushing on the butter, sprinkle the hot breadsticks with grated Parmesan cheese for a cheesy crust. Or, for a little kick, add a pinch of red pepper flakes to the butter mixture. Everything bagel seasoning is another fantastic option for a savory, crunchy topping.
Don’t be afraid to experiment. You could add different herbs to the butter, like parsley or oregano, or even a little bit of finely grated lemon zest for a bright, fresh twist. Cooking is all about making things you and your family will love, so have fun with it!

Easy, Homemade Olive Garden Breadsticks (Copycat Recipe)
Ingredients
- For the Breadstick Dough:
- Warm Water: 1 1/2 cups. It should feel like a warm bath, around 110°F. If it's too hot, it will kill the yeast.
- Active Dry Yeast: 2 1/4 teaspoons (which is one standard packet).
- Granulated Sugar: 2 tablespoons. This not only feeds the yeast but also adds a touch of sweetness to the dough, just like the original.
- Olive Oil: 2 tablespoons. Use a decent quality extra virgin olive oil for the best flavor.
- Salt: 1 1/2 teaspoons. I prefer using fine sea salt for bread making.
- All-Purpose Flour: 4 to 4 1/2 cups, plus more for dusting. You can also use bread flour if you want an even chewier breadstick.
- Buttermilk Powder: 2 tablespoons. This is my secret weapon! It adds a wonderful tenderness and a slight tang to the dough that really makes it special. You can find it in the baking aisle near the powdered milk.
- For the Garlic Herb Topping:
- Unsalted Butter: 1/2 cup (1 stick), melted. Using unsalted butter lets you control the saltiness of the final product.
- Garlic Powder: 1 teaspoon. Don't be shy with this! It's essential for that classic flavor.
- Salt: 1/2 teaspoon. A coarse sea salt or kosher salt is lovely here for a little texture.
- Dried Rosemary: 1/4 teaspoon, lightly crushed between your fingers.
- Dried Thyme: 1/4 teaspoon. This herb pairing is what gives the topping its signature twist.
Instructions
- Activate the Yeast: In the bowl of a stand mixer (or a large mixing bowl), combine the 1 1/2 cups of warm water, 2 tablespoons of sugar, and 2 1/4 teaspoons of active dry yeast. Give it a gentle stir and let it sit for about 5 to 10 minutes. You’re looking for the mixture to become foamy and bubbly on top. This is how you know your yeast is alive and ready to work.
- Mix the Dough: Once the yeast is activated, add the 2 tablespoons of olive oil, 1 1/2 teaspoons of salt, 2 tablespoons of buttermilk powder, and 4 cups of all-purpose flour to the bowl. Using the dough hook attachment on your stand mixer, mix on low speed until a shaggy dough forms. Increase the speed to medium and knead for 5 to 7 minutes, or until the dough is smooth and elastic. If kneading by hand, turn the dough out onto a lightly floured surface and knead for 8 to 10 minutes. If the dough is too sticky, add the remaining 1/2 cup of flour, one tablespoon at a time.
- First Rise: Lightly grease a large bowl with olive oil. Form your dough into a ball and place it in the bowl, turning it once to coat the top with oil. Cover the bowl with plastic wrap or a clean kitchen towel. Let it rise in a warm, draft-free spot for 60 to 90 minutes, or until it has doubled in size.
- Shape the Breadsticks: Gently punch down the risen dough to release the air. Transfer it to a lightly floured surface and divide it into 12 equal portions. A kitchen scale is your best friend here for perfectly uniform breadsticks. Roll each portion into a rope about 8 to 9 inches long. Place the shaped breadsticks on a large baking sheet lined with parchment paper, leaving a little space between them.
- Second Rise: Cover the baking sheet loosely with a kitchen towel and let the breadsticks rest for another 15 to 20 minutes. They will puff up slightly. While they rest, preheat your oven to 400°F.
- Bake to Perfection: Bake the breadsticks for 12 to 15 minutes, or until they are a beautiful golden brown.
- Add the Topping: While the breadsticks are baking, melt the 1/2 cup of butter in a small bowl. Stir in the 1 teaspoon of garlic powder, 1/2 teaspoon of salt, 1/4 teaspoon of dried rosemary, and 1/4 teaspoon of dried thyme. As soon as the breadsticks come out of the oven, use a pastry brush to generously coat them with the garlic herb butter. Serve them immediately while they’re hot and fresh.
5 FAQs About Olive Garden Breadsticks
Here are some straightforward answers to the most common questions I receive about this breadstick recipe.
Why are my Olive Garden breadsticks tough or dense?
A tough or dense breadstick is usually the result of a few common issues with the dough. The most likely culprit is the kneading process. If you don’t knead the dough enough, the gluten network won’t be strong enough to trap the air bubbles created by the yeast, resulting in a dense crumb. On the other hand, over-kneading can make the gluten too tight, leading to a tough breadstick. A good way to check if your dough is perfectly kneaded is the “windowpane test.” Pinch off a small piece of dough and gently stretch it between your fingers. If you can stretch it thin enough to see light through it without it tearing, the gluten is well-developed.
Another reason could be your yeast. If your yeast is old or wasn’t activated properly, it won’t produce enough carbon dioxide to make the dough rise, leaving you with heavy, dense bread. Always check the expiration date and make sure your yeast gets nice and foamy before you proceed. Lastly, adding too much flour can also lead to a dry, tough dough. Stick to the recipe measurements and only add extra flour a tiny bit at a time if the dough is unmanageably sticky.
Can I make the dough for these Olive Garden breadsticks ahead of time?
Absolutely! This is one of my favorite time-saving tricks, especially when I’m planning a big dinner. You can prepare the dough through the first rise and then store it in the refrigerator. After you’ve mixed and kneaded the dough, place it in a greased bowl, cover it tightly with plastic wrap, and pop it in the fridge. The cold temperature will slow down the fermentation process, allowing the dough to develop a more complex flavor.
The dough can be refrigerated for up to 24 hours. When you’re ready to bake, take the bowl out of the refrigerator and let the dough sit on the counter for about 30 to 60 minutes to take the chill off and become easier to handle. Then, simply punch it down, shape your breadsticks, let them go through their short second rise, and bake as directed. It’s a wonderful way to break up the process and get a head start on your meal.
How do I get my copycat Olive Garden breadsticks all the same size?
Getting uniformly sized breadsticks is the secret to even baking and a professional-looking result. While you can certainly eyeball it, the most foolproof method is to use a kitchen scale. After the first rise, press the dough out into a rough rectangle and use a bench scraper or a knife to divide it into 12 pieces. Weigh each piece of dough on the scale to ensure they are all equal. This might seem a little fussy, but it only takes a couple of extra minutes and makes a huge difference.
Once your portions are equal, focus on your rolling technique. Start in the middle of the dough ball and use gentle, even pressure with the palms of your hands to roll it outwards into a rope. Try to keep the pressure consistent along the entire length of the rope to avoid having thick middles and skinny ends. Rolling them on a clean, unfloured countertop can provide a bit of traction to help you shape them more easily. With a little practice, you’ll be rolling perfect breadsticks every time.
What makes these Olive Garden breadsticks taste authentic?
The authentic flavor and texture of Olive Garden’s breadsticks come from a specific balance of elements, which this recipe carefully recreates and enhances. First is the texture. The dough has a relatively high hydration level and includes fat from the olive oil, which contributes to a very soft, tender, and slightly chewy crumb. The double rise is also critical for developing that light, airy interior. A well-risen dough is a happy dough!
Second is the flavor profile. The dough itself has a subtle sweetness from the sugar, which is a key characteristic of the original. This is balanced by the salt in the dough and, most importantly, the savory topping. The generous brushing of garlic butter and salt right after they come out of the oven is non-negotiable for that classic taste. My addition of buttermilk powder deepens the flavor with a slight tang and makes the texture even softer, while the herbs in the butter topping add a homemade touch that makes them taste even better than the restaurant version, in my humble opinion.
Can I freeze these homemade Olive Garden breadsticks?
Yes, you can, and it’s a fantastic way to have fresh-tasting breadsticks on hand whenever you want! You have two options: freezing them after baking or freezing the unbaked, shaped dough. To freeze baked breadsticks, let them cool completely. Do not add the garlic butter topping. Wrap them tightly in plastic wrap and then place them in a freezer-safe bag or container. They can be frozen for up to 3 months. To reheat, let them thaw on the counter for a bit, then wrap them in foil and bake at 350°F for about 10 minutes, or until heated through. Brush with the freshly made garlic butter topping before serving.
To freeze the unbaked dough, shape the breadsticks and place them on a parchment-lined baking sheet. Put the entire sheet in the freezer until the breadsticks are frozen solid. Once frozen, you can transfer them to a freezer bag. When you’re ready to bake, place the frozen breadsticks on a parchment-lined baking sheet, cover them, and let them thaw and rise in a warm place. This will take longer than a fresh second rise, about 1 to 2 hours. Once they look puffy, bake as directed. This method yields results that are almost indistinguishable from freshly made breadsticks.
Try These Recipes Next
If you loved this homemade version of a restaurant classic, you’ll definitely want to try some of my other popular copycat recipes.
- Easy Homemade Olive Garden Zuppa Toscana (Copycat Recipe): This is my original take on the classic, perfect for when you don’t have fennel on hand.
- Easy Homemade Olive Garden Alfredo Sauce (Copycat Recipe): For another night when you’re craving some serious Italian-American comfort food, this rich and creamy Alfredo sauce is a must-try.
- Copycat Wendy’s Chili: Rich, meaty, and packed with beans, this chili is pure comfort food. It’s a hearty lunch that will definitely stick to your ribs.
I hope you enjoy making these favorites as much as my family and I do!