
Miso Pizza Dough: The Secret Ingredient for a Perfectly Chewy Crust
This is, hands down, the best pizza dough recipe you will ever make.
I don’t make that claim lightly, y’all. For years, Friday night has been pizza night in our house. I’ve tried countless recipes, from super-quick versions to complicated, multi-day affairs. They were all fine, but none of them ever had that special something, that restaurant-quality flavor I was chasing.
Then my dear friend Carter, a chef down in Charleston, came to visit. I told him we were having a casual pizza night, and he showed up with a small container of white miso paste. I must have given him a sideways glance, because he just laughed and said, “Trust me, Julie. Just a spoonful.”
So, I trusted him. I whisked a tablespoon of that savory paste into the warm water before adding the yeast. The rest of the process was the same, but the result was anything but. The crust that came out of my oven was spectacular. It was golden brown, perfectly chewy, and had this incredible depth of flavor. It was a savory, almost cheesy note that was impossible to place but utterly addictive.
That little spoonful of miso was the secret. It enhances all the other flavors, creating a crust that’s not just a vehicle for toppings, but the star of the show. This miso pizza dough is my new standard, and I have a feeling it’s about to become yours, too.
Why This Pizza Dough Recipe Works
Making pizza dough from scratch can feel intimidating, but it’s one of the most rewarding kitchen projects you can tackle. At its heart, it’s a simple combination of flour, water, yeast, and salt. The magic is in the technique and the quality of the ingredients. Homemade pizza has a freshness and texture that you just can’t get from a store-bought crust.
This recipe builds on a classic foundation that has been perfected over generations. We use high-protein bread flour for a satisfying chew and a bit of semolina for that authentic, crispy pizzeria-style bottom. A slow, cold fermentation period in the refrigerator is key. This step isn’t just for convenience, it’s where the real flavor development happens, creating complex, tangy notes in the dough.
But the real game-changer here is the white miso paste. This is my secret weapon. Miso is a fermented soybean paste that is a powerhouse of umami, the fifth taste known for its savory, rich, and complex flavor. When added to the pizza dough, it works in the background, not to make the crust taste Japanese, but to amplify the natural, wheaty sweetness of the flour and the tangy flavor from the yeast.
The enzymes in the miso also help break down the starches and proteins in the flour, resulting in a crust that is more tender and browns beautifully in the oven. It adds a subtle, savory depth that will have everyone asking for your secret. It’s a simple twist that elevates a good pizza dough into a truly unforgettable one.
Ingredients for Pizza Dough
The beauty of a great pizza dough is its reliance on a few simple, high-quality ingredients. While the list is short, each component plays a critical role in creating the perfect texture and flavor for your crust. And of course, we have one little ingredient that makes all the difference.
- 1 ⅓ cups (320ml) warm water (105-115°F / 40-46°C)
- 1 tablespoon white miso paste
- 2 ¼ teaspoons (1 packet) instant yeast
- 1 teaspoon honey or granulated sugar
- 4 cups (500g) bread flour or “00” flour
- ¼ cup (40g) fine semolina flour, plus more for dusting
- 2 teaspoons fine sea salt
- 2 tablespoons extra-virgin olive oil, plus more for the bowl
The undeniable star of this recipe is the white miso paste. Please don’t skip this. You’ll want to find white miso, sometimes labeled “shiro miso,” which is milder and slightly sweeter than its red or yellow counterparts. It provides that perfect savory umami kick without overpowering the dough.
For the flour, you have a choice. Bread flour has a higher protein content, which develops more gluten and gives your crust a wonderfully chewy, foldable, New York-style texture. Alternatively, Italian “00” flour is ground extra-fine, creating a crust that’s incredibly light and tender with a delicate crispness, just like a classic Neapolitan pizza. Both are excellent choices.
Don’t overlook the semolina flour. We use a little in the dough itself for texture, but its main job is for dusting. It acts like tiny ball bearings, helping your pizza slide effortlessly from the peel into the hot oven and giving the bottom of your crust a fantastic, subtle crunch. Finally, a good extra-virgin olive oil adds flavor and softness to the dough, so use one you enjoy the taste of.
Step-by-Step Instructions For Making Pizza Dough
Follow these steps closely, and you’ll be well on your way to crafting the best homemade pizza you’ve ever had. We’ll walk through everything from activating the yeast to stretching the dough like a pro.
1. Activate the Yeast and Miso
In the large bowl of your stand mixer, pour in the warm water. It’s important that the water is like a warm bath, between 105 and 115 degrees Fahrenheit. Too hot and it will kill the yeast, too cool and it won’t wake up. Add the white miso paste and whisk it vigorously until it’s completely dissolved into the water. Sprinkle the yeast and honey over the surface, give it a little swirl with the whisk, and let it sit for about 5 to 10 minutes. You’re looking for the mixture to become foamy and fragrant, which is the sign your yeast is alive and ready to work.
2. Combine the Dry Ingredients
While the yeast is blooming, grab a separate medium-sized bowl. Add your bread flour or “00” flour, the semolina flour, and the fine sea salt. Give these a good whisk to combine everything evenly. This step ensures you don’t get pockets of salt in your final dough.
3. Mix the Dough
Pour the dry flour mixture and the two tablespoons of olive oil into the bowl with the foamy yeast mixture. If you’re using a stand mixer, attach the dough hook and mix on low speed until a shaggy dough forms and you don’t see any dry flour at the bottom of the bowl. If you’re mixing by hand, use a sturdy wooden spoon or spatula for this part.
4. Knead Until Smooth
Once the dough has come together, increase the mixer speed to medium-low and let it knead for 6 to 8 minutes. The dough is ready when it’s smooth, elastic, and pulls away cleanly from the sides of the bowl. To test it, you can poke it with your finger, it should spring back slowly. If kneading by hand, turn the dough out onto a lightly floured countertop and knead for 8 to 10 minutes until it feels smooth and supple.
5. Let the Dough Rise
Take a separate large, clean bowl and drizzle a little olive oil in it. Form your kneaded dough into a smooth ball and place it in the oiled bowl, turning it over once to coat the top with oil. This prevents a skin from forming. Cover the bowl tightly with plastic wrap or a clean, damp kitchen towel. Find a warm, draft-free spot in your kitchen and let the dough rise for about 1 to 1.5 hours, or until it has doubled in size.
6. Divide and Begin the Cold Ferment
Gently press down on the risen dough to deflate it. Transfer it to a lightly floured surface and divide it into two equal portions. Form each piece into a tight ball by tucking the edges underneath. For the absolute best flavor, we’re going to let this dough cold ferment. Place each dough ball into a separate oiled, airtight container or a large zip-top bag and pop them in the refrigerator for at least 24 hours, and up to 3 days. This slow ferment develops incredible flavor.
7. Prepare for Baking
About 2 hours before you plan to make your pizza, take the dough out of the fridge. Leave it covered on the counter to come to room temperature. This relaxes the gluten, making it much easier to stretch. About 45 minutes before baking, place your pizza stone or steel in the oven and preheat it to its highest setting, usually between 500 and 550 degrees Fahrenheit. Getting your baking surface screaming hot is essential for a crispy crust.
8. Stretch and Bake
Dust your work surface and a pizza peel with semolina flour. Take one ball of dough and gently press it out with your fingertips, starting from the center and working your way out. Avoid using a rolling pin, as it will crush all the beautiful air bubbles. Stretch the dough into a 12-inch circle, leaving the outer edge a little thicker to create a nice crust. Transfer the stretched dough to the prepared peel, add your sauce and toppings, and slide it onto the hot stone in the oven. Bake for 6 to 10 minutes, until the crust is golden and the cheese is bubbling. Repeat with the second dough ball and enjoy!
How To Serve Pizza Dough
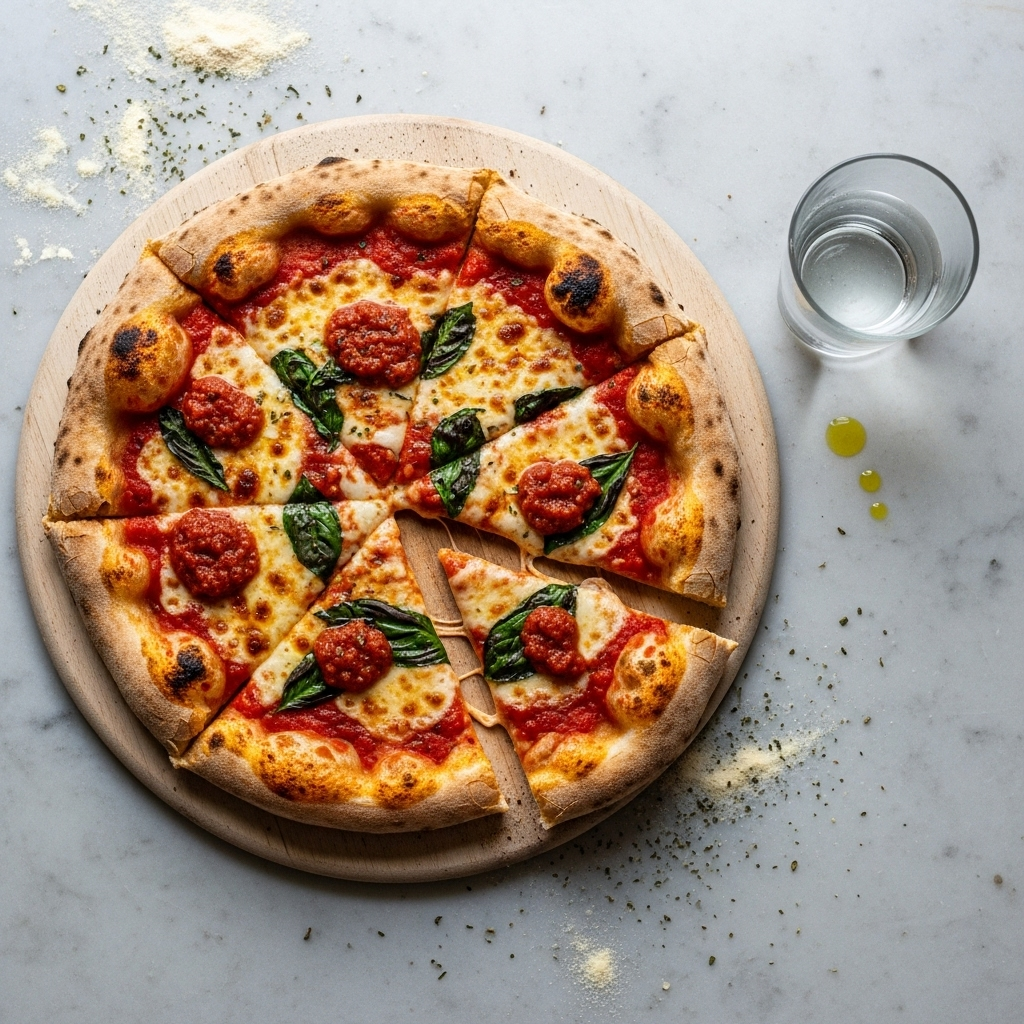
Of course, the most obvious and beloved way to use this incredible pizza dough is to make, well, pizza! It’s a perfect canvas for any toppings your heart desires. You can go classic with a margherita, loaded with fresh mozzarella, basil, and a simple tomato sauce. Or pile it high with pepperoni, mushrooms, and peppers. Some of our family favorites include a white pizza with ricotta, garlic, and spinach, or a sweet and savory combination of prosciutto, fig jam, and arugula.
But don’t feel like you have to stop there. This versatile dough is the starting point for so many other delicious creations that are perfect for appetizers, snacks, or even a main course. Think beyond the pie!
Here are a few creative ways to serve your pizza dough:
- Stromboli or Calzones: Load up one half of a stretched dough round with your favorite fillings like ricotta, mozzarella, sausage, and peppers. For a calzone, fold it into a half-moon and crimp the edges. For a stromboli, roll it up like a log. Brush with an egg wash and bake until golden brown.
- Garlic Knots: Divide one of the dough balls into smaller pieces, roll them into ropes, and tie them into simple knots. Brush generously with melted butter mixed with minced garlic, parsley, and a pinch of salt before baking. Serve with a side of marinara for dipping.
- Cheesy Breadsticks: Press the dough into a rectangular shape on a baking sheet. Brush with olive oil, sprinkle with garlic powder, Italian seasoning, and a thick layer of shredded mozzarella and parmesan cheese. Bake until bubbly and golden, then slice into sticks.
- Grilled Pizza: For a smoky, charred flavor perfect for summertime, try grilling your pizza. Stretch the dough, brush with oil, and grill for a couple of minutes on one side. Flip it, quickly add your toppings to the cooked side, and continue grilling until the crust is cooked through and the cheese is melted.
No matter how you shape it or top it, this dough provides a flavorful, wonderfully textured base that is sure to impress everyone at your table.
How To Store & Reuse Pizza Dough Leftovers
One of the best things about this pizza dough recipe is that it makes two crusts, which is perfect for planning ahead. Properly storing your dough, whether it’s unbaked or already transformed into a delicious pizza, is key to enjoying it later.
For unbaked dough, you have a couple of wonderful options. The cold fermentation process in the recipe already involves storing the dough in the refrigerator. You can keep the airtight containers of dough in the fridge for up to three days. In fact, many people find the flavor is even better on day two or three. If you want to store it for longer, the freezer is your best friend.
- Freezing Pizza Dough: After the first rise, divide the dough into balls. Lightly coat each ball with olive oil and place it in an individual zip-top freezer bag. Squeeze out as much air as possible before sealing. The dough can be frozen for up to 3 months.
- Thawing Pizza Dough: When you’re ready to use it, transfer the frozen dough from the freezer to the refrigerator and let it thaw overnight. Then, let it sit on the counter for about 2 hours to come to room temperature before stretching.
If you happen to have leftover baked pizza, please promise me you won’t put it in the microwave. Microwaving turns that perfect crust into a soggy, chewy disappointment. The goal is to reheat the pizza while re-crisping the crust. My favorite method is using a skillet on the stovetop. Place a slice in a dry, non-stick skillet over medium heat for a couple of minutes until the bottom is crispy. Then, add a few drops of water to the pan (away from the pizza), cover it with a lid, and let it steam for another minute to melt the cheese perfectly. An air fryer or a hot oven also work wonders for bringing leftover pizza back to life.
Substitutions & Variations For Pizza Dough
While I believe this pizza dough recipe is just about perfect as written, I know that sometimes you need to work with what you have in your pantry, or you just feel like experimenting. This dough is wonderfully forgiving and provides a great base for your own creative twists.
If you’re looking to make some simple swaps or add a little extra something, here are a few ideas that work beautifully. Feel free to mix and match to find your family’s new favorite combination.
- Flour Swaps: If you don’t have bread flour or “00” flour, you can certainly use all-purpose flour. The crust will be a little less chewy and more tender, but still delicious. For a heartier, nuttier flavor, try substituting up to 1 cup of the bread flour with whole wheat flour.
- Sweetener Options: The honey or sugar is mainly food for the yeast. You can easily substitute it with an equal amount of maple syrup or agave nectar if that’s what you prefer.
- Herb Infusions: For a crust that’s bursting with extra flavor, try adding 1 to 2 teaspoons of dried herbs directly into your flour mixture. Dried oregano, basil, or a good Italian seasoning blend are all fantastic choices. A teaspoon of garlic powder is also a welcome addition.
- For a Cheesier Crust: Mix about ¼ cup of finely grated Parmesan or Pecorino Romano cheese in with your dry ingredients. It will bake right into the crust, adding another layer of salty, savory goodness that complements the miso beautifully.
Remember, the heart of this recipe is the technique and that special touch of miso. As long as you follow the steps for kneading and fermentation, you’ll end up with a fantastic foundation for your pizza night creations, no matter which little variations you choose to try.
The Best Pizza Dough (With a Secret Ingredient!)
Description: A perfectly chewy and flavorful homemade pizza dough with a secret ingredient, white miso paste, that adds incredible umami and depth. This recipe uses a cold fermentation process for the best possible texture and taste.
Yield: 2 12-inch pizzas | Category: Dough, Main Course | Cuisine: Italian-American
Prep Time: 20 minutes + 25 hours rising | Cook Time: 10 minutes
Ingredients
- 1 ⅓ cups (320ml) warm water (105-115°F / 40-46°C)
- 1 tablespoon white miso paste
- 2 ¼ teaspoons (1 packet) instant yeast
- 1 teaspoon honey or granulated sugar
- 4 cups (500g) bread flour or “00” flour
- ¼ cup (40g) fine semolina flour, plus more for dusting
- 2 teaspoons fine sea salt
- 2 tablespoons extra-virgin olive oil, plus more for the bowl
Instructions
- In a large bowl, whisk warm water and miso paste until dissolved. Sprinkle yeast and honey over top, stir gently, and let stand for 5-10 minutes until foamy.
- In a separate bowl, whisk together bread flour, semolina, and salt.
- Add flour mixture and olive oil to the wet ingredients. Mix until a shaggy dough forms.
- Knead with a dough hook or by hand for 6-10 minutes until smooth and elastic.
- Place dough in an oiled bowl, cover, and let rise in a warm place for 1-1.5 hours, or until doubled.
- Punch down dough, divide in two, and form into balls.
- For best results, place dough balls in oiled, airtight containers and refrigerate for 24 hours to 3 days.
- Two hours before baking, remove dough from fridge to rest at room temperature.
- Preheat oven with a pizza stone to 500-550°F.
- Stretch one dough ball into a 12-inch round, top as desired, and bake for 6-10 minutes until golden and bubbly. Repeat with second dough ball.
Notes
The 24-hour cold fermentation is highly recommended for the best flavor and texture, but if you’re short on time, you can proceed with baking after the initial 1.5-hour rise.
Servings: 8 slices | Calories: 295 kcal | Fat: 6g | Carbohydrates: 51g | Protein: 8g
5 FAQs About Pizza Dough
Here are some straightforward answers to the most common questions I receive about this pizza dough recipe.
Can I make this pizza dough without a stand mixer?
Yes, absolutely! People have been making incredible pizza dough by hand for centuries, long before stand mixers were a staple in home kitchens. While a mixer makes the kneading process faster and less labor-intensive, you can achieve the exact same results with a little bit of elbow grease.
To do so, you’ll start by mixing the ingredients in a large bowl with a wooden spoon until the shaggy dough forms. Then, turn the dough out onto a lightly floured, clean surface. Knead the dough by pressing the heel of your hand into it, pushing it forward, and then folding it over on itself. Rotate the dough a quarter turn and repeat. Continue this push, fold, and turn motion for about 8 to 10 minutes. You’ll know it’s ready when the dough transforms from a sticky, uneven mass into a smooth, elastic, and supple ball that springs back when you gently poke it. It’s a fantastic workout and a really satisfying process.
Why is my pizza dough not rising?
This is the most common issue in any yeast-based recipe, and it’s almost always due to one of two things: your yeast or the temperature. First, your yeast may no longer be active. Yeast is a living organism, and it can expire. Always check the date on the packet. If you’re unsure, you can test it by putting it in the warm water with the honey before adding any other ingredients. If it doesn’t get foamy within 10 minutes, you’ll need to start over with fresh yeast.
The second culprit is temperature. The water used to activate the yeast must be warm, between 105-115°F. If it’s too hot (over 120°F), it will kill the yeast instantly. If it’s too cold, the yeast won’t become active. Likewise, the dough needs a warm, draft-free environment for its first rise. If your kitchen is chilly, try placing the bowl of dough in an oven that is turned off but has the light on. The gentle heat from the bulb creates a perfect proofing box.
What is the purpose of the cold fermentation for this pizza dough?
The cold fermentation step, where the dough rests in the refrigerator for one to three days, is truly what separates good pizza dough from great pizza dough. While it might seem like just a waiting game, there is a lot of science happening during this time. The cold temperature significantly slows down the yeast’s production of carbon dioxide (which causes the dough to rise), but it doesn’t stop the fermentation process altogether.
This slow, cold ferment allows enzymes in the yeast and flour to develop much more complex and nuanced flavors. You’ll get a slightly tangy, almost sourdough-like character that you simply cannot achieve with a quick, same-day rise. Beyond flavor, this process also improves the dough’s texture. The gluten gets a long time to relax, making the dough easier to stretch without snapping back, and it results in a crust with a better chew, more beautiful browning, and those lovely large air pockets (the “leopard-spotting”) characteristic of artisanal pizza.
Can I freeze this pizza dough?
Yes, this pizza dough freezes beautifully, which makes it incredibly convenient for future pizza nights. The best time to freeze the dough is after the first rise and after you’ve divided it into two balls. To freeze it properly, lightly coat each dough ball with a thin layer of olive oil. This prevents it from drying out and forming a tough skin in the freezer.
Place each oiled ball into its own individual zip-top freezer bag. Before you seal the bag, be sure to press out as much air as possible to prevent freezer burn. Label the bags with the date, and they can be stored in the freezer for up to three months. When you’re ready to make pizza, simply move the dough from the freezer to the refrigerator and let it thaw slowly overnight. Then, about two hours before you want to bake, take it out of the fridge and let it rest on the counter to come to room temperature, just as the recipe directs.
What makes this miso pizza dough different from regular pizza dough?
The simple addition of one tablespoon of white miso paste is the secret that elevates this pizza dough from a standard recipe to something truly special. Miso is a traditional Japanese seasoning made from fermented soybeans, and it is a powerhouse of savory, complex flavor known as umami. When you add it to the pizza dough, it works its magic in the background.
It does not make the crust taste distinctly like miso or Asian food. Instead, it deepens and enhances the natural flavors of the wheat and the yeast. It adds a subtle, savory richness that tastes almost cheesy or nutty, making the crust itself a destination, not just a base for toppings. The enzymes in the miso also contribute to a more tender crumb and help the crust achieve a more uniform and beautiful golden-brown color in the oven. It’s a simple, unexpected ingredient that adds a layer of complexity and will have your family and friends raving about your pizza-making skills.
Try These Recipes Next
Now that you’ve mastered this incredible homemade pizza dough, you’re ready to tackle all sorts of delicious kitchen projects. If you’re looking for more inspiration for your weekly meal plan, I’ve got you covered. This dough is a perfect starting point for a fun family dinner, a budget-friendly meal, or even a creative breakfast idea.
Here are a few collections from the blog that I think you’ll love exploring next:
- 110 Easy Dinner Ideas That Taste Great: When you need to get a delicious dinner on the table without a fuss, this list is your best friend. It’s packed with simple, crowd-pleasing recipes for any night of the week.
- Cheap Meal Ideas & Budget Friendly Recipes: Making homemade pizza is a fantastic way to save money, and this list has even more ideas for delicious meals that are gentle on your wallet.
- Easy Breakfast Ideas & Recipes: Who says pizza is just for dinner? Try topping this dough with scrambled eggs, bacon, and cheese for an amazing breakfast pizza the whole family will go crazy for. This collection has plenty of other morning inspiration, too!