
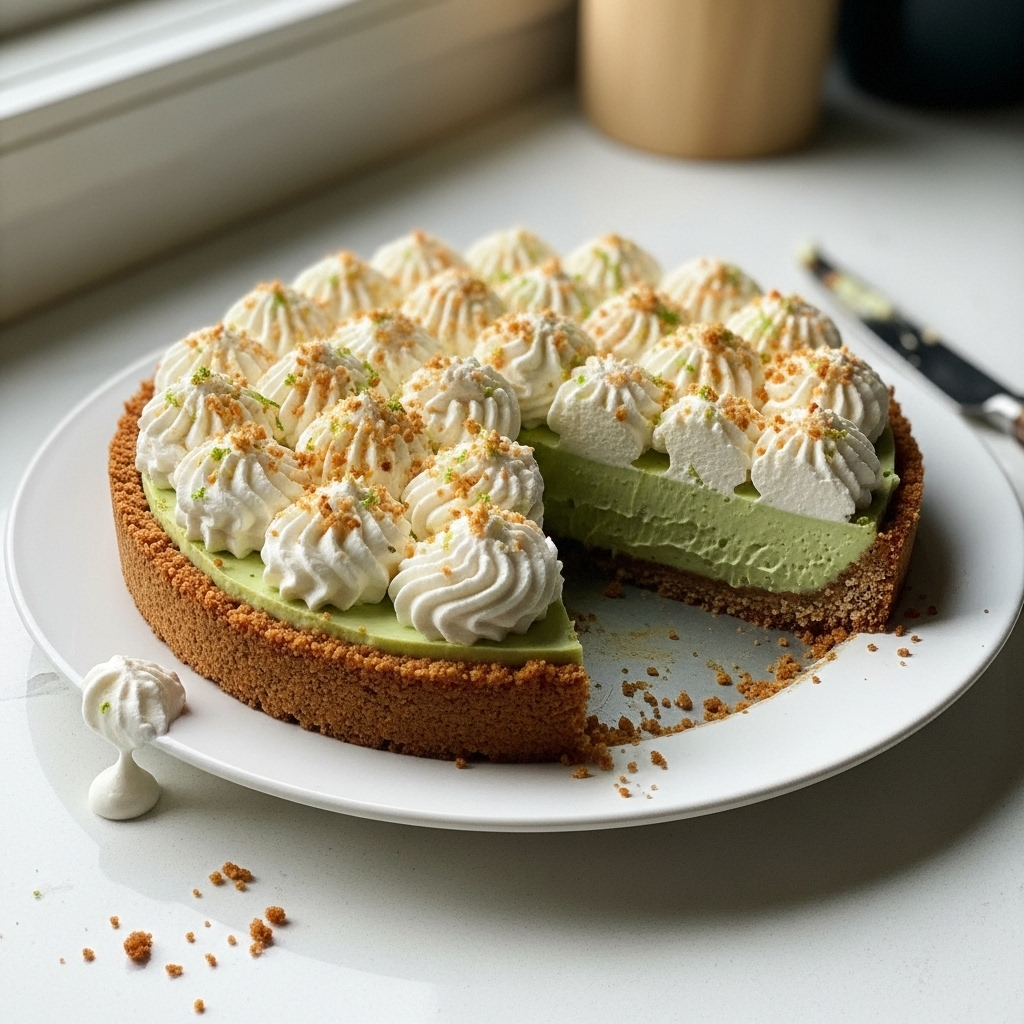
Key Lime Pie with a Toasted Coconut Macadamia Crust
This is, without a doubt, the best Key Lime Pie recipe you will ever make.
My first real taste of Key Lime Pie was on a little anniversary trip my husband and I took down to the Florida Keys. We stopped at a roadside shack that promised the “World’s Best” slice, and goodness, it was close. It was perfectly tart, wonderfully sweet, and creamy as all get out. The memory of that perfect citrusy bite, with the warm sun on my face, stuck with me long after we got home.
Of course, being me, I couldn’t just leave well enough alone. That classic pie was a perfect 10, but I started dreaming about how I could make it a 12. My mind wandered to other tropical flavors that would feel right at home with that bright, zesty lime.
That’s when it hit me. Toasted coconut. And for a little something extra, crunchy, buttery macadamia nuts. I swapped some of the graham crackers in the crust for toasted coconut and finely ground macadamia nuts. Then, I folded more of that golden-brown toasted coconut right into the whipped cream topping. The result was pure magic. It’s that same classic Key Lime Pie we all love, but with a warm, nutty, tropical whisper that makes every bite an absolute experience. It became my signature dessert for summer cookouts, and now, I’m so excited to share it with y’all.
Why This Key Lime Pie Recipe Works
Key Lime Pie is a true American classic, born out of necessity and ingenuity in Key West, Florida, in the late 19th century. Before refrigeration was common, cooks relied on shelf stable ingredients like canned sweetened condensed milk. When combined with the acidic juice of the native Key limes and egg yolks, a magical chemical reaction occurred, thickening the mixture without any baking at all. This simple, refreshing dessert quickly became a regional icon.
The beauty of the original is its simplicity. The tartness of the limes is perfectly balanced by the rich sweetness of the condensed milk, all held together by a simple graham cracker crust. It’s a study in contrasts, and that’s why it has remained so popular for over a century. It’s the official state pie of Florida for a reason.
So, why mess with perfection? Well, I believe in enhancing it. My twist takes this beloved classic and gives it a subtle, yet unforgettable, tropical upgrade. The secret is the Toasted Coconut and Macadamia Nut Crust. By toasting the coconut, we bring out a deep, nutty sweetness that you just don’t get straight from the bag. The roasted, salted macadamia nuts add a rich, buttery crunch and a hint of salt that cuts through the sweetness of the filling.
This isn’t just a crust, it’s a foundational layer of flavor that complements the lime beautifully. The tropical notes of coconut and macadamia elevate the pie from a simple dessert to something that feels a little more special, a little more vacation-like. We even carry that flavor through to the topping by folding toasted coconut into the whipped cream. It’s this thoughtful layering of flavors and textures that makes this Key Lime Pie recipe a true showstopper.
Ingredients for Key Lime Pie
The magic of this recipe comes from a few simple, high quality ingredients working together in perfect harmony. While the filling is classic, the crust and topping are where we add that special touch that will have everyone asking for the recipe. The star players here are definitely the toasted coconut and macadamia nuts.
Here is exactly what you will need to gather from your pantry and fridge:
For the Toasted Coconut-Macadamia Crust:
- 1 cup graham cracker crumbs
- ⅔ cup sweetened shredded coconut, toasted
- ½ cup roasted, salted macadamia nuts
- ¼ cup granulated sugar
- 6 tablespoons unsalted butter, melted
For the Key Lime Filling:
- 4 large egg yolks
- 1 (14-ounce) can sweetened condensed milk
- ⅔ cup freshly squeezed Key lime juice
- 2 tablespoons fresh lime zest
For the Toasted Coconut Whipped Cream:
- 1 cup heavy whipping cream, very cold
- 3 tablespoons powdered sugar
- ½ teaspoon vanilla extract
- ⅓ cup toasted sweetened shredded coconut, reserved from the crust ingredients
- Lime zest for garnish
A quick note on a few key ingredients. For the lime juice, please, please use freshly squeezed if you can. Bottled juice, even Key lime juice, can have a slightly bitter or metallic taste. The fresh juice is brighter and more fragrant. If you can’t find Key limes, Persian limes (the regular kind in the grocery store) will work, but the flavor will be slightly less intense and aromatic. You may need a few more to get enough juice.
For the macadamia nuts, using a roasted and salted variety adds a wonderful depth of flavor to the crust. It creates a perfect sweet and salty balance against the filling. If you only have raw macadamia nuts, just toast them for a few minutes with the coconut to bring out their flavor before processing them.
Step-by-Step Instructions For Making Key Lime Pie
Making this pie is a breeze, I promise. We will build it in three simple stages: the crust, the filling, and the topping. Just follow these steps, and you will have a perfect, tropical inspired Key Lime Pie to share.
Step 1: Toast the Coconut and Prepare the Oven
First things first, preheat your oven to 350°F (175°C). While it’s heating up, spread your sweetened shredded coconut evenly on a baking sheet. Pop it in the oven for 5 to 7 minutes. The key here is to watch it like a hawk. Coconut can go from perfectly golden to burnt in a flash. I like to set a timer for 3 minutes, give it a good stir, and then watch it for the last couple of minutes until it’s fragrant and a beautiful light brown. Once it’s done, take it out and set it aside to cool completely. Don’t forget to reserve about ⅓ cup of this toasted goodness for our whipped cream later on.
Step 2: Make and Bake the Crust
In the bowl of a food processor, combine the graham cracker crumbs, the rest of your toasted coconut, the roasted macadamia nuts, and the granulated sugar. Pulse everything together until the nuts are finely ground and it all looks like a uniform, sandy mixture. Now, pour in your melted butter and pulse again just until it’s all combined and looks like wet sand. Don’t overmix it. Press this mixture firmly and evenly into the bottom and up the sides of a 9-inch pie plate. I use the bottom of a flat measuring cup to get it really packed in there. Bake the crust for 10 to 12 minutes until it’s fragrant and lightly browned. Let it cool on a wire rack while you make the filling.
Step 3: Mix the Key Lime Filling
This part is so simple. In a medium bowl, whisk your egg yolks and lime zest together for a couple of minutes until the mixture turns pale and gets a little fluffy. This helps ensure a smooth, creamy texture. Next, whisk in the can of sweetened condensed milk until it’s completely incorporated. Now, while you’re still whisking, slowly and steadily pour in the fresh Key lime juice. Keep whisking until the filling is smooth. You’ll notice it starts to thicken up right away, that’s that magic I was talking about.
Step 4: Bake and Chill the Pie
Pour that luscious filling into your slightly cooled, pre-baked crust. Smooth the top with a spatula. Bake for 15 to 18 minutes. The way to tell it’s done is that the edges will be set, but the very center will still have a little jiggle to it when you gently nudge the pan. It should not look liquidy, just a slight wobble. Let the pie cool completely on a wire rack for at least an hour. Then, cover it loosely with plastic wrap (don’t let the wrap touch the surface!) and pop it in the refrigerator for at least 4 hours, but overnight is even better. This chilling time is crucial for the pie to set up perfectly firm.
Step 5: Prepare the Topping and Serve
Just before you are ready to serve, it’s time to whip up the topping. In a large, chilled bowl (I like to pop my bowl and beaters in the freezer for 10 minutes), beat the very cold heavy cream, powdered sugar, and vanilla extract with an electric mixer. Start on low and gradually increase to high speed. Beat until stiff peaks form. That means when you lift the beaters out, the cream holds its shape. Gently fold in that ⅓ cup of reserved toasted coconut. You can either pipe this glorious whipped cream onto your pie or just dollop it on for a more rustic look. A final sprinkle of lime zest on top makes it look extra special. Slice and serve immediately!
How To Serve Key Lime Pie
Serving this Key Lime Pie is the best part, because you get to see everyone’s eyes light up when they take that first bite. Because this pie is such a stunner on its own, you don’t need to do much, but a few simple touches can make it feel extra special for any occasion.
For a casual family dinner or a backyard barbecue, I love to serve it straight from the pie plate. I’ll add big, generous dollops of the toasted coconut whipped cream on top for a beautiful, rustic look. A little extra lime zest sprinkled over the top of the whipped cream adds a pop of color and a fresh burst of citrus aroma right before serving. It’s simple, homey, and lets the pie speak for itself.
If you’re hosting a more formal get together or want to make individual servings, you can get a little fancier. A few ideas include:
- Piped Perfection: Use a piping bag fitted with a star tip to create beautiful rosettes of the toasted coconut whipped cream around the edge of the pie or on top of individual slices. This gives it a professional, bakery quality finish.
- Garnish with Style: Place a very thin slice of lime on top of the whipped cream for each slice. You can even add a few extra flakes of toasted coconut or a single macadamia nut for an elegant touch.
- Mini Pies: This recipe can easily be adapted for mini tartlet pans. They make for adorable, single serving desserts that are perfect for parties. Just reduce the baking time for the crusts and the filling accordingly.
No matter how you present it, this pie should always be served chilled. The cold temperature keeps the filling firm and makes the tart lime flavor incredibly refreshing. It’s the perfect sweet and tangy ending to a heavy meal or a delightful treat on a hot summer day.
How To Store & Reuse Key Lime Pie Leftovers
While I doubt you’ll have much of this Key Lime Pie leftover, on the off chance you do, proper storage is key to keeping it delicious. The filling and the crust have different textures, so you want to protect them to avoid a soggy bottom.
The best way to store the pie is in the refrigerator. If you can, use a pie carrier or a container with a tall lid to prevent anything from touching the whipped cream topping. If you don’t have one, you can loosely tent it with plastic wrap or aluminum foil. A good trick is to insert a few toothpicks around the edge of the pie to hold the wrap up and away from the topping. Your leftover pie will keep well in the fridge for up to 3 days. After that, the crust may start to lose its crispness.
If you’re looking for longer storage or want to reuse the components, here are a few ideas:
- Freezing the Pie: You can absolutely freeze this Key Lime Pie, but I recommend doing so without the whipped cream topping. Toppings with cream don’t always freeze and thaw well. Let the pie chill completely in the fridge, then wrap it tightly in a layer of plastic wrap, followed by a layer of aluminum foil. It can be frozen for up to one month. To serve, thaw it overnight in the refrigerator, then prepare a fresh batch of the toasted coconut whipped cream to top it with before serving.
- Leftover Filling Parfaits: If you have leftover filling, you can create a deconstructed pie parfait. Layer the filling in small glasses or jars with crumbled graham crackers (or the leftover crust), and top with the coconut whipped cream. It’s a fun and easy way to enjoy the same flavors in a new format.
Properly stored, this pie is just as delightful on day two or three. The flavors have even more time to meld together, making each bite just as refreshing and satisfying as the first. Just be sure to keep it cold until the moment you serve it.
Substitutions & Variations For Key Lime Pie
One of the things I love most about cooking is making a recipe my own. While I think this version is just about perfect, there are plenty of ways you can tweak it to suit your tastes, your dietary needs, or what you happen to have in your pantry. This Key Lime Pie recipe is a wonderful canvas for creativity.
Feel free to experiment with the crust. That’s where you can make the biggest impact with the smallest change. The filling is a classic for a reason, but the base and topping are ripe for personalization. Just remember that changing ingredients can affect baking times and final texture, so keep an eye on things.
Here are a few substitutions and variations you might want to try:
- Nut Variations: If you don’t have macadamia nuts, you can substitute them with pecans, walnuts, or even almonds for a different nutty flavor profile. Just be sure to toast them to bring out their best flavor before adding them to the food processor. For a nut free version, simply omit the nuts and use 1 ½ cups of graham cracker crumbs instead.
- Citrus Swaps: While it wouldn’t technically be a “Key Lime” Pie anymore, this recipe is fantastic with other citrus fruits. Try using Meyer lemon juice for a sweeter, more floral version, or even grapefruit juice for a sophisticated, slightly bitter edge.
- Gluten-Free Crust: To make this pie gluten-free, simply use your favorite gluten-free graham cracker style cookies for the crust. The rest of the ingredients are naturally gluten-free, making this an easy swap.
- Spice it Up: Add a pinch of ground ginger or cardamom to the crust mixture for a warm, spicy note that pairs beautifully with the lime and coconut. It’s an unexpected twist that adds another layer of complexity.
- Merengue Topping: If you’re a fan of a classic meringue topping instead of whipped cream, you can use the leftover egg whites to make one. Just whip the 4 egg whites with ½ cup of sugar until stiff, glossy peaks form. Spread it over the baked and cooled pie and brown it quickly under the broiler or with a kitchen torch.
Don’t be afraid to play around with the garnishes, either. A sprinkle of high quality white chocolate shavings or a drizzle of passion fruit puree can take this dessert in a whole new and delicious direction. Have fun with it.
Toasted Coconut & Macadamia Key Lime Pie
Description: A classic, creamy, and tart Key Lime Pie with a tropical twist. A buttery crust made with toasted coconut and macadamia nuts holds a silky lime filling, all topped with a fluffy, coconut-infused whipped cream.
Yield: 8 Servings | Category: Dessert | Cuisine: American
Prep Time: 25 minutes | Cook Time: 30 minutes
Ingredients
- For the Crust: 1 cup graham cracker crumbs, ⅔ cup sweetened shredded coconut (toasted), ½ cup roasted salted macadamia nuts, ¼ cup granulated sugar, 6 tbsp unsalted butter (melted).
- For the Filling: 4 large egg yolks, 1 (14-ounce) can sweetened condensed milk, ⅔ cup freshly squeezed Key lime juice, 2 tbsp fresh lime zest.
- For the Whipped Cream: 1 cup heavy whipping cream (very cold), 3 tbsp powdered sugar, ½ tsp vanilla extract, ⅓ cup toasted sweetened shredded coconut.
Instructions
- Preheat oven to 350°F. Toast coconut for 5-7 minutes until golden. Reserve ⅓ cup for topping.
- Process graham crackers, remaining coconut, macadamia nuts, and sugar. Pulse in melted butter. Press into a 9-inch pie plate.
- Bake crust for 10-12 minutes until lightly browned. Cool slightly.
- Whisk egg yolks and lime zest until pale. Whisk in condensed milk, then slowly whisk in lime juice until smooth.
- Pour filling into the crust. Bake for 15-18 minutes, until the center is almost set but has a slight jiggle.
- Cool completely on a wire rack, then refrigerate for at least 4 hours or overnight.
- Before serving, beat cold heavy cream, powdered sugar, and vanilla to stiff peaks. Fold in reserved toasted coconut.
- Top the pie with whipped cream and garnish with more lime zest.
Notes
For the best flavor, use freshly squeezed Key lime juice. If you can’t find Key limes, Persian limes are a suitable substitute. Ensure your heavy cream and mixing bowl are very cold for the fluffiest whipped cream.
Servings: 8 | Calories: 550 kcal | Fat: 38g | Carbohydrates: 48g | Protein: 7g
5 FAQs About Key Lime Pie
Here are some straightforward answers to the most common questions I receive about this Key Lime Pie recipe.
Can I use regular limes instead of Key limes for this Key Lime Pie?
Yes, you absolutely can. While Key limes give the pie its signature name and a distinct aromatic, slightly more floral flavor, they can be hard to find and are much smaller, meaning you have to juice a whole lot of them. Regular Persian limes, the kind you see in every grocery store, are a perfectly acceptable substitute.
The flavor profile will be slightly different. Persian limes are a bit more acidic and have a straightforward tartness, whereas Key limes are more complex. However, the difference is subtle to most palates, and your pie will still be incredibly delicious and refreshing. You will need the same amount of juice, ⅔ cup, which you can get from about 4-5 regular sized limes. Don’t let the lack of Key limes stop you from making this wonderful dessert.
Why is my Key Lime Pie not setting up properly?
A runny Key Lime Pie is a common and very frustrating problem. There are usually two main culprits. The first is not using enough acidic lime juice or using a sweetened lime juice. The magic of a Key Lime Pie filling is the chemical reaction between the acid in the lime juice and the proteins in the sweetened condensed milk and egg yolks. This reaction is what causes the filling to thicken. If your juice isn’t acidic enough, the filling won’t set properly.
The second, and more common, reason is underbaking or not chilling it for long enough. The baking process helps to set the eggs, and the chilling process is absolutely crucial for the pie to become firm. It needs at least 4 hours in the refrigerator, but I find that letting it chill overnight yields the best, firmest results. Be patient. Rushing the chilling process is the surest way to a soupy slice of pie.
Do I have to use a graham cracker crust for this Key Lime Pie recipe?
Not at all! While my recipe calls for a unique twist on the classic graham cracker crust, you can use several other bases. The graham cracker crust is traditional because its honeyed sweetness provides a perfect counterpoint to the tart filling, but you have options. A crust made from crushed vanilla wafers or shortbread cookies would be wonderful, offering a more buttery flavor.
For a completely different texture, you could make a traditional pastry crust (pâte sablée) and blind bake it before adding the filling. This would give you a more sophisticated, French patisserie style dessert. You can also make a nut-based crust using ground almonds or pecans for a gluten-free alternative. The crust is a great place to get creative, so feel free to use what you like best.
How do I know when my Key Lime Pie is done baking?
This is a fantastic question because it can be tricky. You don’t want to overbake it, which can lead to a rubbery texture or cracks on the surface. The visual cue you’re looking for is that the filling should be set around the edges of the pie, but the very center, about a 2 to 3-inch circle, should still have a slight wobble or jiggle when you gently shake the pie plate. It should look like Jell-O, not like a liquid.
If the entire surface is liquidy and ripples when you move it, it needs more time. If it’s completely firm with no jiggle at all, it’s likely overbaked. It’s better to err on the side of slightly underbaked, as the filling will continue to set and firm up significantly as it cools and chills in the refrigerator. The bake time of 15-18 minutes is a solid guideline, but always trust the jiggle test over the timer.
Can I make this Key Lime Pie ahead of time?
This is one of the best make-ahead desserts out there. In fact, it’s actually better when you make it ahead of time because it requires that long chilling period to fully set up and allow the flavors to meld. You can bake the pie, cool it, and let it chill in the refrigerator a full day or two before you plan to serve it. This makes it a perfect dessert for dinner parties or holidays because you can get it completely done and out of the way.
The only part I recommend waiting to do is the whipped cream topping. Whipped cream is always best when it’s fresh. It can start to weep or deflate if it sits for too long. So, make and chill the pie a day ahead, and then just before you’re ready to serve, whip up the toasted coconut cream and top the pie. It will take you less than 5 minutes and ensures your dessert looks and tastes its absolute best.
Try These Recipes Next
If you loved the fresh and comforting flavors of this Key Lime Pie, I know you’ll enjoy some of my other favorite recipes. Here are a few that are always a hit in my house: