
Easy, Homemade KFC Fried Chicken (Copycat Recipe)
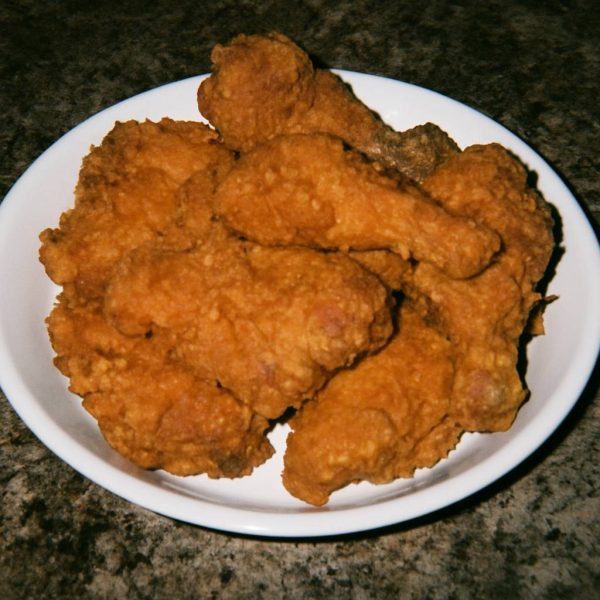
There is truly nothing in this world quite like a perfectly crispy, juicy piece of fried chicken.
I remember going to our annual church picnic as a little girl, and the highlight was always the long tables groaning under the weight of everyone’s best dishes. But my eyes, and my little tummy, were always drawn to the platters of golden-brown fried chicken. One year, Sister Mildred brought a batch that changed my life. It was so much better than anything I’d ever had, even from the famous Colonel’s place.
I pestered her for that recipe for years, but she’d just wink and say, “A lady never tells all her secrets.” So, I made it my mission to create my own. I spent years tinkering, trying to capture that same magical flavor and crunch. My goal was a homemade KFC Fried Chicken that was even better than the original.
After countless batches and a kitchen dusted in a permanent layer of flour, I finally found the secret. It wasn’t just in the eleven herbs and spices. The real magic, the little twist that makes this chicken sing, is a good, long soak in a buttermilk brine with a splash of dill pickle juice. It tenderizes the meat to an unbelievable degree and gives it a subtle, tangy flavor that will have your family asking for your secret, too.
Why This KFC Fried Chicken Recipe Works
Fried chicken is more than just a meal here in the South, it’s a tradition. It’s the centerpiece of Sunday dinners, family reunions, and summer celebrations. The reason Colonel Sanders’ original recipe became a global sensation is because it captured that comforting, savory flavor that feels like home. It’s a masterful blend of familiar spices that creates something truly special.
This copycat KFC Fried Chicken recipe honors that tradition. We use a similar blend of herbs and spices that make the crust so famously delicious. It has that peppery, savory, and slightly herbaceous flavor profile you know and love. We aren’t trying to reinvent the wheel here, just make it roll a little smoother.
So, why does this recipe work so well? It all comes down to the technique. The secret isn’t just in the spice blend, it’s in the preparation. My method uses a buttermilk and pickle juice brine, which is a total game-changer. The acidity in the buttermilk and pickle juice works to break down the proteins in the chicken, resulting in incredibly tender and moist meat. This brine also helps the seasoned flour coating adhere better, giving you that craggy, crispy crust we all crave. It takes the classic concept and elevates it, ensuring every single bite is juicy on the inside and perfectly crunchy on the outside.
Ingredients for KFC Fried Chicken
For this recipe, we’re using simple, high-quality ingredients to create that iconic flavor. The real star of the show, my little secret, is the dill pickle juice in the brine. Don’t you worry, it won’t make your chicken taste like a pickle. It just adds a magical tang and tenderness that you can’t get any other way.
For the Chicken Brine:
- 4 cups buttermilk
- 1/2 cup dill pickle juice
- 1 large egg, beaten
- 1 tablespoon hot sauce (optional, for a little kick)
- 3 to 4 lbs bone-in, skin-on chicken pieces (a mix of thighs, drumsticks, and wings works best)
For the Seasoned Flour:
- 3 cups all-purpose flour
- 1/2 cup cornstarch
- 4 tablespoons paprika (use sweet, not smoked)
- 3 tablespoons salt
- 2 tablespoons black pepper
- 2 tablespoons garlic powder
- 2 tablespoons onion powder
- 1 tablespoon dried thyme
- 1 tablespoon dried oregano
- 1 tablespoon celery salt
- 1 tablespoon ground ginger
- 1 tablespoon white pepper
For Frying:
- 48 oz (about 6 cups) vegetable or peanut oil
A little note on your ingredients. Using a whole chicken that you break down yourself often gives you the best quality and flavor. For the oil, peanut oil has a high smoke point and a neutral flavor, which makes it ideal for frying. However, good old vegetable or canola oil will work just fine, too.
Step-by-Step Instructions For Making KFC Fried Chicken
Making perfect fried chicken is all about patience and process. Don’t rush these steps, and I promise you’ll be rewarded with the best chicken you’ve ever made. The most important tool you can have is a heavy-bottomed pot like a Dutch oven or a deep cast-iron skillet to maintain a steady oil temperature.
- Brine the Chicken: In a large bowl or a zip-top bag, whisk together the buttermilk, dill pickle juice, beaten egg, and optional hot sauce. Add your chicken pieces, making sure they are fully submerged. Cover the bowl or seal the bag and refrigerate for at least 4 hours, but overnight is even better for maximum tenderness.
- Prepare the Dredge: In a separate large bowl or a brown paper bag, combine the all-purpose flour, cornstarch, and all 11 herbs and spices (paprika through white pepper). Whisk everything together until it’s thoroughly mixed. This seasoned flour is the heart of our KFC Fried Chicken flavor.
- Dredge the Chicken: Remove the chicken from the brine one piece at a time, letting the excess liquid drip off. Do not pat it dry. Transfer the damp chicken directly into the seasoned flour mixture. Toss to coat each piece completely, pressing the flour into the skin to help it adhere. Place the coated chicken on a wire rack and let it rest for 15 to 20 minutes. This step is crucial, it helps the coating set and become one with the chicken, which means it won’t fall off in the fryer.
- Heat the Oil: Pour the oil into your Dutch oven or cast-iron skillet until it’s about 2 inches deep. Heat over medium-high heat until the oil reaches 325°F. Use a candy or deep-fry thermometer to monitor the temperature. This is the most common mistake people make, if the oil is too hot, the crust will burn before the inside is cooked.
- Fry the Chicken: Carefully place a few pieces of chicken into the hot oil, skin-side down. Do not overcrowd the pan. This will lower the oil temperature and make your chicken greasy. Fry in batches. Cook for about 6 to 8 minutes per side, until the chicken is a deep golden brown and cooked through. The internal temperature should reach 165°F on a meat thermometer.
- Drain and Rest: Once cooked, remove the chicken from the oil and place it on a clean wire rack to drain. This keeps the bottom from getting soggy. Let it rest for at least 10 minutes before serving. This allows the juices to redistribute, ensuring every bite is moist.
How To Serve KFC Fried Chicken
Once you’ve pulled that last piece of golden, crispy chicken from the fryer, the fun part begins. Serving this KFC Fried Chicken is all about leaning into comfort and tradition. Of course, you can just set the platter on the table and let everyone have at it, but pairing it with the right sides turns a simple meal into a true Southern feast.
For a classic Sunday dinner spread, you simply can’t go wrong with the essentials. Think creamy mashed potatoes with a rich gravy, a tangy and crisp coleslaw, and of course, fluffy buttermilk biscuits to sop up every last delicious bit. It’s a combination that has stood the test of time for a good reason.
If you want to get a little more creative, here are a few of my favorite ways to serve it up:
- Southern Style Picnic: Serve the chicken cold or at room temperature alongside some creamy potato salad, baked beans, and sweet cornbread. It’s perfect for a day at the park or a casual backyard get-together.
- Chicken and Waffles Brunch: Place a piece of hot fried chicken on top of a fluffy Belgian waffle and drizzle generously with warm maple syrup. A little pat of butter on top doesn’t hurt either. It’s that perfect sweet and savory combination.
- Spicy Chicken Sandwiches: Use a boneless, skinless thigh, fry it up using this recipe, and serve it on a toasted brioche bun with some spicy mayo and a few dill pickle slices. It’s better than any drive-thru sandwich you’ll ever find.
No matter how you serve it, just be sure to have plenty of napkins on hand. This is a hands-on meal that’s meant to be enjoyed with family, friends, and a whole lot of love. It’s a meal that makes memories.
How To Store & Reuse KFC Fried Chicken Leftovers
Now, in my house, leftover fried chicken is a rare and precious thing. But on the off chance you have a few pieces left over, storing them properly is key to enjoying them the next day. The biggest challenge is keeping that wonderful crust from getting sad and soggy in the refrigerator.
First things first, let the chicken cool down completely to room temperature. Placing hot chicken directly into a sealed container will create steam, which is the number one enemy of a crispy crust. Once cooled, you can store it for three to four days. How you store it makes all the difference.
Here are the best ways to keep and reheat your leftover chicken to bring back some of that original crunch:
- Storing in the Fridge: Place the cooled chicken in a shallow airtight container or a large zip-top bag. Don’t stack the pieces if you can help it. Some folks like to place a paper towel in the bottom to absorb any excess moisture, which is a fine little trick.
- Reheating in the Oven: This is my preferred method. Preheat your oven to 400°F. Place the chicken on a wire rack set on top of a baking sheet. This allows the hot air to circulate all around the chicken. Bake for 15 to 20 minutes, or until it’s heated through and the skin has crisped up again.
- Reheating in the Air Fryer: The air fryer works wonders for reviving leftover fried chicken. Set it to 375°F and place the chicken in the basket in a single layer. Heat for about 5 to 8 minutes, flipping halfway through, until crispy.
Please, for the love of all things crispy, avoid the microwave. It will make the skin rubbery and sad. Leftover cold fried chicken is also a Southern delicacy all on its own, perfect for a quick lunch or chopped up and tossed into a salad.
Substitutions & Variations For KFC Fried Chicken
One of the best things about a home-cooked meal is the ability to make it your own. While this KFC Fried Chicken recipe is a treasure as it is, there’s always room to play around a little to suit your tastes or what you have on hand in your pantry. A good recipe is a starting point, not a set of strict rules.
Whether you need to adjust for a dietary restriction or you just feel like spicing things up, this recipe is wonderfully flexible. You can swap out a few key ingredients without sacrificing that delicious, crispy outcome. Don’t be afraid to experiment.
Here are a few simple substitutions and fun variations you can try:
- Make it Spicy: For a Nashville-style kick, add 2 to 3 tablespoons of cayenne pepper to your seasoned flour mixture. You can also add an extra tablespoon of your favorite hot sauce to the buttermilk brine for a deeper, more infused heat.
- Gluten-Free Option: You can easily make this recipe gluten-free. Simply substitute the all-purpose flour with a good quality gluten-free all-purpose baking blend that contains xanthan gum. I’ve had great results with these blends for frying.
- Different Chicken Cuts: This recipe is fantastic for more than just bone-in pieces. Try it with boneless, skinless chicken thighs for amazing sandwiches, or cut chicken breasts into strips for the best chicken tenders you’ve ever had. Just remember to adjust the cooking time accordingly, as smaller, boneless pieces will cook much faster.
- No Buttermilk? No Problem: If you don’t have buttermilk, you can make a quick substitute. Add one tablespoon of white vinegar or lemon juice to every one cup of regular milk. Let it sit for about 5 to 10 minutes until it curdles slightly, then use it as directed in the brine.
Feel free to adjust the spices too. If you love a smokier flavor, a little smoked paprika can be a lovely addition. The kitchen is your playground, so have some fun with it.
5 FAQs About KFC Fried Chicken
Here are some straightforward answers to the most common questions I receive about this KFC Fried Chicken recipe.
Why is my KFC Fried Chicken not crispy?
A lack of crispiness is almost always related to one of three things: oil temperature, moisture, or overcrowding the pan. The most critical factor is the temperature of your frying oil. You need to maintain a steady 325°F. If the oil is not hot enough, the chicken will absorb too much oil before the crust can set, resulting in a greasy, soggy coating. If it’s too hot, the crust will burn before the chicken is cooked through.
Another culprit could be excess moisture. After you remove the chicken from the brine, you should let the excess drip off but not pat it completely dry. That bit of moisture helps the flour stick. However, the 15 to 20 minute resting period after dredging is key. This allows the flour to hydrate and form a “paste” that clings to the chicken skin, which creates a better crust. Finally, never overcrowd your pan. Adding too many pieces at once drastically drops the oil temperature. Fry in small batches to give each piece plenty of room to cook and crisp up evenly.
Can I make this KFC Fried Chicken in an air fryer?
Yes, you can certainly adapt this recipe for an air fryer, but you’ll need to adjust your expectations a bit. The crust won’t be exactly the same as deep-fried chicken, as it won’t have that super craggy, thick texture that only comes from being submerged in hot oil. However, you can still get a very delicious and wonderfully crispy result.
After you dredge the chicken and let it rest, generously spray all sides of each piece with cooking oil spray. This is essential for helping the flour coating “fry” and turn golden brown in the air fryer. Preheat your air fryer to 380°F. Place the chicken in a single layer in the basket, ensuring there’s space between the pieces. Air fry for about 20 to 25 minutes, flipping halfway through, until the chicken is cooked to 165°F and the coating is crispy and golden.
What is the secret to getting the flour coating to stick to my KFC Fried Chicken?
This is a question I get all the time. Losing that beautiful crust in the fryer is so disappointing. The secret is a three-part process. First, start with the right surface. The slightly damp chicken coming out of the buttermilk brine is perfect. The brine’s thickness, along with the egg in it, acts as a binder that helps the flour grab on.
Second, when you dredge the chicken, really press the seasoned flour onto the surface. Don’t be gentle. Make sure every nook and cranny is thoroughly coated. The third and most important step, which many people skip, is to let the coated chicken rest on a wire rack for at least 15 minutes before frying. This allows the flour to absorb moisture from the brine, creating a glue-like paste. This paste-like coating will adhere much better during the frying process, giving you a perfect, intact crust.
How do I know when my KFC Fried Chicken is fully cooked?
While visual cues like a deep golden-brown color are helpful, they can be deceiving. The only foolproof way to know for sure that your chicken is perfectly cooked, both for safety and for taste, is to use an instant-read meat thermometer. Chicken is safe to eat when it reaches an internal temperature of 165°F.
To check the temperature, insert the thermometer into the thickest part of the chicken piece, making sure not to touch the bone, as the bone will give you an inaccurate, hotter reading. For a thigh or drumstick, this is usually the area closest to the bone. Using a thermometer not only ensures your chicken is safe but also prevents you from overcooking it, which can lead to dry meat. A perfectly cooked piece of chicken will be juicy and tender all the way through.
Can I prepare this KFC Fried Chicken recipe ahead of time?
Absolutely. You can do some of the prep work in advance to make your cooking day a little easier. The brine is the perfect make-ahead step. You can let the chicken sit in the buttermilk brine in the refrigerator for up to 24 hours. The longer it brines, the more tender and flavorful it will be. You can also mix up your entire seasoned flour dredge and store it in an airtight container at room temperature for weeks.
However, I highly recommend frying the chicken fresh, just before you plan to serve it. Fried chicken is always at its best right after it has rested from the fryer. You can dredge the chicken an hour or two ahead of time and keep it on a wire rack in the fridge, but for the ultimate crispy, juicy experience, the frying should be the last step. It’s well worth the effort.
Try These Recipes Next