
Easy, Decadent Chocolate Cake Recipe For Beginners
This is, hands down, the best chocolate cake you will ever bake.
I know, I know, that’s a mighty big claim for a Southern girl to make. We take our cakes very seriously down here. But trust me on this one. My journey with this particular chocolate cake started at a little farm-to-table restaurant on a weekend trip with my husband. They served a chocolate dessert so rich, so complex, it made me stop mid-sentence.
I just had to ask the chef what his secret was. He winked and said two words, “good vinegar.” I was floored. Vinegar in a cake? It sounded like something my great-granny would do out of necessity, not for flavor.
But the more I thought about it, the more it made sense. I went home and spent weeks in my kitchen, tinkering with my own go-to chocolate cake recipe. I tested different ratios and types of vinegar until I landed on the perfect one, a rich, aged balsamic. It doesn’t make the cake taste sour or vinegary at all. Instead, it elevates the chocolate to a whole new level, adding a deep, almost fruity note that cuts through the sweetness and makes the cocoa flavor sing. This Deepest Dark Chocolate Balsamic Cake is the result of that obsession, and it’s the one I make for every special occasion, or just when a Tuesday needs a little something extra.
Why This Chocolate Cake Recipe Works
A classic chocolate cake is a cornerstone of American baking. It’s the centerpiece of birthday parties, the comfort food we turn to, and a dessert that feels both simple and celebratory. Most recipes follow a familiar formula, balancing cocoa, flour, sugar, and fat to create a moist, tender crumb. They are beloved for their straightforward, comforting flavor and dependable results.
The magic in a truly great chocolate cake often comes from one or two ingredients that amplify the chocolate itself. Many recipes, including this one, use hot coffee. The coffee doesn’t make the cake taste like a mocha, instead its bitterness deepens the cocoa notes, making the chocolate flavor more robust and pronounced. It’s a trick bakers have been using for generations to get a richer result.
So, where does my twist come in? The secret weapon here is aged balsamic vinegar. It might sound unusual, but it’s pure culinary genius. A good quality balsamic has a natural, subtle sweetness and a complex, tangy profile. When you add it to the cake batter and the frosting, it performs a little bit of magic. The acidity in the vinegar reacts with the baking soda for an extra lift, making the cake incredibly tender.
More importantly, it enhances the flavor profile in a way nothing else can. The slight tanginess cuts through the richness of the chocolate and the sweetness of the sugar, preventing the cake from being overwhelmingly sweet. It pulls out the fruity undertones of the cocoa beans, creating a dark chocolate cake that is incredibly deep, complex, and sophisticated. It’s the kind of subtle change that makes everyone pause and ask, “What is in this? It’s amazing!”
Ingredients for Chocolate Cake
The beauty of a good chocolate cake is that it starts with simple, everyday pantry staples. But the quality of a few key ingredients, especially my secret one, can turn a good cake into a spectacular one. Let’s walk through what you’ll need.
My number one rule is to use ingredients at room temperature, especially the buttermilk and eggs. This helps them combine more evenly into the batter, creating a smoother texture and a more uniform crumb. It’s a small step that makes a big difference in the final product.
The real star here, the ingredient that gives this chocolate cake its signature flavor, is the good-quality aged balsamic vinegar. Please don’t reach for the thin, harsh salad dressing vinegar. You want to find an aged balsamic, one that’s a little thicker and has a syrupy consistency. It will have a sweeter, more complex flavor that complements the chocolate perfectly. You’ll use it in both the cake and the frosting, and it truly is the key to that “wow” factor.
Another important choice is your cocoa powder. I always opt for Dutch-processed cocoa powder. It has a smoother, less acidic flavor and a darker color than natural cocoa powder, which gives the cake its “deepest dark” name and a truly decadent chocolate taste. Sifting it before you add it to the dry ingredients prevents any stubborn lumps.
Here’s the full list of what you’ll need:
- For the Cake:
- 2 cups all-purpose flour
- 2 cups granulated sugar
- ¾ cup high-quality, Dutch-processed cocoa powder
- 2 teaspoons baking soda
- 1 teaspoon baking powder
- 1 teaspoon fine sea salt
- 1 cup buttermilk, at room temperature
- ½ cup vegetable oil
- 2 large eggs, at room temperature
- 2 teaspoons pure vanilla extract
- 2 tablespoons good-quality aged balsamic vinegar
- 1 cup freshly brewed hot coffee
- For the Dark Chocolate Balsamic Frosting:
- 1 cup (2 sticks) unsalted butter, softened
- 1 cup Dutch-processed cocoa powder, sifted
- 4 cups powdered sugar, sifted
- ⅓ cup heavy cream or whole milk
- 2 tablespoons good-quality aged balsamic vinegar
- 1 teaspoon pure vanilla extract
- ¼ teaspoon fine sea salt
Step-by-Step Instructions For Making Chocolate Cake
This chocolate cake comes together so easily, which is part of its charm. There’s no complicated technique, just a simple process of combining wet and dry ingredients. Just follow these steps, and you’ll have a perfect cake every time.
1. Prep Your Oven and Pans
First things first, preheat that oven to 350°F. Getting your oven fully heated is crucial for an even bake. While it’s warming up, prepare two 9-inch round cake pans. I like to grease them with butter or shortening, then lightly dust them with flour. A quicker method is to line the bottoms with parchment paper rounds and just grease the sides. This guarantees your cake layers will pop right out without any fuss.
2. Combine the Dry Ingredients
In a large mixing bowl, or the bowl of your stand mixer, whisk together all your dry ingredients. That’s the flour, sugar, Dutch-processed cocoa powder, baking soda, baking powder, and salt. Whisking them together first ensures that the leavening agents are evenly distributed, which helps the cake rise beautifully.
3. Mix the Wet Ingredients
In a separate, medium-sized bowl, whisk together the buttermilk, vegetable oil, eggs, vanilla, and those two tablespoons of glorious balsamic vinegar. Keep whisking until everything is smooth and fully combined. Having these ingredients at room temperature really helps them emulsify into a silky mixture.
4. Combine Wet and Dry
Now, pour the wet mixture into the bowl of dry ingredients. Mix everything on low speed, or by hand with a spatula, just until it’s combined. It is so important not to overmix at this stage. A few little lumps in the batter are perfectly fine. Overmixing develops the gluten in the flour and can lead to a tough, dense cake.
5. Add the Hot Coffee
This is where the batter transforms. Carefully and slowly pour the cup of hot coffee into the batter. Use a spatula to gently stir it in until the batter is smooth. You’ll notice the batter becomes very thin, almost like a soup. Don’t be alarmed. This is exactly what you want. This thin batter is the secret to an incredibly moist chocolate cake.
6. Bake to Perfection
Divide the batter evenly between your two prepared cake pans. Bake for 30 to 35 minutes. You’ll know they’re done when a toothpick or wooden skewer inserted into the center comes out clean or with just a few moist crumbs clinging to it. Let the cakes cool in the pans for about 15 minutes before turning them out onto a wire rack to cool completely. Never, ever try to frost a warm cake. Patience is a virtue here, darlin’.
7. Whip Up the Frosting
While the cakes cool, make the frosting. In a large bowl, beat the softened butter with an electric mixer until it’s light and creamy. Sift in the cocoa powder and powdered sugar and mix on low until they’re incorporated. Then add the heavy cream, balsamic vinegar, vanilla, and salt. Turn the mixer up to medium-high and beat for a good 3 to 5 minutes. The frosting will become wonderfully light, fluffy, and smooth.
8. Assemble Your Masterpiece
Once your cake layers are completely cool, it’s time to assemble. Place one layer on your cake stand or serving plate. Spread a thick, generous layer of frosting on top. Place the second layer on top of the first, and then frost the top and sides of the entire cake. You can make pretty swirls with an offset spatula or keep it sleek and smooth.
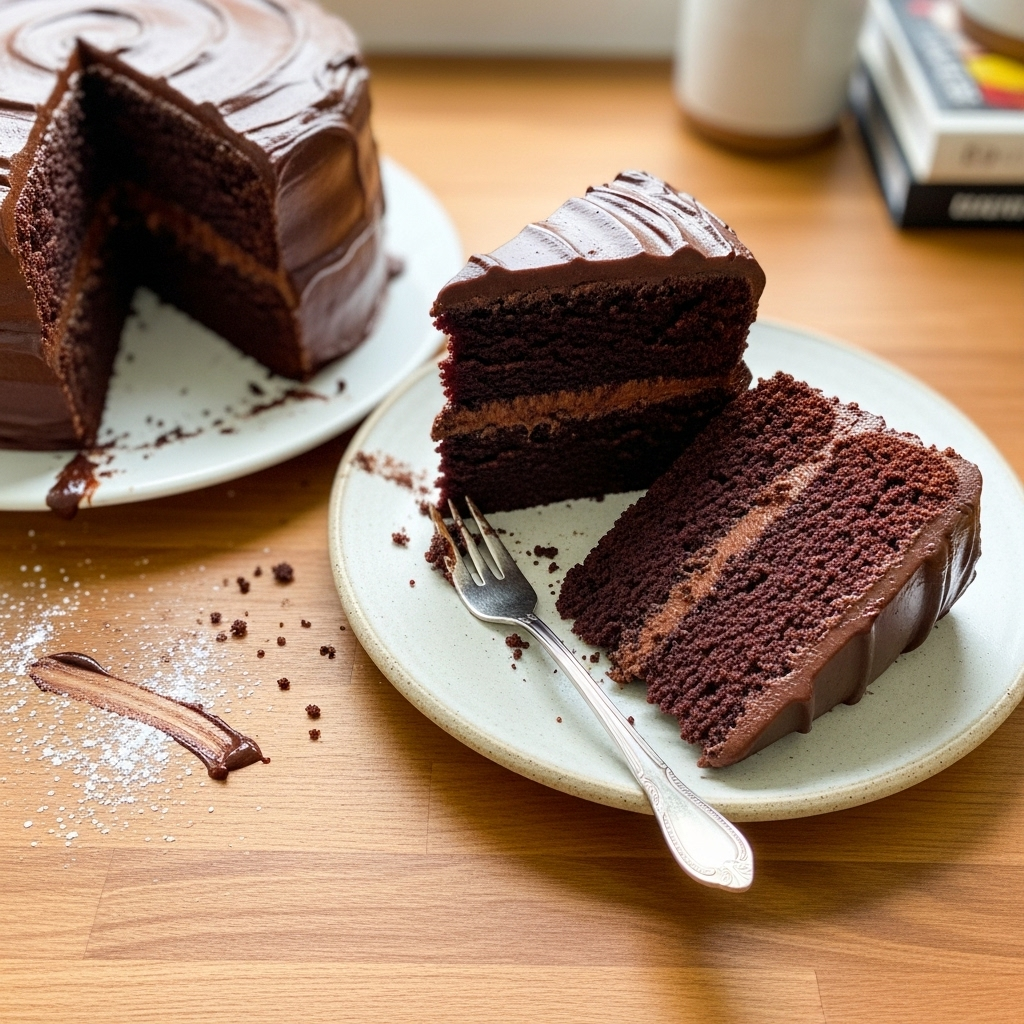
How To Serve Chocolate Cake
Once you’ve created this beautiful chocolate cake, serving it is half the fun. While a simple, generous slice is pure perfection on its own, you can easily dress it up for any occasion. This cake is rich and decadent, so a little goes a long way, but I won’t tell anyone if you go back for seconds.
For a simple, elegant presentation, a dusting of extra cocoa powder or some delicate chocolate shavings over the top of the frosting adds a lovely touch. If you have fresh berries on hand, especially raspberries or strawberries, their bright tartness is a wonderful contrast to the deep chocolate flavor. A small handful scattered on top or alongside each slice looks just beautiful and tastes even better.
Of course, you can never go wrong with a scoop of ice cream. Here are a few of my favorite ways to serve this incredible cake:
- The Classic A La Mode: A scoop of high-quality vanilla bean ice cream is the perfect partner. The cold, creamy vanilla melts slightly into the warm slice of cake, creating an irresistible combination of textures and temperatures.
- Coffee Shop Style: Serve a slice with a dollop of freshly whipped cream and a hot cup of coffee or an espresso. The bitterness of the coffee beautifully complements the sweetness of the cake, making it a perfect afternoon treat.
- For the Adults: If you’re serving this at a dinner party, a small glass of ruby port or a coffee liqueur on the side can be a sophisticated pairing that brings out the cake’s complex notes.
- Celebration Ready: For birthdays or special events, add some festive sprinkles or a drizzle of warm salted caramel sauce over each slice just before serving. It adds a little extra sparkle and another layer of delicious flavor.
No matter how you choose to serve it, this chocolate cake is meant to be shared. It’s the kind of dessert that brings people together around the table, sparking conversation and creating sweet memories. Just be prepared for everyone to ask for the recipe.
How To Store & Reuse Chocolate Cake Leftovers
On the rare occasion that we have leftovers of this chocolate cake, it’s important to store it properly to keep it just as moist and delicious as it was on day one. Because of the creamy frosting, you’ll want to be mindful of how you keep it. Leaving it out on the counter uncovered is just asking for a dry, sad cake, and we can’t have that.
The best way to store the frosted cake is under a cake dome or in an airtight container. This protects it from air, which is the enemy of a moist cake crumb. It will keep beautifully at room temperature for up to two days. If your kitchen is particularly warm, or if you need to store it for longer, the refrigerator is your best friend. In the fridge, it will last for about four to five days.
When you take it out of the fridge, be sure to let the slice sit at room temperature for about 20 to 30 minutes before serving. This allows the butter in the cake and frosting to soften, bringing back that perfect, tender texture.
If you find yourself with a few slices that are past their prime, don’t you dare throw them away. There are so many wonderful ways to give them a second life:
- Decadent Chocolate Trifle: Crumble the leftover cake into a glass dish and layer it with chocolate pudding, whipped cream, and maybe some fresh berries or chopped nuts. It’s a stunning and incredibly easy dessert.
- Quick Cake Pops: Mash the leftover cake with a little extra frosting until it forms a dough-like consistency. Roll into balls, insert a stick, and dip them in melted chocolate. Let them set in the fridge for a fun treat.
- Ultimate Chocolate Milkshake: Blend a slice of cake with a couple of scoops of vanilla or chocolate ice cream and a splash of milk. It creates the most indulgent, thick, and delicious milkshake you’ve ever had.
With these tips, not a single crumb of this delicious chocolate cake will go to waste. It’s just too good to let that happen. It’s a dessert that keeps on giving, even days after you’ve baked it.
Substitutions & Variations For Chocolate Cake
While I believe this chocolate cake recipe is perfect as is, I know that sometimes you need to make a swap based on what’s in your pantry or your family’s dietary needs. The good news is that this recipe is quite forgiving, and there are plenty of ways to put your own little spin on it.
One of the most common questions I get is about buttermilk. If you don’t have any on hand, you can easily make a substitute. Just measure out one cup of regular milk and stir in one tablespoon of lemon juice or white vinegar. Let it sit for about five to ten minutes until it looks slightly curdled, and then use it as you would buttermilk. The acidity is key for a tender cake, so this is a great fix.
You can also play around with the flavors to create something new and exciting. A little bit of creativity can make this classic chocolate cake feel brand new every time you bake it. Here are a few of my favorite ideas:
- Espresso Infusion: To really amp up the chocolate flavor, you can add one or two teaspoons of instant espresso powder to your dry ingredients. It won’t make the cake taste like coffee, but it will make the chocolate taste even more intense and rich.
- A Hint of Spice: For a little warmth, especially in the fall and winter months, try adding a half teaspoon of cinnamon or a quarter teaspoon of cayenne pepper to the dry ingredients. This Mexican chocolate-inspired twist is absolutely delicious.
- Different Extracts: While vanilla is classic, you can experiment with other extracts. A teaspoon of almond extract can add a lovely nutty note, or a little peppermint extract during the holidays can make it wonderfully festive.
- Gluten-Free Option: For a gluten-free version, you can substitute the all-purpose flour with a good quality one-to-one gluten-free baking flour blend. Be sure to use a blend that contains xanthan gum to help with the structure of the cake. The texture might be slightly different, but it will still be a delicious chocolate cake.
Don’t be afraid to experiment a little and make this recipe your own. That’s the joy of baking, after all. You might just discover your own secret ingredient that makes everyone ask for your recipe.
Deepest Dark Chocolate Balsamic Cake
Description: An incredibly moist, rich, and decadent chocolate cake with a secret ingredient, aged balsamic vinegar, that elevates the chocolate flavor to new, sophisticated heights. Paired with a silky smooth dark chocolate balsamic frosting, this cake is perfect for any celebration or special treat.
Yield: 12-16 servings | Category: Dessert | Cuisine: American
Prep Time: 20 minutes | Cook Time: 35 minutes
Ingredients
- For the Cake:
- 2 cups all-purpose flour
- 2 cups granulated sugar
- ¾ cup high-quality, Dutch-processed cocoa powder
- 2 teaspoons baking soda
- 1 teaspoon baking powder
- 1 teaspoon fine sea salt
- 1 cup buttermilk, at room temperature
- ½ cup vegetable oil
- 2 large eggs, at room temperature
- 2 teaspoons pure vanilla extract
- 2 tablespoons good-quality aged balsamic vinegar
- 1 cup freshly brewed hot coffee
- For the Dark Chocolate Balsamic Frosting:
- 1 cup (2 sticks) unsalted butter, softened
- 1 cup Dutch-processed cocoa powder, sifted
- 4 cups powdered sugar, sifted
- ⅓ cup heavy cream or whole milk
- 2 tablespoons good-quality aged balsamic vinegar
- 1 teaspoon pure vanilla extract
- ¼ teaspoon fine sea salt
Instructions
- Preheat oven to 350°F (175°C). Grease and flour two 9-inch round cake pans.
- In a large bowl, whisk together flour, sugar, cocoa powder, baking soda, baking powder, and salt.
- In a separate bowl, whisk buttermilk, oil, eggs, vanilla, and 2 tbsp balsamic vinegar.
- Pour the wet ingredients into the dry and mix until just combined. Do not overmix.
- Carefully stir in the hot coffee until the batter is smooth and thin.
- Divide batter between prepared pans and bake for 30-35 minutes, until a toothpick comes out clean.
- Cool cakes in pans for 15 minutes, then invert onto a wire rack to cool completely.
- To make frosting, beat butter until creamy. Sift in cocoa and powdered sugar, and mix on low.
- Add cream, 2 tbsp balsamic vinegar, vanilla, and salt. Beat on medium-high for 3-5 minutes until light and fluffy.
- Frost the completely cooled cake layers and enjoy.
Notes
Ensure all refrigerated ingredients (buttermilk, eggs) are at room temperature for the best texture. Use a high-quality, syrupy aged balsamic vinegar for the best flavor. Do not frost the cake until it is completely cool to prevent the frosting from melting.
Servings: 16 slices | Calories: 550 kcal | Fat: 28g | Carbohydrates: 75g | Protein: 6g
5 FAQs About Chocolate Cake
Here are some straightforward answers to the most common questions I receive about this chocolate cake recipe.
What makes this balsamic chocolate cake different from a regular one?
The key difference in this balsamic chocolate cake is, of course, the aged balsamic vinegar. A regular chocolate cake relies on ingredients like buttermilk and coffee to create a moist crumb and deep flavor, and this recipe uses those too. However, the addition of a good-quality balsamic vinegar adds a layer of complexity you won’t find in a standard recipe. It’s not about making the cake taste like vinegar, not at all. You won’t even be able to pinpoint the flavor specifically.
Instead, the balsamic works in two ways. First, its acidity reacts with the baking soda, giving the cake an extra-tender and light texture. Second, its inherent sweetness and tangy, fruity notes enhance the chocolate itself. It cuts through the sweetness, balancing the overall flavor profile and making the cocoa taste richer, darker, and more nuanced. Think of it like adding a pinch of salt to caramel, it just makes the primary flavor pop. This small, secret addition transforms a familiar dessert into something truly special and memorable.
Why is the batter for this chocolate cake so thin?
If you’re used to thick, scoopable cake batters, the consistency of this one can be a little surprising. The batter for this chocolate cake is very thin and liquidy, almost like a chocolate soup, and that is completely intentional. The thinness comes from the high liquid-to-flour ratio, particularly the full cup of hot coffee added at the end.
This high liquid content is the secret to an incredibly moist and tender cake. While it’s baking, that liquid creates steam, which helps the cake rise and results in a very soft, delicate crumb that stays moist for days. Don’t be tempted to add more flour to thicken it up, as that will only lead to a dry, dense result. Just trust the process, pour the thin batter carefully into your pans, and get ready for one of the moistest chocolate cakes you’ve ever had.
Can I use regular cocoa powder instead of Dutch-processed in this chocolate cake?
You can, but it will change the final result. Dutch-processed cocoa powder has been treated with an alkalizing agent to neutralize its acidity. This process gives it a milder, smoother flavor and a darker, almost black, color. Natural cocoa powder, on the other hand, is acidic and has a sharper, more intense chocolate flavor.
This recipe is balanced for Dutch-processed cocoa. It uses baking soda, which is a base, to react with the acidic ingredients like buttermilk and balsamic vinegar to create lift. Since Dutch-processed cocoa is neutral, the leavening reaction isn’t dependent on it. If you use natural cocoa powder, which is acidic, you’ll get a stronger reaction with the baking soda, which could affect the rise and texture. The flavor will also be different, a bit more intensely chocolatey but also sharper. For the deep, dark color and smooth, rich flavor I designed this cake to have, I strongly recommend sticking with Dutch-processed cocoa.
Why did my chocolate cake turn out dry?
Oh, a dry chocolate cake is one of the saddest things in the kitchen. There are usually a few common culprits. The most frequent one is overbaking. Even a couple of extra minutes in the oven can suck the moisture right out of a cake. It’s best to start checking for doneness a few minutes before the recipe suggests. The cake is ready when a toothpick inserted into the center comes out with a few moist crumbs attached, not perfectly clean.
Another reason could be measuring the flour incorrectly. If you scoop the flour directly out of the bag with your measuring cup, you can accidentally pack in too much. Too much flour will absorb all the liquid and result in a dense, dry cake. The best way to measure flour is to fluff it up with a spoon, gently spoon it into your measuring cup until it’s overflowing, and then level it off with the back of a knife. Finally, make sure you’re not overmixing the batter after adding the flour. Mixing too much develops the gluten, which leads to a tough, dry texture instead of a tender one.
Can I make this chocolate cake ahead of time?
Absolutely! This chocolate cake is a fantastic recipe to make ahead, which is perfect for parties or when you just want to get a head start on dessert. You have a couple of options. You can bake the cake layers a day or two in advance. Once they have cooled completely, wrap each layer tightly in plastic wrap and store them at room temperature. They’ll stay perfectly moist.
You can also make the frosting ahead of time. Just whip it up as directed, then store it in an airtight container in the refrigerator for up to a week. When you’re ready to frost the cake, let the frosting sit at room temperature for about an hour to soften, then give it a quick whip with your mixer to bring it back to a light and fluffy consistency. You can even assemble and frost the entire cake a day in advance and store it, covered, in the refrigerator. Just remember to let it come to room temperature before serving for the best flavor and texture.
Try These Recipes Next
If you loved making this decadent chocolate cake, I know you’ll enjoy exploring some of my other favorite recipes here on This Gal Cooks. Cooking for my family and friends is my greatest joy, and I love sharing the meals that bring us all together around the table. From quick weeknight dinners to easy breakfasts, there’s always something delicious to whip up.
Here are a few collections to get you started on your next kitchen adventure. I’ve gathered some of my most popular and foolproof recipes that are perfect for any occasion.
- For those busy weeknights when you need something delicious on the table fast, check out my collection of 110 Easy Dinner Ideas. You’re sure to find a new family favorite.
- Start your day off right with some wonderful breakfast inspiration. My list of Easy Breakfast Ideas has everything from quick grabs to lazy Sunday morning treats.
- We all love a good meal that doesn’t break the bank. This list of Cheap Meal Ideas is packed with budget-friendly recipes that are full of flavor and comfort.
I hope these recipes bring as much happiness to your kitchen as they do to mine. Happy cooking, y’all!