
Easy Brown Butter Buttermilk Waffles Recipe (SO GOOD!)
These are, without a doubt, the most incredible waffles you will ever make right in your own kitchen.
I’ll never forget the first time I had a truly life-altering waffle. My husband, bless his heart, had taken me on a little anniversary getaway to Charleston. We ended up at this darling little brunch spot with ivy climbing the walls and the most heavenly smells wafting from the kitchen. I ordered the waffles on a whim, and when they arrived, I knew something was different.
They were golden brown and impossibly crisp on the outside, but the inside was so light and airy it practically melted in my mouth. There was a deep, nutty, almost caramel-like flavor that I just couldn’t place. It wasn’t just butter and syrup, it was something more complex, something that made you close your eyes and savor every bite. I spent the whole meal trying to figure it out.
Back home, I became a woman possessed. I tested a dozen waffle recipes, but none of them had that special something. They were good, but they weren’t *that*. Then, one afternoon while making a sauce, I was browning some butter and that nutty aroma filled my kitchen. A lightbulb went off. That was it! That was the secret. I immediately whipped up a batch of buttermilk batter, but this time, I used rich, fragrant brown butter. The result was pure magic. These are those waffles, my little taste of Charleston right here at home.
Why This Waffles Recipe Works
A good waffle is a thing of beauty, a cornerstone of a proper weekend breakfast. For generations, buttermilk waffles have been a staple, loved for their slight tang and tender crumb. The classic recipe is popular for a reason, it’s reliable, comforting, and delicious. But I always feel like there’s room for a little something extra, a touch that takes a beloved classic from good to absolutely unforgettable.
That’s where the brown butter comes in. This isn’t just about adding fat, it’s about adding layers of flavor. By gently cooking the butter until the milk solids toast, you transform it from a simple ingredient into a complex one. It develops a deep, nutty, and slightly caramelized flavor that infuses the entire batter. This one simple step elevates the entire flavor profile of the waffles, giving them a richness that plain melted butter simply cannot match.
Beyond the flavor, this recipe is engineered for the perfect texture. The combination of baking powder and baking soda gives the waffles an initial lift, while the tangy buttermilk reacts with the baking soda to create a tender interior. The real secret to the lightness, however, is separating the eggs. By whipping the egg whites to stiff peaks and gently folding them in, you are incorporating air into the batter. This creates a delicate, airy structure that is the hallmark of a truly superior waffle. The result is the perfect balance, a crisp, golden exterior giving way to a cloud-like, fluffy center, all humming with that incredible brown butter flavor.
Ingredients for Waffles
The magic of these waffles comes from using simple, quality ingredients and one very special technique. While the list might look standard at first glance, the way we treat one key ingredient makes all the difference in the world. Paying a little attention to what you’re using will pay off in big flavor.
Here’s exactly what you’ll need to get started:
- 2 cups all-purpose flour
- 2 tablespoons granulated sugar
- 1 tablespoon light brown sugar, packed
- 2 teaspoons baking powder
- 1/2 teaspoon baking soda
- 3/4 teaspoon kosher salt
- 1/2 cup (1 stick) unsalted butter
- 2 large eggs, separated
- 1 3/4 cups buttermilk, well-shaken
- 1 teaspoon vanilla extract
The undisputed star of this show is the unsalted butter. We’re going to transform it into brown butter, which is the secret to the deep, nutty flavor of these waffles. Using unsalted butter is important because it allows you to control the salt level in the final dish. Different brands have different amounts of salt, and we want precision here.
For the other ingredients, a few things to keep in mind. Full-fat buttermilk will give you the best flavor and the most tender crumb. If your baking powder has been sitting in the pantry for a while, it’s worth checking if it’s still active. A fresh box ensures you get that beautiful lift. And please, use pure vanilla extract. The imitation stuff just doesn’t compare and can leave a bit of an artificial aftertaste that you don’t want competing with that gorgeous brown butter.
Step-by-Step Instructions For Making Waffles
Making these waffles is a simple process, but paying attention to a few key techniques will guarantee you get that perfect crisp-on-the-outside, fluffy-on-the-inside texture every single time. Just follow along, and you’ll be pulling gorgeous waffles off the iron in no time.
Step 1: Get Everything Ready
First things first, let’s get organized. Turn on your waffle iron so it can get nice and hot. Every model is different, so just follow the manufacturer’s instructions for preheating. To make sure your waffles stay warm and crisp, preheat your oven to a low 200°F. Place a wire cooling rack on top of a baking sheet and pop it in the oven. This will be your holding station for finished waffles.
Step 2: Brown the Butter
This is the most important step! In a small, light-colored saucepan (using a light color helps you see the color change), melt the stick of unsalted butter over medium heat. Let it continue to cook after it melts. It will foam and sputter, that’s normal. Swirl the pan occasionally to make sure it cooks evenly. After about 5 to 8 minutes, you’ll see toasted brown specks at the bottom of the pan and smell a wonderfully nutty aroma. Remove it from the heat immediately to prevent burning and set it aside to cool down a bit.
Step 3: Whisk the Dry Ingredients
In a large bowl, add your all-purpose flour, granulated sugar, light brown sugar, baking powder, baking soda, and kosher salt. Give it all a good whisk. This step is more important than it seems, it ensures all the leavening agents are evenly distributed, which means your waffles will cook up evenly.
Step 4: Mix the Wet Ingredients
Grab a separate medium-sized bowl. In it, whisk together the two egg yolks (set the whites aside for later!), the buttermilk, and the vanilla extract until they are just combined.
Step 5: Combine Butter and Wet Ingredients
Now, pour the slightly cooled brown butter, including all those tasty brown bits from the bottom of the pan, into the egg yolk and buttermilk mixture. Whisk it all together until it’s well combined.
Step 6: Combine Wet and Dry
Pour the wet ingredient mixture into the large bowl with the dry ingredients. Use a spatula to gently mix until they are just combined. It’s very important not to overmix the batter! A few lumps are perfectly fine and are actually a good sign. Overmixing develops the gluten in the flour and can make your waffles tough.
Step 7: Whip the Egg Whites
In a clean, dry bowl, use an electric mixer or a good old-fashioned whisk to beat the two egg whites you set aside earlier. Beat them on high speed until they form stiff peaks. This means when you lift the beaters out of the whites, the peak that forms holds its shape and doesn’t flop over.
Step 8: Fold in the Egg Whites
Gently scoop about one-third of the beaten egg whites into your waffle batter and fold it in with a spatula to lighten the batter. Then, add the rest of the egg whites and continue to fold gently until just incorporated. The goal is to keep as much air in the batter as possible, so be careful not to stir or deflate the whites.
Step 9: Rest and Cook the Waffles
Let the finished batter rest for about 5 minutes. This allows the gluten to relax and results in a more tender waffle. Lightly grease your hot waffle iron if your model requires it. Pour the amount of batter recommended for your iron onto the center, close the lid, and cook until the waffle is a beautiful golden brown and steam is no longer coming out of the sides. This is the best indicator that it’s done.
Step 10: Keep Warm and Serve
Carefully remove the cooked waffle and place it on the wire rack in your warm oven. This keeps it perfectly crisp while you cook the rest of the batter. Repeat with the remaining batter, and serve them all warm with your favorite toppings.
How To Serve Waffles
Once you have a beautiful stack of crisp, golden brown waffles, the fun really begins. Serving them up is a chance to get creative and tailor them to any craving, whether you’re in the mood for something sweet and decadent or savory and satisfying. These waffles have such a wonderful, nutty flavor from the brown butter that they provide a perfect canvas for all sorts of toppings.
Of course, you can never go wrong with the classics. A pat of good quality butter melting into those deep pockets and a generous pour of real maple syrup is a timeless combination for a reason. It’s simple, elegant, and lets the flavor of the waffle shine through.
But why stop there? Here are a few of my favorite ways to dress them up:
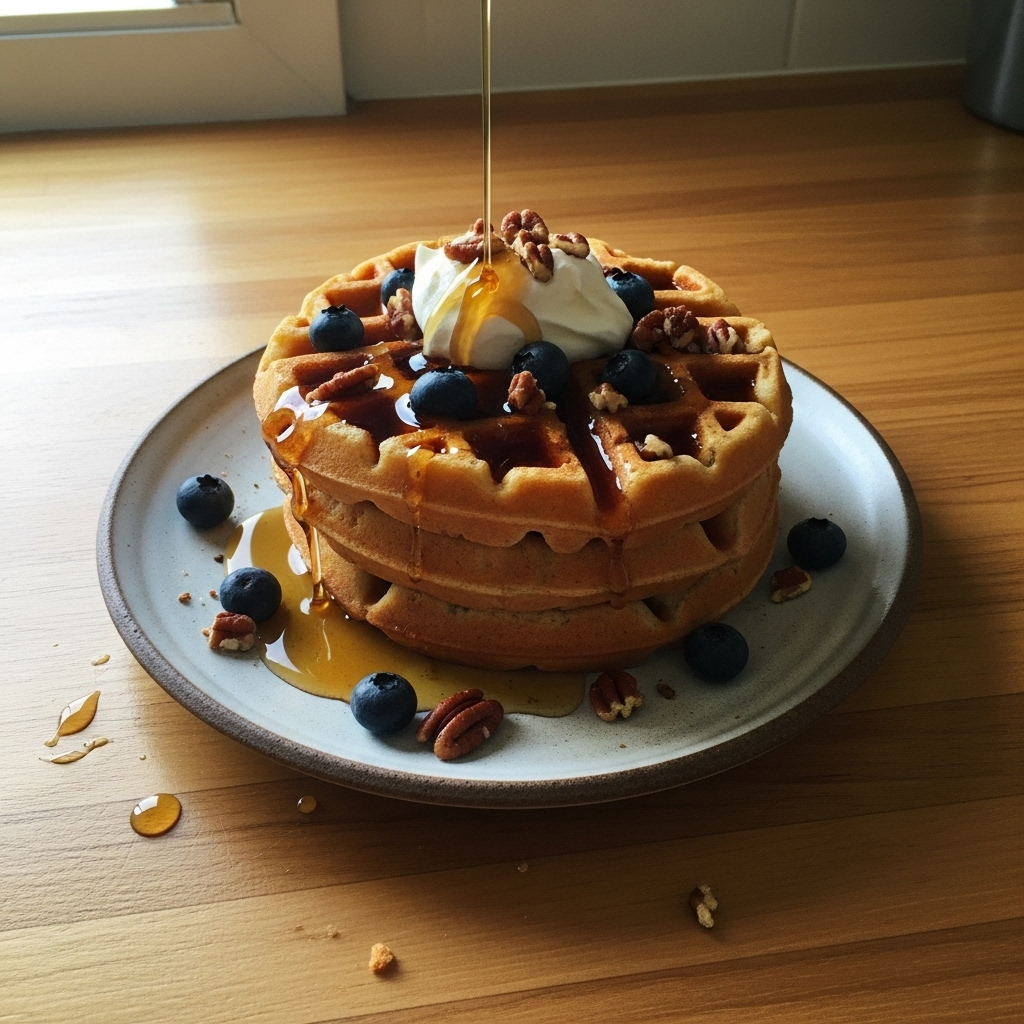
- Fresh and Fruity: Top the waffles with a big dollop of freshly whipped cream or Greek yogurt, and a handful of mixed berries like strawberries, blueberries, and raspberries. A little dusting of powdered sugar makes it look extra special.
- Decadent Delight: For a real treat, try a drizzle of warm chocolate or caramel sauce, some sliced bananas, and a sprinkle of toasted pecans. It’s like a dessert for breakfast!
- Southern Classic: This is a must. Serve a waffle with a piece of crispy Southern fried chicken on top. A drizzle of hot honey or maple syrup over the whole thing is non-negotiable. It’s the ultimate sweet and savory combination.
- Breakfast for Dinner: Turn these waffles into a hearty meal by topping them with a perfectly fried egg, some crispy bacon or sausage crumbles, and a sprinkle of chives.
You can even set up a waffle bar for a family brunch. Put out small bowls of various toppings like different fruits, syrups, whipped cream, chocolate chips, nuts, and sprinkles, and let everyone build their own perfect waffle creation. It’s always a huge hit in my house.
How To Store & Reuse Waffles Leftovers
If you happen to find yourself with leftover waffles, consider yourself lucky. They store and reheat beautifully, making them perfect for a quick and delicious breakfast on a busy weekday morning. The key to success is storing them properly to maintain their texture so you don’t end up with a sad, soggy waffle later on.
First and foremost, you must let the waffles cool completely to room temperature before you even think about storing them. Placing warm waffles in a container or bag will create steam, which turns into condensation and is the number one enemy of a crisp waffle. I like to leave them on a wire cooling rack on the counter for at least 30 minutes.
Once they are fully cooled, you have a couple of great storage options:
- In the Refrigerator: If you plan on eating the waffles within a few days, you can store them in the fridge. Place them in a single layer in an airtight container or a zip-top bag. I sometimes place a sheet of parchment paper between the layers if I have to stack them to prevent them from sticking together. They will keep well for up to 3 days.
- In the Freezer: For longer-term storage, the freezer is your best friend. Place the cooled waffles on a baking sheet in a single layer and pop them in the freezer for about an hour, or until they are firm. This is called flash-freezing and it prevents them from sticking together. Once frozen solid, transfer them to a freezer-safe zip-top bag or airtight container. They’ll stay fresh for up to 3 months.
When you’re ready to enjoy your leftovers, please step away from the microwave. It will only make them soft and chewy. The best way to bring back that original crispness is to reheat them directly from the fridge or freezer in a toaster or toaster oven until they are hot and crispy. You can also place them on a baking sheet in a 350°F oven for about 5-10 minutes. They’ll taste almost as good as they did fresh off the iron.
Substitutions & Variations For Waffles
One of the things I love about a solid base recipe like this one is how easily you can adapt it to your own tastes or dietary needs. These brown butter waffles are spectacular as they are, but they also serve as a wonderful starting point for a little culinary creativity. Don’t be afraid to play around and make them your own!
If you have some dietary restrictions or are just missing an ingredient, here are a few simple swaps that work well. Just keep in mind that changing ingredients can slightly alter the final texture and flavor, but you’ll still end up with delicious waffles.
Here are some variations and substitutions you can try:
- Gluten-Free Waffles: You can substitute the all-purpose flour with a good quality measure-for-measure gluten-free flour blend. Look for one that contains xanthan gum, as this will help with the structure and texture of the waffles.
- Dairy-Free Waffles: For a dairy-free version, you can make your own “buttermilk” by adding 1 tablespoon of lemon juice or white vinegar to 1 3/4 cups of your favorite unsweetened plant-based milk (like almond or soy). Let it sit for 5-10 minutes to curdle slightly. Use a high-quality dairy-free butter substitute for making the brown butter.
- Add Some Spice: Warm spices pair beautifully with the nutty brown butter. Try adding 1/2 teaspoon of ground cinnamon and a pinch of nutmeg to the dry ingredients for a cozy, comforting flavor.
- Flavorful Mix-Ins: After the batter is fully mixed, you can gently fold in about 1/2 cup of mix-ins. Mini chocolate chips are a classic choice for kids, or you could try fresh blueberries (toss them in a little flour first to prevent sinking), or even finely chopped toasted pecans for extra crunch. A tablespoon of orange or lemon zest can also brighten up the flavor profile beautifully.
Feel free to experiment with different extracts as well. While vanilla is classic, a touch of almond extract can add another layer of nutty complexity that complements the brown butter perfectly. Just have fun with it and see what delicious combinations you can come up with!
Buttermilk Brown Butter Waffles
Description: The ultimate waffle recipe, featuring crisp edges, a fluffy interior, and a deep, nutty flavor from homemade brown butter. Perfect for a special weekend breakfast or brunch.
Yield: 8-10 waffles | Category: Breakfast | Cuisine: American
Prep Time: 15 minutes | Cook Time: 20 minutes
Ingredients
- 2 cups all-purpose flour
- 2 tablespoons granulated sugar
- 1 tablespoon light brown sugar, packed
- 2 teaspoons baking powder
- 1/2 teaspoon baking soda
- 3/4 teaspoon kosher salt
- 1/2 cup (1 stick) unsalted butter
- 2 large eggs, separated
- 1 3/4 cups buttermilk, well-shaken
- 1 teaspoon vanilla extract
Instructions
- Preheat waffle iron. Place a wire rack on a baking sheet in a 200°F oven.
- Melt butter in a light-colored saucepan over medium heat. Cook until milk solids turn brown and it smells nutty (5-8 mins). Cool slightly.
- In a large bowl, whisk together flour, sugars, baking powder, baking soda, and salt.
- In a separate bowl, whisk egg yolks, buttermilk, and vanilla. Whisk in the cooled brown butter.
- Pour the wet ingredients into the dry and mix with a spatula until just combined. Do not overmix.
- In a clean bowl, beat egg whites with an electric mixer until stiff peaks form.
- Gently fold the beaten egg whites into the batter in two additions. Let the batter rest for 5 minutes.
- Cook batter in the preheated waffle iron according to manufacturer’s directions until golden brown and crisp.
- Transfer cooked waffles to the warm oven to keep crisp. Serve warm.
Notes
Do not overmix the batter; a few lumps are okay. Be very gentle when folding in the egg whites to keep the batter light and airy. Every waffle iron is different, so cooking times may vary.
Servings: 4-5 | Calories: 450 kcal | Fat: 22g | Carbohydrates: 52g | Protein: 11g
5 FAQs About Waffles
Here are some straightforward answers to the most common questions I receive about this waffles recipe.
Why are my homemade waffles not crispy?
This is probably the most common waffle woe I hear about. A soggy waffle is such a disappointment! There are usually a few culprits. First, make sure your waffle iron is fully preheated. Pouring batter onto a lukewarm iron will cause it to just soak up the fat and steam itself instead of getting that immediate sear that creates a crisp crust. Patience is key here, so let it get good and hot.
Another major factor is the batter itself. Too much moisture can lead to a soft waffle. This recipe is carefully balanced, but if you’re using substitutions, that could affect the liquid ratio. Also, the secret weapon in this recipe for crispiness is the separated eggs. The whipped egg whites create a light, airy batter that crisps up beautifully. Finally, don’t stack your finished waffles on a plate! Stacking traps steam between them, which will soften them right up. The best practice is to place them in a single layer on a wire rack in a warm oven as you cook the rest of the batch.
Can I make this waffles batter ahead of time?
While you might be tempted to mix the batter the night before for a quicker morning, I generally advise against it for this particular recipe. The reason comes down to the leavening agents. The baking powder and baking soda start to react as soon as they are combined with the wet ingredients like buttermilk. Their lifting power is most potent right after the batter is mixed. Letting the batter sit for too long, especially overnight, can cause them to lose some of their fizz, resulting in denser, less fluffy waffles.
Additionally, the air you so carefully folded in with the whipped egg whites will deflate over time. If you want to get a head start, you can pre-measure and whisk together all your dry ingredients in one bowl and all your wet ingredients (except for the brown butter and egg whites) in another. Cover both and refrigerate the wet mix. In the morning, you’ll just need to brown the butter, whip the egg whites, and combine everything. It saves a lot of measuring and mess when you’re still half-asleep.
What is the secret to light and fluffy waffles?
The secret to achieving that coveted light-as-a-cloud interior lies in two key techniques used in this recipe. The first is not overmixing the batter. When you combine the wet and dry ingredients, you want to mix them only until they are just incorporated. A few lumps are perfectly fine! Overmixing develops the gluten in the flour, which can lead to a tough, chewy texture instead of a tender one.
The second, and most important, secret is separating the eggs and whipping the whites. By beating the egg whites to stiff peaks, you are essentially creating a light, airy foam. When you gently fold this foam into the batter, you are trapping thousands of tiny air bubbles. As the waffle cooks, these air bubbles expand, creating a super light, airy, and fluffy texture on the inside. It’s an extra step that is absolutely worth the effort and makes a world of difference.
Do I really need to use buttermilk for these waffles?
I highly recommend using buttermilk for the best possible results. Its signature tangy flavor is a classic component of a great waffle, and it pairs beautifully with the sweet, nutty notes of the brown butter. From a scientific standpoint, the acidity in buttermilk does two important things. It reacts with the baking soda to give the waffles an extra boost of lift, and it helps to break down the gluten in the flour, resulting in a more tender and delicate crumb.
However, if you find yourself without any buttermilk in the fridge, you can make a quick substitute in a pinch. For every 1 cup of buttermilk needed, you can use 1 cup of regular milk mixed with 1 tablespoon of either lemon juice or white vinegar. Stir them together and let the mixture sit for about 5 to 10 minutes. It will start to look slightly curdled, and you can then use it as a 1-to-1 replacement in the recipe. The flavor and texture will be slightly different from real buttermilk, but it will work well.
What’s the difference between waffle batter and pancake batter?
This is a great question! While they share many of the same ingredients, there are a few key differences in the ratios and preparation that make them distinct. Generally, waffle batter contains a higher percentage of fat (like our brown butter here) and often more sugar than pancake batter. The extra fat is crucial for creating that crisp, golden-brown exterior when it hits the hot waffle iron, and the sugar helps with caramelization and browning.
Waffle batter also tends to be a bit thicker than pancake batter. A thinner, more pourable batter is ideal for pancakes so it can spread into a perfect circle on a griddle. A thicker batter works better for waffles as it fills the deep grids of the iron without running over. Finally, more advanced waffle recipes, like this one, often call for folding in whipped egg whites. This technique is rarely used for pancakes and is specifically designed to create that signature light, airy interior that contrasts so well with a waffle’s crispy outside.
Try These Recipes Next
I truly hope you and your family love these Buttermilk Brown Butter Waffles as much as we do. There’s something so special about starting the weekend with a warm, delicious breakfast that feels a little bit fancy but is actually so simple to make. It’s all about having those go-to recipes that you know will bring a smile to everyone’s face.
If you enjoyed this recipe, I have a feeling you’ll love exploring some of the other favorites here on This Gal Cooks. Cooking should be fun and full of flavor, and that’s what I aim for with every recipe I share. Whether you’re looking for another breakfast idea, a quick weeknight dinner, or a budget-friendly meal, I’ve got you covered.
Here are a few places you might want to look next:
- Easy Breakfast Ideas & Recipes: If breakfast is your favorite meal of the day, you’ll find plenty of inspiration here, from fluffy pancakes to savory egg casseroles.
- Cheap Meal Ideas & Budget Friendly Recipes: Making delicious food doesn’t have to break the bank. This collection is full of satisfying recipes that are as easy on your wallet as they are on your tastebuds.
- 110 Easy Dinner Ideas: For those busy weeknights when you need to get a great meal on the table without a lot of fuss. Who says waffles can’t be for dinner?
Thank you for stopping by and spending some time in my kitchen. Happy cooking, y’all!