
The Ultimate Buffalo Chicken Dip with Caramelized Onions
This is, without a doubt, the best Buffalo Chicken Dip you will ever make.
I first encountered Buffalo Chicken Dip at a neighborhood potluck years ago. It was one of those sprawling Southern affairs where every dish on the buffet table is someone’s pride and joy. I took a scoop of the bright orange, cheesy dip, and it was good. It had that classic spicy, creamy tang everyone loves.
But as I stood there, chatting with a neighbor while scooping up more with a tortilla chip, I couldn’t help but think. My mind just works that way in the kitchen. I always wonder how I can take a classic and add a little something extra, a signature touch that makes people ask, “What is in this? It’s incredible!”
The original dip was a bit one-note. It was spicy and creamy, but it needed depth. It needed a counterpoint to all that richness. My mind immediately went to one of my favorite secret weapons in the kitchen, caramelized onions. Their deep, sweet, almost jammy flavor would be the perfect partner to the sharp heat of the hot sauce and the tang of the cream cheese. It was the twist I was looking for.
After a few test batches in my own kitchen, I knew I had a winner. The onions melted into the dip, creating this incredible sweet and savory backbone that elevated the entire dish. Now, this is the Buffalo Chicken Dip recipe my family and friends beg me to bring to every single get-together. It’s the one that disappears first, every single time.
Why This Buffalo Chicken Dip Recipe Works
Let’s be honest, Buffalo Chicken Dip is a party classic for a reason. It’s a culinary masterpiece born from the flavors of Buffalo wings, without any of the mess. It combines spicy hot sauce, tender chicken, and a creamy, cheesy base into a dip that’s pretty much irresistible. It first started showing up in the early 2000s, likely as a brilliant way to use up leftover rotisserie chicken and cream cheese, and it quickly became a staple for tailgates, Super Bowl parties, and holiday gatherings.
The standard recipe is fantastic on its own. It hits all the right notes of comfort food. You have the heat from the hot sauce, the cooling tang from the dairy, and the savory satisfaction of the chicken and cheese. It’s simple, it’s a crowd pleaser, and it’s easy to make.
So, why mess with a good thing? Because we can make it a great thing. The secret that makes this Buffalo Chicken Dip recipe truly special is the addition of deeply caramelized onions. This isn’t just a minor tweak. It’s a game changer.
Cooking onions low and slow until they are soft, sweet, and golden brown creates a profound depth of flavor. This sweet, savory jamminess weaves its way through the entire dip, balancing the sharp spice of the hot sauce and cutting through the richness of the three different cheeses and sour cream. It adds a sophisticated layer of flavor that you just don’t get from a standard recipe. It turns a simple party dip into something that tastes complex and thoughtfully prepared, all with one simple, extra step. The little bit of patience it takes is rewarded tenfold in the final taste.
Ingredients for Buffalo Chicken Dip
The magic of this dip comes from using simple, quality ingredients and combining them in a way that creates something truly special. While every component plays its part, the real star that sets this recipe apart is our caramelized onion base. It all starts with a little butter, a yellow onion, and a pinch of sugar.
Here’s what you’ll need to gather to create the ultimate Buffalo Chicken Dip. I always find that using good quality ingredients makes a world of difference, especially when it comes to the cheese. Grating your own cheese from a block ensures a much smoother, creamier melt compared to the pre-shredded kind, which often contains anti-caking agents.
-
- 1 tbsp unsalted butter: For caramelizing the onions.
- 1 large yellow onion, thinly sliced: This is our secret weapon. The sweetness of the yellow onion is perfect for caramelizing.
- 1/2 tsp sugar: Just a pinch to help the onions caramelize beautifully.
- 8 oz block cream cheese, softened to room temperature: Using a full-fat, block-style cream cheese gives the dip the best texture. Make sure it’s fully softened to avoid lumps.
- 1/2 cup sour cream: Adds a lovely tang and extra creaminess.
- 1/4 cup mayonnaise: Provides richness and helps keep the dip from becoming greasy. I recommend Duke’s if you can find it.
- 1/2 cup Frank’s RedHot Original Cayenne Pepper Sauce: For that authentic Buffalo flavor, this is the one. Don’t substitute if you can help it.
- 1/4 tsp smoked paprika: Adds a subtle smoky depth that complements the hot sauce.
* 1/4 tsp garlic powder: For a little boost of savory flavor.
- 3 cups shredded rotisserie chicken: A store-bought rotisserie chicken is a fantastic time saver and its meat is perfectly seasoned and moist.
- 1 cup freshly grated sharp cheddar cheese, divided: The sharp flavor really stands up to the other ingredients.
- 1 cup freshly grated Monterey Jack cheese, divided: This cheese is a superior melter, giving you that perfect cheese pull.
- 2 oz crumbled blue cheese, for garnish: A classic pairing with Buffalo sauce, it adds a pungent, salty bite.
- 2 tbsp thinly sliced green onions or chives, for garnish: For a pop of fresh, mild onion flavor and color.
Bringing these ingredients together creates a symphony of flavors. The spicy, the creamy, the cheesy, the savory, and that surprising, wonderful sweetness from the onions all work in perfect harmony. It’s a combination that truly sings.
Step-by-Step Instructions For Making Buffalo Chicken Dip
Making this dip is a straightforward process, but taking your time with each step, especially the first one, is what makes all the difference. Don’t rush the onions, and your patience will be rewarded with a dip that’s leagues above the rest. Let’s walk through it together.
Step 1: Caramelize the Onions
This is where the magic begins. Melt your butter in a large skillet over medium-low heat. A heavy-bottomed skillet, like cast iron or stainless steel, works best as it distributes heat evenly and helps prevent scorching. Add your thinly sliced onion and let it cook slowly. You’ll stir it just occasionally for the first 15-20 minutes until the onions are very soft and translucent. Then, sprinkle the sugar over the top. This little bit of sugar helps speed up the browning process. Continue cooking for another 10-15 minutes, stirring more often now, until they are a beautiful, deep golden brown. This step cannot be rushed. Low and slow is the key to true caramelization, not just burnt onions.
Step 2: Prepare Your Oven and Dish
While your onions are finishing up, go ahead and preheat your oven to 375°F (190°C). Grab a 1.5-quart baking dish, which is a standard 8×8 inch pan or a similar-sized round casserole dish, and give it a light coating of cooking spray or a little butter. This will prevent the dip from sticking and make cleanup so much easier later on.
Step 3: Mix the Creamy Base
In a large mixing bowl, combine your softened cream cheese, sour cream, mayonnaise, Frank’s RedHot sauce, smoked paprika, and garlic powder. It’s crucial that your cream cheese is at room temperature to ensure a smooth, lump-free base. I like to use a silicone spatula to really scrape the sides of the bowl, but an electric hand mixer on low speed can make quick work of this and get it perfectly smooth.
Step 4: Fold Everything Together
Once your onions are beautifully caramelized, set aside about two tablespoons for the topping. Add the rest of the caramelized onions to your cream cheese mixture. Now, fold in the shredded chicken, a half cup of the sharp cheddar, and a half cup of the Monterey Jack. Gently stir everything together until it’s all evenly incorporated. You want every bite to have a little bit of everything in it.
Step 5: Assemble and Bake
Spread this glorious chicken mixture evenly into your prepared baking dish. Top it with the remaining half cup of cheddar and half cup of Monterey Jack cheese. Now, take those reserved caramelized onions and just dollop them right over the top of the cheese. Bake for 20-25 minutes. You’ll know it’s ready when the dip is bubbling around the edges and the cheese on top is completely melted and just starting to brown.
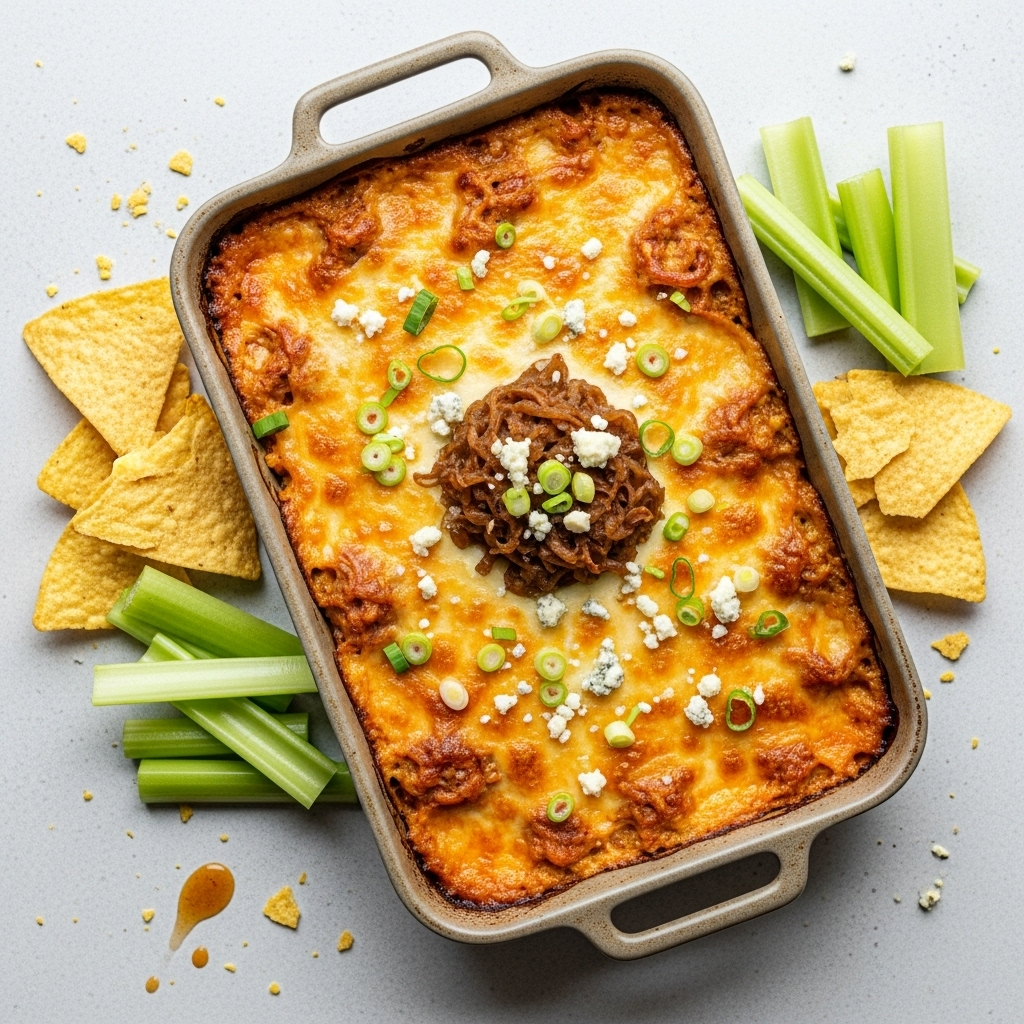
Step 6: Garnish and Serve
Let the dip rest for about five minutes after you pull it from the oven. This allows it to set up slightly and prevents anyone from burning their mouth. Just before serving, sprinkle the top with the crumbled blue cheese and fresh green onions. This final touch adds a pop of color and another layer of flavor. Now it’s ready to be devoured.
How To Serve Buffalo Chicken Dip
Once that bubbly, cheesy dish of goodness comes out of the oven, the possibilities for serving are nearly endless. You want dippers that are sturdy enough to handle the thick, hearty texture of this Buffalo Chicken Dip without breaking. While classic tortilla chips are always a winner, thinking beyond the chip can make your spread even more exciting for your guests.
I love to create a platter with a variety of textures and flavors to complement the dip. It makes for a beautiful presentation and gives everyone something they’ll enjoy. A mix of crunchy, fresh, and savory options is always a hit at my house.
Here are some of my favorite ways to serve this dip:
- Classic Dippers: Thick-cut tortilla chips, sturdy potato chips like kettle-cooked, and Fritos Scoops are perfect for scooping up every last bit.
- Fresh Vegetables: For a lighter, healthier option that provides a wonderful cool crunch, serve with celery sticks, carrot sticks, and slices of red or green bell pepper. The crispness is a fantastic contrast to the creamy dip.
- Breads and Crackers: Toasted baguette slices, also known as crostini, are wonderful. Hearty crackers like Triscuits, Wheat Thins, or even buttery Club crackers also hold up well and taste delicious.
- Pretzel Power: Soft pretzel bites or crunchy pretzel crisps offer a salty, savory pairing that works so well with the buffalo flavor.
If you want to get really creative, you can use the dip as more than just a dip. Think of it as a filling or a topping. It’s amazing spread onto sliders, used as a filling for stuffed jalapeños, or even dolloped on top of a baked potato for an incredibly decadent meal. No matter how you serve it, this dip is sure to be the star of the show.
How To Store & Reuse Buffalo Chicken Dip Leftovers
On the rare occasion that we actually have leftovers of this Buffalo Chicken Dip, it’s a happy bonus because it reheats beautifully and can be repurposed in some truly delicious ways. Proper storage is key to making sure it tastes just as good the next day. You want to keep it from drying out while also preserving its creamy texture.
The first step is to let the dip cool down to room temperature before you store it. Putting a hot dish directly into the refrigerator can create condensation, which can make the dip watery. Once it’s cool, transfer it to an airtight container or cover the original baking dish tightly with plastic wrap or foil. It will keep well in the refrigerator for up to 3 to 4 days.
When you’re ready to enjoy it again, here’s how to bring it back to life:
- Reheating in the Oven: This is my preferred method. Preheat your oven to 350°F (175°C). Place the dip in an oven-safe dish and bake for 15-20 minutes, or until it’s hot and bubbly again. You can add a little extra cheese on top before baking if you like.
- Reheating in the Microwave: For a quicker option, you can microwave it. Place the desired amount in a microwave-safe bowl and heat it in 30-second intervals, stirring in between each one to ensure it heats evenly and stays creamy.
Now for the fun part, reusing the leftovers. Instead of just serving it as a dip again, you can transform it into something new and exciting for lunch or dinner the next day. It’s a wonderful way to avoid food waste and enjoy the flavors in a different way. Some of my favorite leftover transformations include making Buffalo chicken quesadillas, stuffing it into bell peppers and baking them, or using it as a decadent topping for nachos. It’s also incredible mixed with pasta for a quick, cheesy bake.
Substitutions & Variations For Buffalo Chicken Dip
One of the things I love most about cooking is how a single recipe can be a starting point for so many different delicious creations. This Buffalo Chicken Dip recipe is fantastic as written, but it’s also wonderfully adaptable. Whether you need to accommodate a dietary need, use up what you have in the fridge, or just feel like experimenting with flavors, there are plenty of ways to make it your own.
Don’t be afraid to play around with the ingredients. Just keep the basic ratio of creamy base to chicken and cheese in mind, and you’ll have a delicious outcome. It’s a great recipe for clearing out those little bits of cheese or half-empty jars of sauces you might have on hand.
Here are a few substitutions and variations that work beautifully:
- Lighter Version: For a slightly lighter dip, you can substitute the sour cream with full-fat plain Greek yogurt. You can also use Neufchâtel cheese in place of the regular cream cheese. Both will still give you a creamy, tangy result.
- Different Cheeses: Feel free to experiment with the cheese blend. Smoked gouda, pepper jack for extra spice, or even a mild provolone would all be delicious. The key is to use good melting cheeses.
- Spice it Up or Cool it Down: If you like more heat, add a pinch of cayenne pepper to the cream cheese mixture or finely dice a jalapeño and fold it in with the chicken. If you prefer a milder dip, you can reduce the amount of hot sauce by a tablespoon or two.
- Add Some Smoke: For all my barbecue lovers, try adding a tablespoon of your favorite smoky BBQ sauce along with the hot sauce. A little liquid smoke would also do the trick. Crispy, crumbled bacon folded into the dip is another fantastic, smoky addition.
- Slow Cooker Method: This dip is easily adapted for a Crock-Pot. Simply combine all ingredients (except the garnishes and half the cheese for topping) in the slow cooker. Cook on low for 2-3 hours, stirring occasionally, until hot and bubbly. Top with the remaining cheese for the last 15 minutes of cooking.
No matter what little tweaks you make, the caramelized onion base will still provide that signature sweet and savory depth that makes this recipe a true standout. Have fun with it and enjoy creating your own perfect version.
The Ultimate Buffalo Chicken Dip with Caramelized Onions
Description: A classic party dip gets a major flavor upgrade with the addition of sweet, jammy caramelized onions. This Buffalo Chicken Dip is irresistibly creamy, cheesy, and spicy, with a depth of flavor that will make it the star of any gathering.
Yield: 6 cups | Category: Appetizer | Cuisine: American
Prep Time: 15 minutes | Cook Time: 45 minutes
Ingredients
- 1 tbsp unsalted butter
- 1 large yellow onion, thinly sliced
- 1/2 tsp sugar
- 8 oz block cream cheese, softened to room temperature
- 1/2 cup sour cream
- 1/4 cup mayonnaise
- 1/2 cup Frank’s RedHot Original Cayenne Pepper Sauce
- 1/4 tsp smoked paprika
- 1/4 tsp garlic powder
- 3 cups shredded rotisserie chicken
- 1 cup freshly grated sharp cheddar cheese, divided
- 1 cup freshly grated Monterey Jack cheese, divided
- 2 oz crumbled blue cheese, for garnish
- 2 tbsp thinly sliced green onions or chives, for garnish
Instructions
- Melt butter in a skillet over medium-low heat. Add onion and cook for 15-20 minutes until soft. Add sugar and cook for 10-15 more minutes until deeply caramelized.
- Preheat oven to 375°F (190°C) and grease a 1.5-quart baking dish.
- In a large bowl, mix softened cream cheese, sour cream, mayo, Frank’s RedHot, paprika, and garlic powder until smooth.
- Reserve 2 tbsp of caramelized onions. Fold the rest of the onions, chicken, 1/2 cup cheddar, and 1/2 cup Monterey Jack into the cream cheese mixture.
- Spread into the prepared dish. Top with remaining cheddar and Monterey Jack cheeses and the reserved onions.
- Bake for 20-25 minutes until hot and bubbly.
- Rest for 5 minutes, then garnish with blue cheese and green onions before serving.
Notes
For the best texture, use full-fat block cream cheese and grate your own cheeses. Using a pre-cooked rotisserie chicken is a great time-saver.
Servings: 12 | Calories: 320 kcal | Fat: 25g | Carbohydrates: 5g | Protein: 18g
5 FAQs About Buffalo Chicken Dip
Here are some straightforward answers to the most common questions I receive about this Buffalo Chicken Dip recipe.
Can I make this Buffalo Chicken Dip in a slow cooker?
Absolutely, and it’s a fantastic option for parties because it keeps the dip warm for hours. To adapt this recipe for a slow cooker, you’ll still want to caramelize the onions on the stovetop first. That step is crucial for developing the deep, sweet flavor that makes this recipe so special, and a slow cooker just can’t achieve that same result. Once your onions are ready, you can combine them with all the other ingredients, except for the garnishes and about half of the shredded cheese, directly in your slow cooker.
Give everything a good stir, cover, and cook on the LOW setting for 2 to 3 hours, or until the mixture is completely heated through and bubbly. I recommend stirring it once or twice during the cooking time to ensure everything melts together evenly. About 15 minutes before you plan to serve, sprinkle the remaining shredded cheese over the top, put the lid back on, and let it melt. When you’re ready, just turn the slow cooker to the WARM setting, add your fresh garnishes, and you’ll have perfect, hot dip for your guests to enjoy throughout the event.
Why is my Buffalo Chicken Dip greasy?
A greasy or oily dip is a common issue, and it usually comes down to a couple of key factors. The most frequent culprit is the cheese. Pre-shredded bagged cheeses are coated with starches and anti-caking agents to prevent clumping, but these additives can cause the cheese to release more oil when it melts. Using freshly grated cheese from a block will almost always result in a creamier, less greasy dip because it melts more cleanly. The type of cheese also matters, as some, like very aged cheddars, can be more oily.
Another factor can be the mayonnaise. Using a lower-quality or “light” mayonnaise can sometimes cause the dip to separate and become oily when heated. I always recommend using a good quality, full-fat mayonnaise. Lastly, if you are cooking your own chicken for the recipe, make sure it is well-drained and not overly fatty. A store-bought rotisserie chicken is usually a safe bet. If your dip does turn out a little oily on top after baking, you can gently blot the surface with a paper towel before serving to absorb the excess.
What’s the best chicken to use for Buffalo Chicken Dip?
You have a few great options for the chicken in this recipe, and the “best” one often comes down to convenience and personal preference. My personal favorite, and the one I call for in the recipe, is a store-bought rotisserie chicken. It’s a huge time-saver, the meat is consistently moist and well-seasoned, and it’s easy to shred. I typically use the breast meat, but a mix of light and dark meat is also delicious.
If you prefer to cook your own chicken, poaching or baking boneless, skinless chicken breasts is a wonderful choice. Just season them simply with salt and pepper, cook until they reach an internal temperature of 165°F, let them cool slightly, and then shred them with two forks. You can even use a stand mixer with the paddle attachment to shred the chicken in seconds. While canned chicken can be used in a pinch, be sure to drain it very well. Its texture can sometimes be a bit soft, so I consider it a last resort, but it will still work if that’s what you have on hand.
Can I prepare Buffalo Chicken Dip ahead of time?
Yes, this is one of the best make-ahead party dips, which is another reason I love it so much. It saves you so much stress on the day of your get-together. You can fully assemble the dip a day or two in advance. Simply follow all the recipe steps right up until the baking part. Caramelize your onions, mix all the ingredients together, and spread the mixture into your baking dish. Top it with the cheese and reserved onions as instructed.
Once it’s assembled, cover the dish tightly with plastic wrap or foil and store it in the refrigerator for up to 48 hours. When you’re ready to serve, just remove it from the fridge about 20-30 minutes before baking to let it come to room temperature a bit. This helps it bake more evenly. You may need to add about 5 to 10 minutes to the total baking time since you’re starting with a cold dip. Then, garnish as usual and serve hot. It makes party prep so much easier.
How can I adjust the spice level of my Buffalo Chicken Dip?
Controlling the heat in this dip is very easy, allowing you to tailor it perfectly to your family’s or guests’ preferences. The heat primarily comes from the Frank’s RedHot sauce. If you have guests who are sensitive to spice, you can easily create a milder version. I would recommend starting with about 1/4 cup of the hot sauce instead of the 1/2 cup the recipe calls for. You can always taste the mixture before adding the chicken and cheese and decide if you want to add more.
On the other hand, if you’re serving a crowd that loves extra heat, you have several ways to kick it up a notch. You can simply add more Frank’s RedHot sauce to your liking. For a different kind of heat, consider adding a pinch of cayenne pepper or a few dashes of a spicier, more concentrated hot sauce like Tabasco. Another fantastic option for adding both heat and flavor is to fold in some finely diced fresh or pickled jalapeños along with the chicken. This adds a nice little burst of spice in every few bites. Always start with a small amount and add more to taste, as it’s much easier to add heat than it is to take it away.
Try These Recipes Next
If you loved the crowd-pleasing, comforting flavors of this Buffalo Chicken Dip, I just know you’ll enjoy some of the other popular recipes here at This Gal Cooks. I focus on creating dishes that are packed with flavor, easy to follow, and perfect for sharing with the people you love. Whether you’re planning a weeknight meal or a big holiday feast, I’ve got you covered.
Putting a delicious dinner on the table doesn’t have to be complicated or take hours. I believe in smart shortcuts and flavor-building techniques that deliver impressive results with minimal fuss. From quick 30-minute meals to slow-simmered Sunday suppers, you’ll find plenty of inspiration to get you through the week.
Here are a few collections I think you’ll want to explore next:
- 110 Easy Dinner Ideas: Feeling stuck in a dinner rut? This massive collection is your ticket out. You’ll find everything from comforting pasta dishes and hearty casseroles to quick skillet meals and fresh salads. There’s truly something for every taste and every night of the week.
- Cheap Meal Ideas & Budget-Friendly Recipes: Eating well doesn’t have to break the bank. This roundup is filled with delicious, satisfying recipes that are designed to be kind to your wallet. Discover how to turn simple, inexpensive ingredients into meals your whole family will love.
- My Favorite Thanksgiving Dinner Ideas: Planning a holiday meal can be a big undertaking, but this collection has everything you need. From the perfect roast turkey to all the classic side dishes and desserts, these are my tried-and-true recipes for a memorable Thanksgiving feast.
I hope these recipes bring as much joy to your table as they do to mine. Happy cooking, y’all!